

Last Saturday was Day 3 of me being a non-smoker. So to take my mind off things I thought I’d sew the current challenge for Stitch Once Rip Twice, organised by Diane over at Vintage Zest. The challenge is ‘A Simple Top’ so I decided to make SergerPepper’s new pattern which I’d recently downloaded from Craftsy.

MammaNene’s new pattern…click HERE to view her patterns on Craftsy.
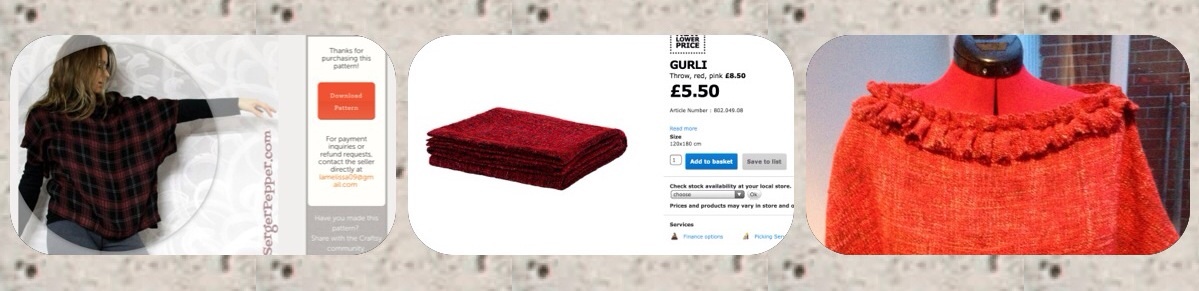
On a recent shopping trip to ikea I bought a lovely red super soft throw with the intention of turning it into something wearable. Here it is on their website:

An absolute bargain at £5.50 for 1.2 x 1.8 metres of fabric!
The 2 ends of the blankets were hemmed which I thought I’d used for the bottom, but once I came to positioning the pattern piece I thought the hem would be too bulky so used the selvidge which had a nice neat finish.
The fabric wasn’t quite big enough for me to use the selvidge as a hem so I lost 2 inches from the back and front pieces (both the same) placing the centre of the top 1 inch past the centre fold. It’s a loose fitting top and I had cut the biggest size so I knew it would still fit me.
I cut the first piece with the rotary cutter and when I lifted it from the mat it nearly fell to pieces in my hands!

Arrrhhhhh! This was the top where the shoulder seam and neck meet.
At the rate it was fraying there wasn’t going to be much left of the first piece before I’d even cut out the second piece! I quickly set up my overlocked and carefully overlocked all edges before cutting anything else out. After cutting piece 2 I gingerly moved it to my overlocker and overlocked this too. Phew! This was a very tense 1/2 hour in my sewing room, and under normal circumstances I probably would have had to retreat to the garden, count to 100 and smoke a cigarette. But I’d resisted. I carried on chewing gum ’til my jaws ached.
The back and front stitched together easy enough. The fabric was surprisingly easy to sew. I finger pressed the seams open then top stitched either side of the seam for added strength. I had visions of it dropping to bits and unravelling on its debut night out.
For the neck I daren’t attempt to cut the required strip on the bias as I instructed, so lazily I turned and stitched it with not very good results.

It wouldn’t lay flat, and really spoilt the top.
I retired from my sewing room for the day at this point to gather my thoughts, chew more gum and get ready for a rare night out with my hubby and another couple.
DAY 4 OF BEING A NON-SMOKER AND THE DAY I RESCUED MY GURLI TOP
I looked at what fabric I had left and had a full length from the other selvidge. I cut along the whole length of it about 3 inches, and them sewed a straight line about 3/4 inch for the extremely frayable edge. Then pulled the loose strands and frayed it to the stitch line.


Then, with Gertrude wearing the to, I set about handstitching the above to the neckline with a ruffled effect.

Loved the effect immediately, but once I reached the other shoulder it became apparent that I wouldn’t have enough trim to complete the ruffle at the back too.

It’s a bit blurred, sorry, but you get the idea – I stitched the trim with no ruffle. When I reached the other shoulder seam I took the trim to the bottom of the sleeve then back under itself and added a button. It looked a bit like an eppaulette. For the other sleeve I pinched a pleated and added a matching button.


Stunning result. I love seeing refashioning projects for the creative vision and bravery. Would be freaked out by the disappearing, fraying fabric. Good luck with giving up smoking – buy a treat every week for yourself with $ saved ; )
Thankyou! The fraying fabric was scary, I envisaged it all been thrown in the bin so am really pleased with how it’s turned out.
Thanks for the tip, the money was the reason I stopped in the end – every time I bought a packet I thought of all the lovely fabric I could buy instead. Looking forward to having extra cash to spend!
Great job, Alyson! I love how you used this material, I’ve made one me too in wool (will share soon), colorblocked. Your idea of adding ruffes on eckline was… wow! Wonderful! I think adding rufles on back to was too much, and the button: a statement!
Thanks for enjoying my pattern, I’ll be happy if you’ll add it in Serger Pepper Flickr Group Board (add as many pics as you like!) here: flickr.com/groups/sergerpepper/
Hugs,
MammaNene @ SergerPepper
Thanks, I love the ruffles too! Looking forward to making it again with something a bit easier to handle. I’ve joined the Flickr group and will try and work out how to get my pix on!
The ruffle is lovely. It adds bundles of charm. Hope you make the IKEA staff smile (they could do with some).
Thankyou!
I bet their staff wouldn’t even notice!
You rocked this! So clever and cute!
Thanks! Maybe I should set up a blanket challenge!? ✂️😀✂️
That is so cool! I love the ruffles 🙂
Thanks, I usually use my ruffling foot, but it was really easy just to ruffle and stitch straight onto the top. 😀
Very good save! The ruffles look great and I think this colour really works on you. Good on you for stopping with smoking, keep it up!
Thanks Emmely, thinking of all the lovely fabric I can buy instead of the ciggies is keeping me motivated! 😀
Depending a bit on the fabric you can probably on average get a metre of fabric/pack of cigarettes that you didn’t buy. Seems like a very good trade to me!
Great version of this top! Nice job! I also love the touch of the button! 🙂 Lisa
Thanks! Can’t wait to make some more 😀
Oh I love it!! What a great look. I keep seeing fleece blankets and wondering if I could do something with it, but this fabric is gorgeous! I love the ruffle on it, very classy! You look great!
I’m a veteran of Gurli throws, I made 4 projects with it and I still have the red one waiting in the wings. This looks really great, and great rescue!
My best tip if you ever want to give Gurli another go is to iron on strips of fusible interfacing after overlocking, especially on necklines, shoulders and hems. I also used it under an invisible zipper. Works like a charm!
Thanks for the tips Alex, i may be tempted to have another go.
I’ve had a look at the grey dress you made, it looks stunning on you! 😀