
Because not all invisible zips are invisible.
SewPhotoHop from Rachel of House of Pinheiro is back!
It’s day 2 which is “Your Favourite Skill”. Knowingly or unknowingly we’re all quite a skilled bunch out there and a lot of them skills we don’t know we have. We’re also a generous bunch too who like to share our skills with other lovely sewists out there.

Over on IG i’ve posted that my favourite skill is inserting invisible zips, or zippers depending where you are in the world. I also mentioned I could share how I do it as it works a treat every time with no pins and no tears. As there were quite a few who wanted me to show you, here we are.
2 things for me when inserting an invisible zip are important.
- it’s invisible
- any seams match up
So here’s how I do it.
Gather your supplies:
- an invisible zip
- a pencil
- iron on interfacing if your fabric is anything other than denim or a robust fabric.
- a normal zipper foot
1 Open up your zip and with a warm (not hot you’ll melt the plastic!) iron the zip to open coils.
2 Add a 2cm strip of iron interfacing to where the zip will be inserted – on the wrong side of the fabric. Also finish any raw edges BEFORE inserting the zip.
3. Stitch one side of the zip in place starting from the top of the garment, and use a long stitch. I have mine set to 5. It doesn’t have to be stitched close to the teeth of the zip for this first row of stitching.

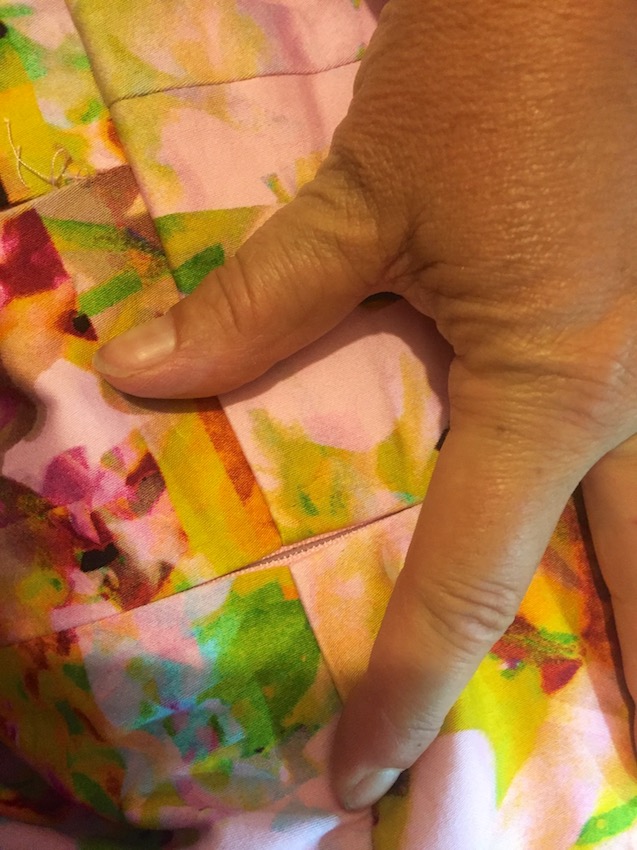
4. Close the zip, and with a pencil mark an area where it is important that it matches – just a seam as shown below.
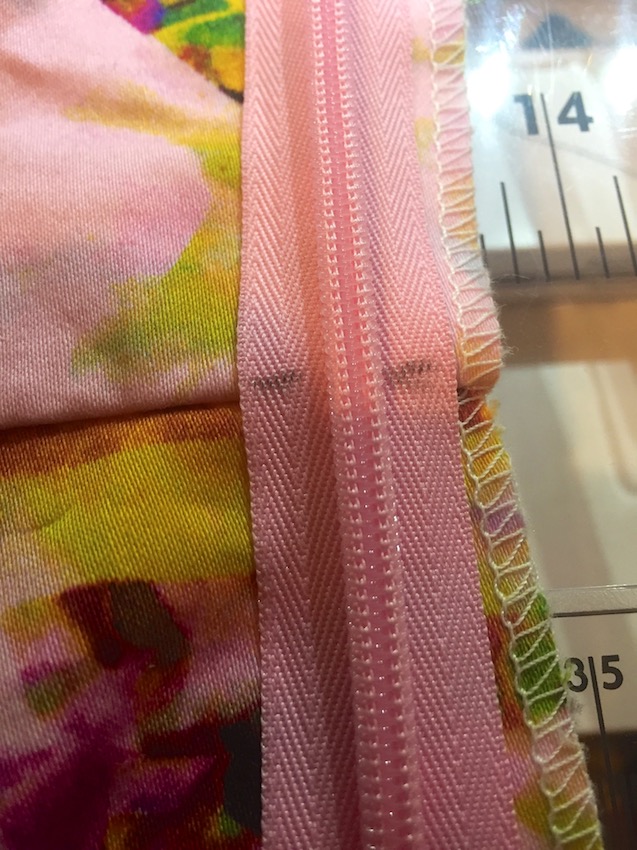
5. Unzip the zip, and line up the pencil mark with the seam.

Stitch 1-2 cm either side of the pencil mark.

I’ve tried to highlight just the few stitches I made below.

They didn’t show too well, so i stitched another row.

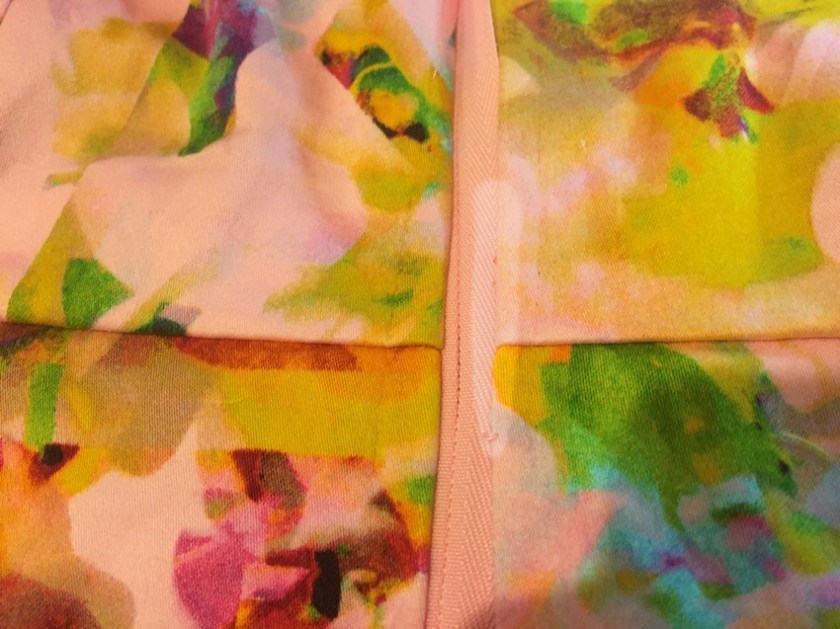
6. Close your zip and check the seams are aligned. If they’re not, but i bet they are!, unpick the last few stitches you made and do it again.
7. Now you need to stitch the full length of the zip. Do it in 2 goes, starting from the seam sewing up, and the matched seam sewing down. This way you won’t get any puckering. Sorry for blurred photo!

8. Zip up your zipper. At this point it won’t be invisible.
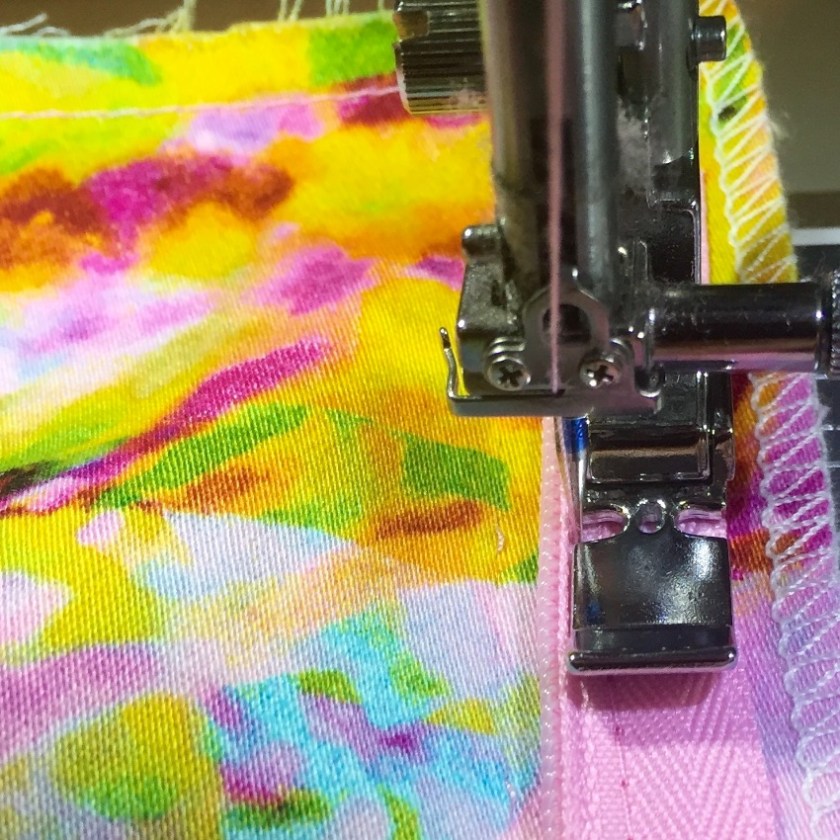
Now all you need to do is get close to those teeth with a row of stitching using a regular stitch length.
The ironing that you did earlier on will help the teeth be pushed flat so you can get close. You can push it down with your finger (i do but be careful!) or you can use a pencil, take it slow. Move the needle position as far over as you can.
Sew both sides. Depending how close you get you might have something like this. If you’ve gotten too close to the teeth you might have hit the plastic. I do sometimes. Just unpick the one of 2 stitching and restitch.
If you have a concealed sipper foot for this part you can use it!
Bulky seam areas are always a bit tricky, but you can go over it again – just the bit that’s not quite invisible, not everything.

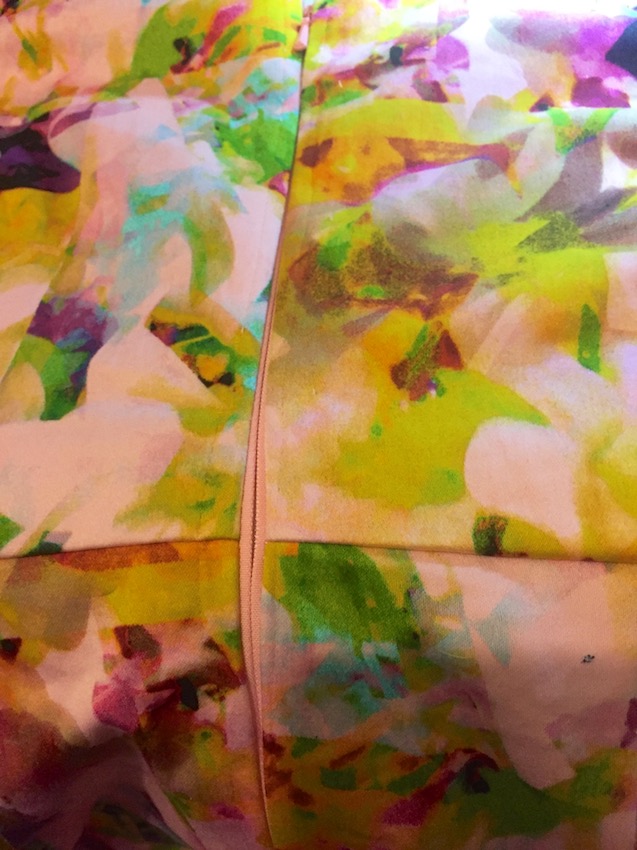
And then, Ta-Da! An invisible zip with a normal zipper foot.

You can see below here’s my extra row of stitching. It may seem tedious to some having to sew 2 rows, but with the how quick and easy it is to get it in position the extra row of stitching takes hardly any time. You can also see where I trimmed any some of the bulk so make opening and closing the zip over the seam easier.

If you really pull it apart at he seam you can see the zip:
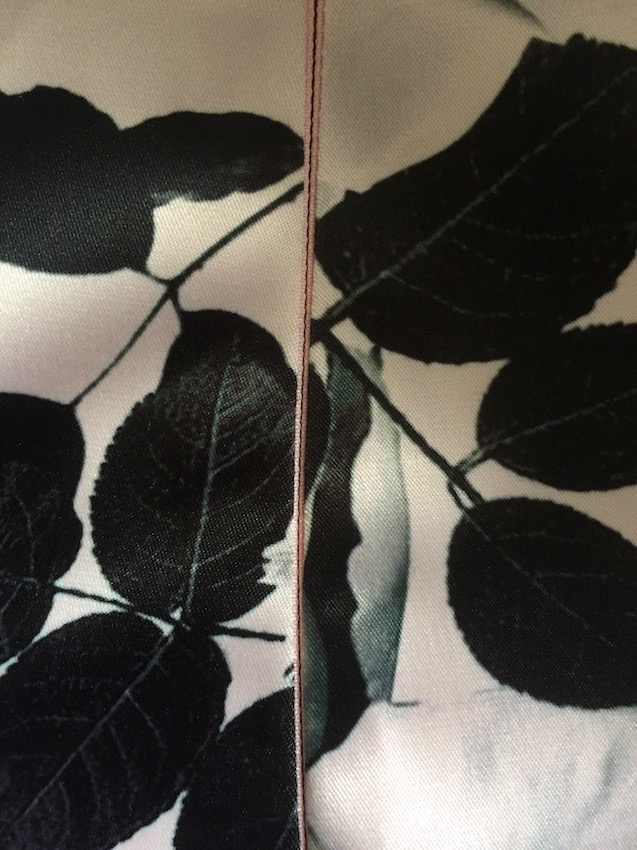
But then check this out on a dress I bought last week, this is visible without any tension on the zip at all!
 If you’ve got any zips on garments you’ve already made and you’re not happy with the invisible-ness go get them and add another row of stitching!
To finish the seam where the zip is inserted I use a method which I learnt on this free mini class on Craftsy.
Hope that’s all made sense.
I did venture out onto the internet and treated myself to an invisible zipper foot for my Janome, but bought the wrong one. I’d had it ages before I realised so couldn’t send it back.
So if anyone out there has a standard Janome and doesn’t like my way and needs a proper concealed zipper foot let me know in the comments and I’ll send it to you – anywhere! If there’s more than one, which I expect there might be, I’ll do a draw. Not sure when, but in a week or so, depending what I’m up to!
It states on the packet that it’s for Horizontal Rotary Hook models – the ones where they just snap on. It won’t fit a machine which can make a 9mm wide stitch like mine.
Happy sewing!

That’s great Ali, thanks for a different take on it, I never thought to just sew the bit where it’s supposed to match first – doh! As for the invisible zip foot, mine seems to work for the left side but I nearly always end up using a regular zip foot for the right side as it inevitably slips out of the groove, mine was bought as a set of feet meant to fit different machines but don’t enter me into the draw I’m happy using what I’ve got – give someone else a chance. I was going to join in the instagram photohop but can’t get my head round the the technology but like your hello pic.
Are you on Instagram already? All the social media stuff is sometimes beyond me but I’m slowly getting the hang of IG. What you stuck with?
Yes I’m on as Fragalisama, but haven’t posted any photos, I just enjoy following everyone elses, mainly sewing related. My difficulty is I only have a laptop & not a tablet & my phone is an oldish Nokia, so I can’t take selfies with it & the photo quality is a bit rubbish, I guess need to upgrade, that’s all! oh & what Geneveive says below too!
Meant Frugalisama, typo – sorry.
This is a terrific method…in fact I think I saw this thru MimiG’s blog but always get impatient and just wing it 😏. Thanks for the reminder, I’ll try to slow down with my next insertion cuz it really is the best way to ensure cross seams match up. My IG’ing is so minimal bcuz I feel like I don’t know what to post/say…I feel kinda dorky 🤓
I know what you mean, I post things and I’ll get a few likes but there’s some cool IGers out there, but I’m we can be cool too! 😃
Will give this a go, have failed miserably so far!
Oh no, they’re not too bad, hope this helps! 😃
Haven’t needed a zip in ages, and don’t have a Janome, but best wishes to all who do! Really like your method here, Ali, and will remember it if and when that next invisible zip comes up!
Now, when do we get to see this new pink dress?! xx
PS/An RTW dress??! (Just teasin’!)
New dresses in show soon I promise. 😘
Have fun tomorrow! 😘
Thanks for sharing your tuorial. I will try this method next time – I always misalign the waist seam..
Hope it helps, but your clothes always look amazing 😃
Fab tips, I had not heard of doing a few stitches over the waist seams and always used a pin which rarely worked perfectly. Might need to watch the craftsy class too as now my overlocker has decided not to work I never know how to finish those seams.
Sorry, when I put finish the seam I meant closing it after the invisible zip had been added. When my over locker acts up I change the needles and totally rethread and it usually does the trick. 😃
That was really, really helpful. The best advice I’ve seen and read on invisible zip insertion. Thank you so much. I always dread that part when making a garment.
You’re welcome Chrissy, you’ll be loving zip insertions now, don’t be scared! 😃
I did it like this for years and it works brilliantly. Wouldn’t hand back my dedicated foot now, though:)
I thought I was investing in one too but bought the wrong one, I may splash out one day! Are you still off to Sewbrum? I bought my train tickets the other day! 🙂
It’s not looking likely. Hubby still hasn’t got a job and our savings are almost gone. The luxury of a trip seems a tad frivolous at the moment, especially after camping last weekend:(
that’s a shame, but I’m sure we’ll be able to catch up one day, keep the ship afloat is definitely more important that a trip up north. xx
You clever old thing you! 🙂
Old! Give over! 😂😂😂 but thanks 😘
Sorry. You clever young whippersnapper!
That’s more like it! Lol 😃
🙂
Pingback: Sewing Tip – How to Install an Invisible Zipper – LaCartera
Really handy tip about sewing just the intersecting seam section – will definitely give that a go. I used to iron my zips open and then had a run of zips that wouldn’t ‘go’. Turns out I was melting them. Not sure how you do it without the magics zipper foot – kudos to you!
I have a semi industrial Janome with screw on feet and she’s a beauty – never plays up. I even kissed her a few times last week, but what a week it was!
Haha… I love my machine but never thought to kiss her, think I might have to show mine some love too! 😘
Pingback: BIG Vintage Sewalong – Vogue 9082 & Sonja Dress Hack – And a Near Miss! | T H I M B E R L I N A