
I recently made Lekala 4119. If you’ve tried Lekala you’ll know the instructions generally expect you to have a fairly decent knowledge of garment construction or time to google. Or both. These are the complete instructions of the top describes as “Blouse with Draping” 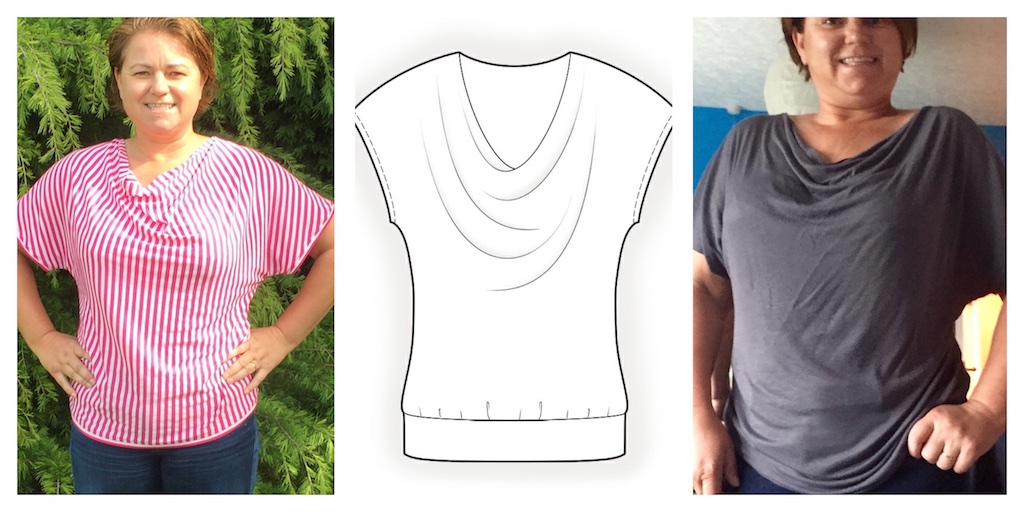
This is a great easy to wear top. Cowls are in, but sleeveless ones narrow down their wearability. With this there’s no sleeves to set in so it’s a really quick make – if you know what you’re doing!
I like a clean finish on all my clothes – makes them last longer, they look more professional and less home made. I thought I’d share how I finish my tops and dresses with a cowl neck.
Bear with me. I’m not a teacher, and I’ve never had sewing lessons. This is just how I’ve found best to do it.
We are going to use a single folded piece of our jersey. It needs a little bit of stretch. If your fabric has stripes or a pattern try and use them – it make it easier when sewing if you’re following a pattern.
The length should be slightly longer than what is required. Fold it in half and press. This top called for a 1cm seam allowance, so your band wants to be slightly more than this -after folding.
I thought the width of the piece below was too wide so I chopped off one stripe. (really technical!). 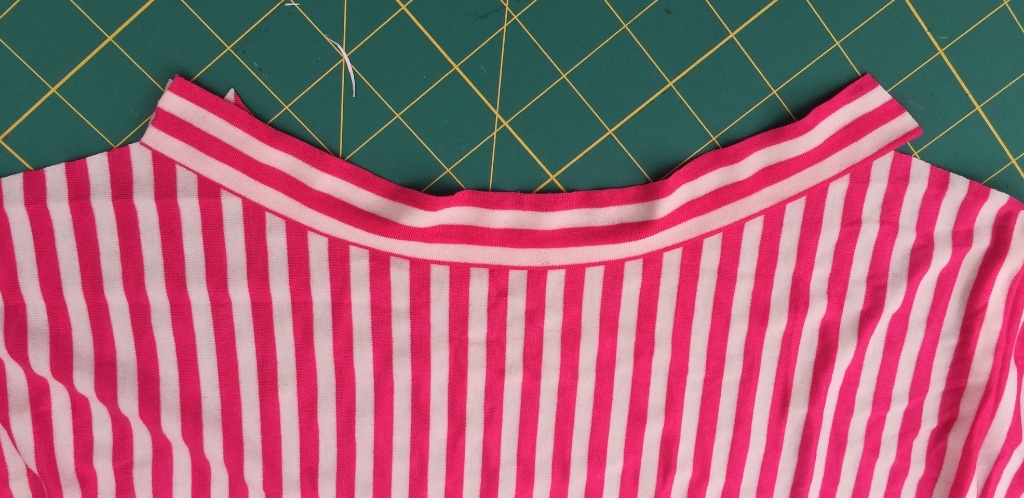 Once you’re happy, pin in place, pulling very slightly so the strip of jersey binding is slightly smaller than the neck line.
 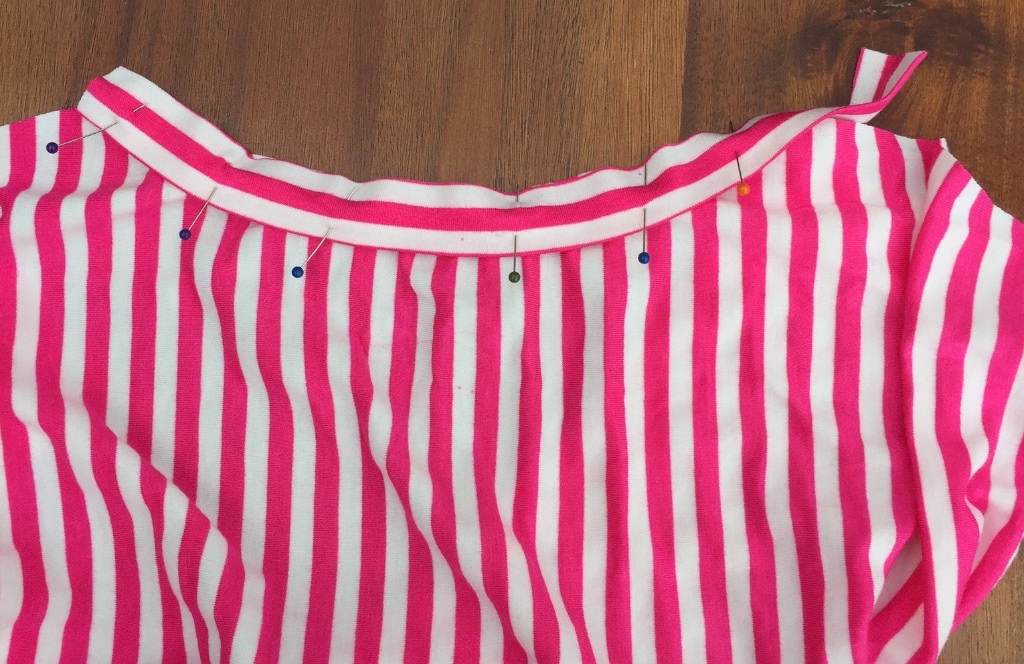 Stitch binding to back neck line using a 1 cm seam allowance – I used the stripes as a guide – you can just make it out as I had a slight wobble midway.
 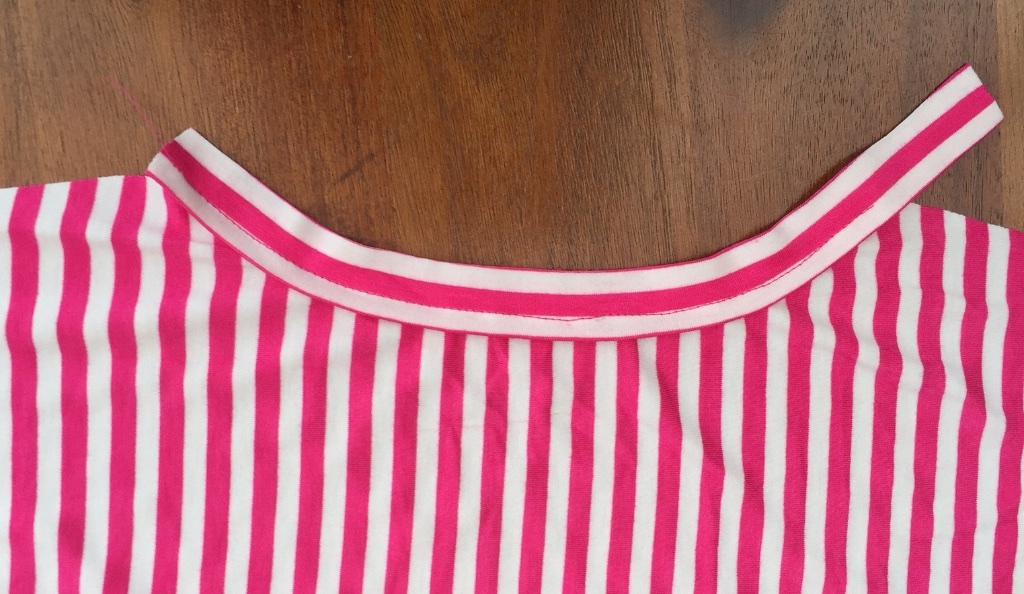 Turn it over and make sure it looks even. Trim off excess binding.
 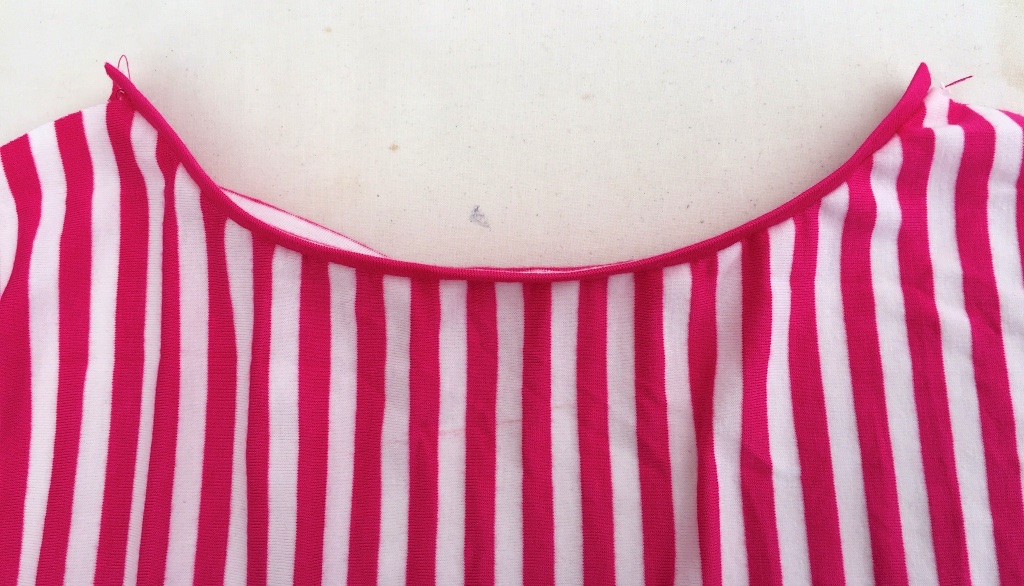 Now you need to finish off your seam allowance. I overlock/serge mine, but you could trim it slightly and zig zag the edges. To serge or zig sag turn the fabric back to how it was when you stitched your binding on.
 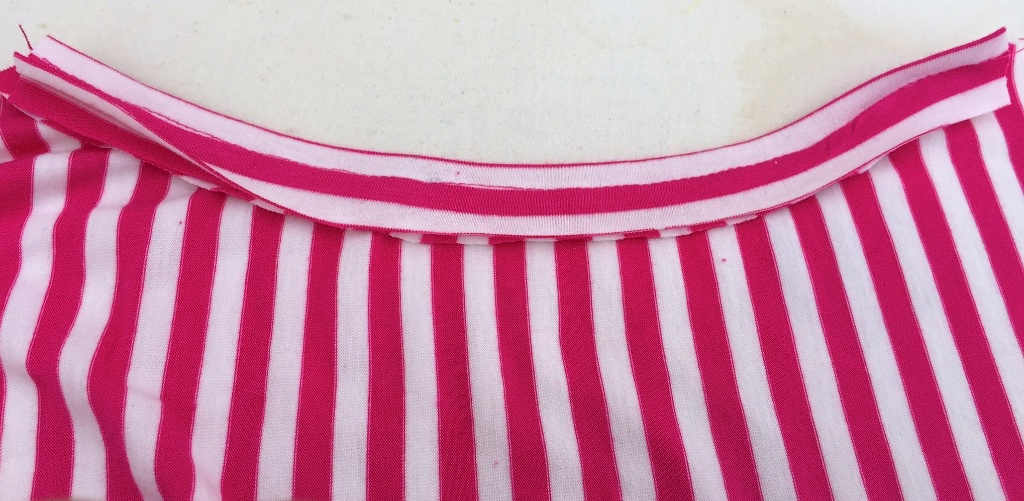 Overlocked/serger……. Give it a good press.
 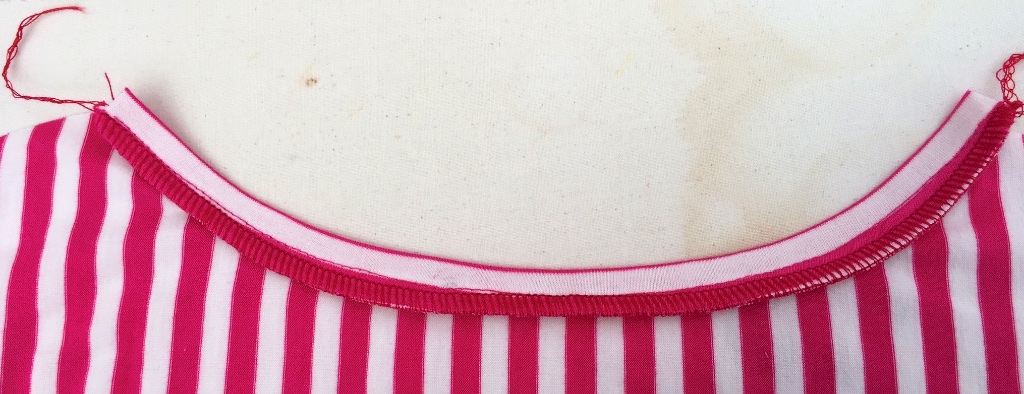 Top stitch in place with a normal straight stitch.
 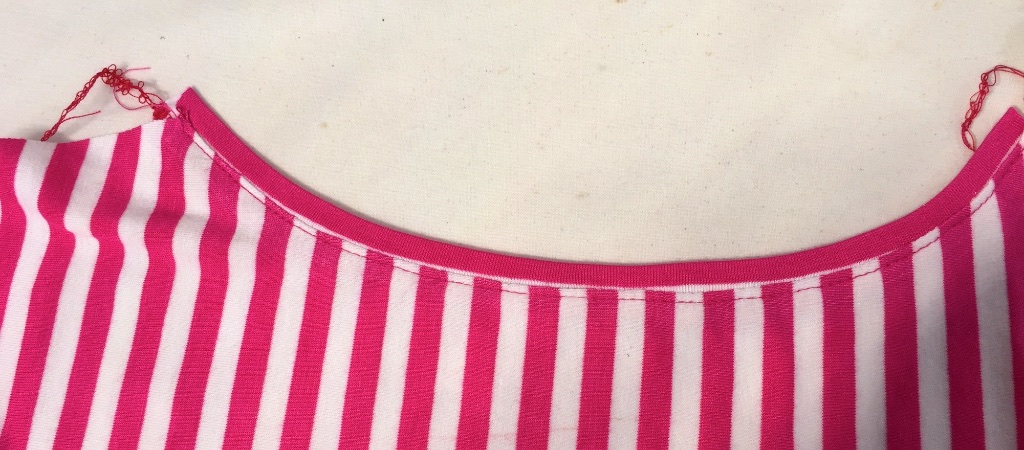 The inside finished.
 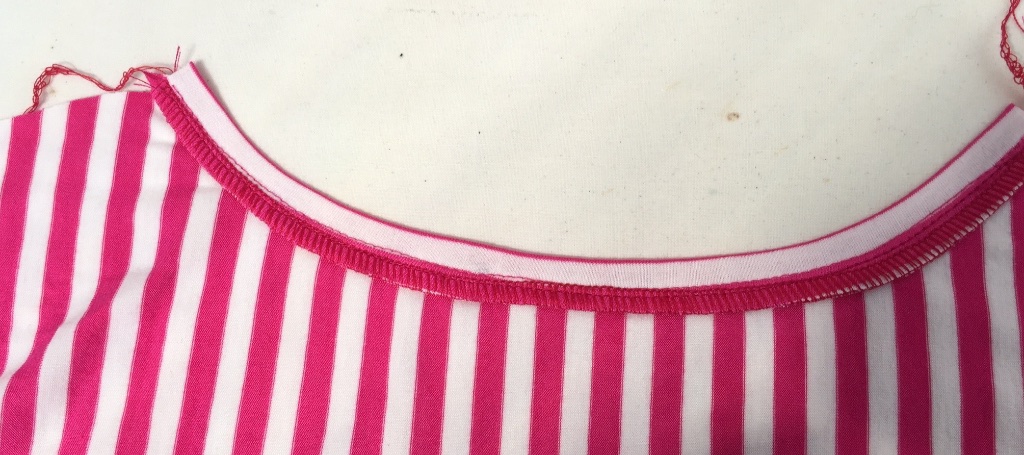 Next you need to sew the shoulder seams. Below you can see the front and back are about the same size.
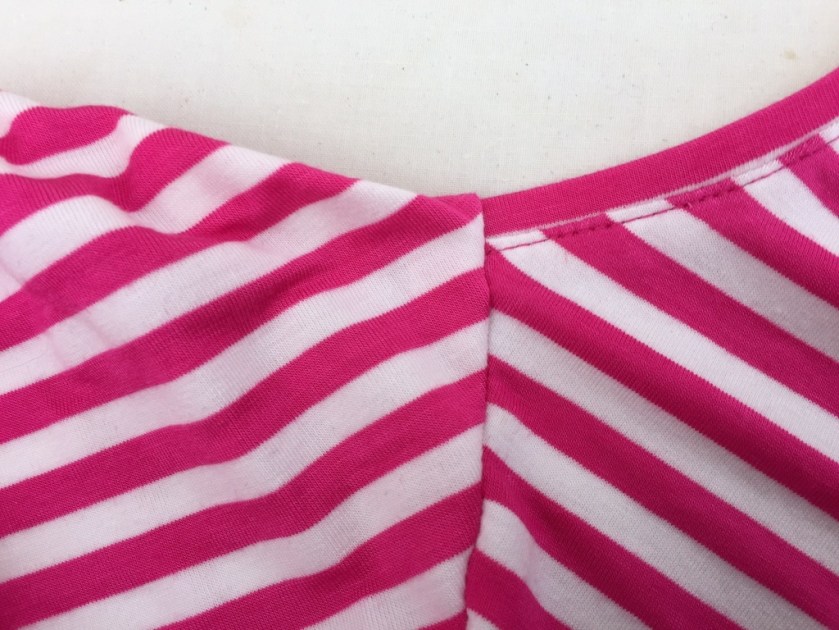
 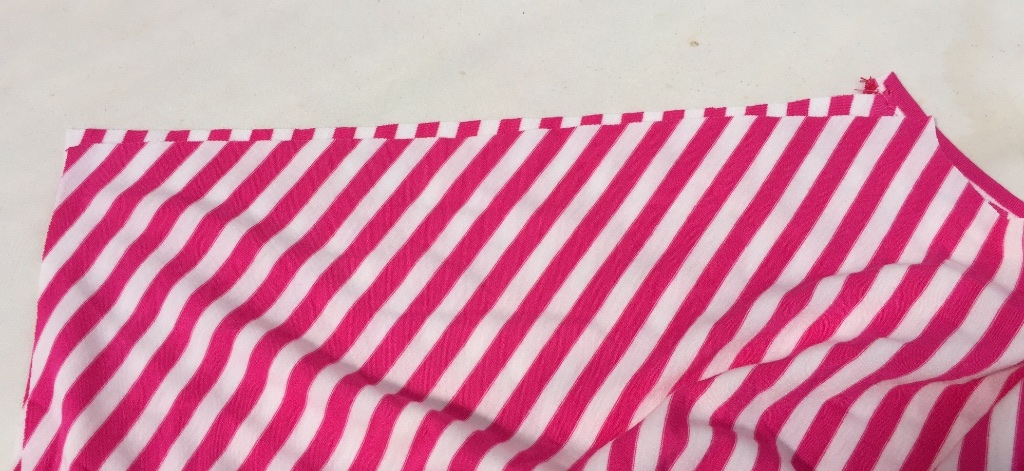 Close up of neckline where front and back pieces will join.
 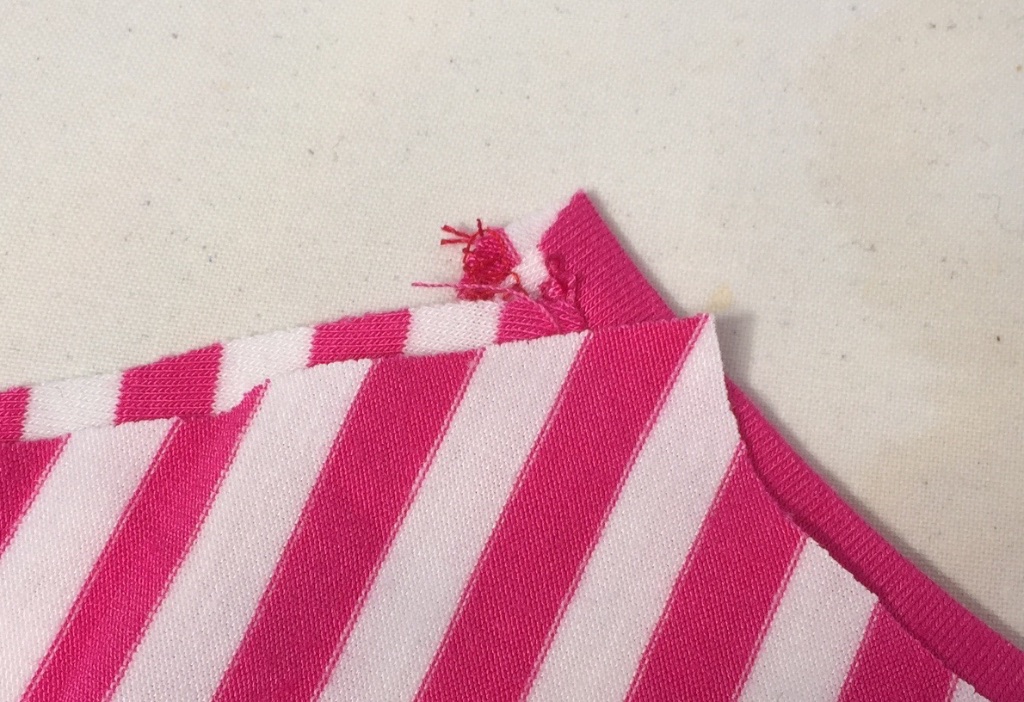 We need the front to over lap the back so shift your fabric so the front overhangs the back by 1.5cm.
 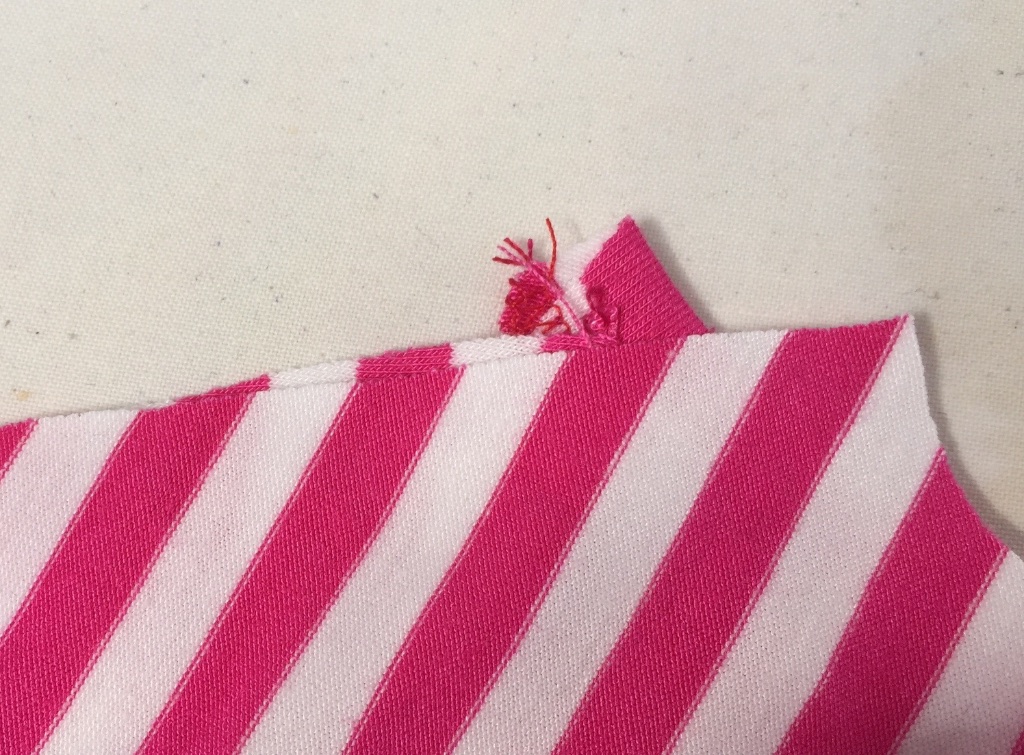 Bend it over and pin.
 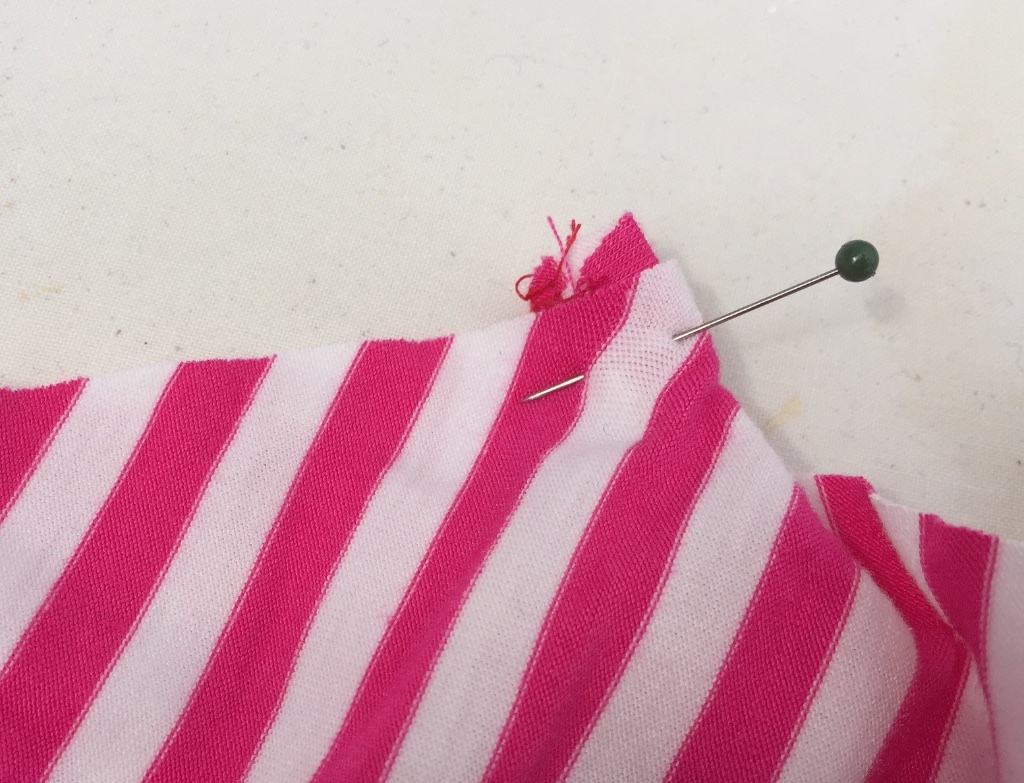 Stitch – I use a straight stitch for all neck and shoulder seams on a cowl top as there’s no negative ease.
 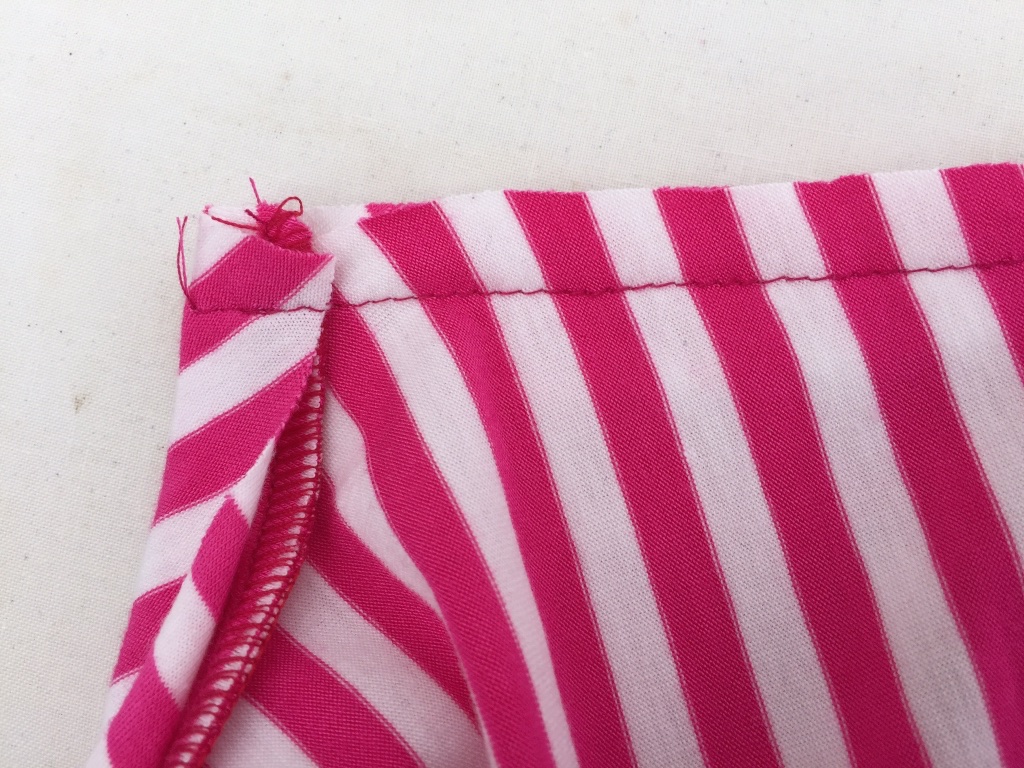 Turn it the right way to check it’s ok. Inside view:
 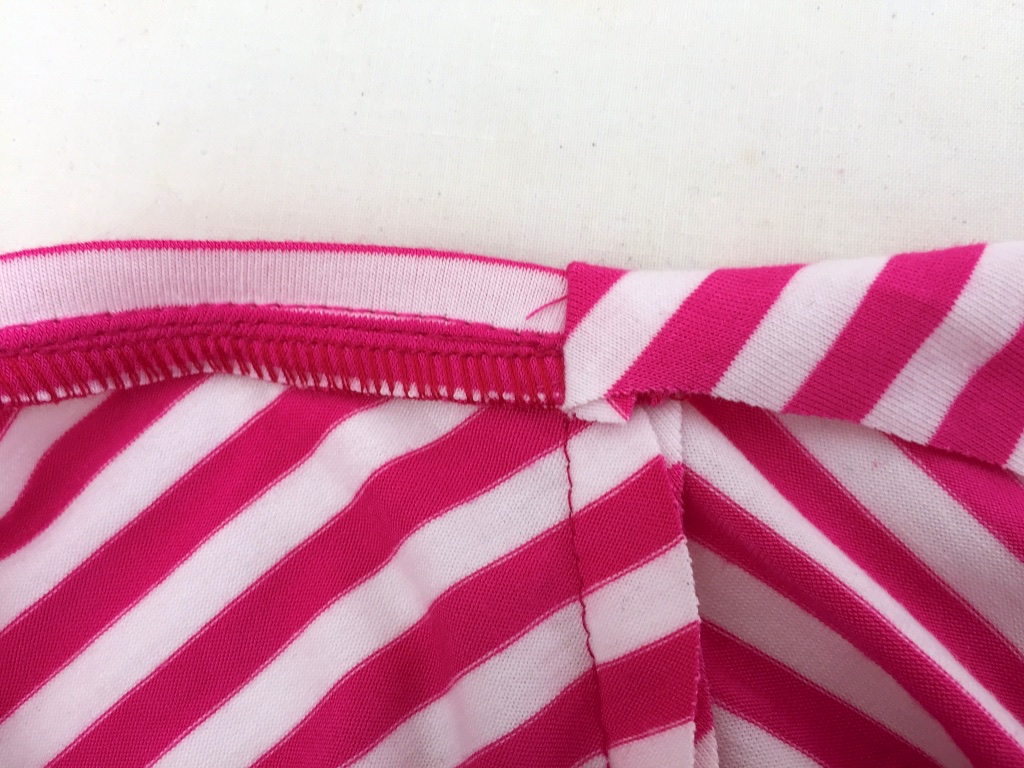 Outside view:
 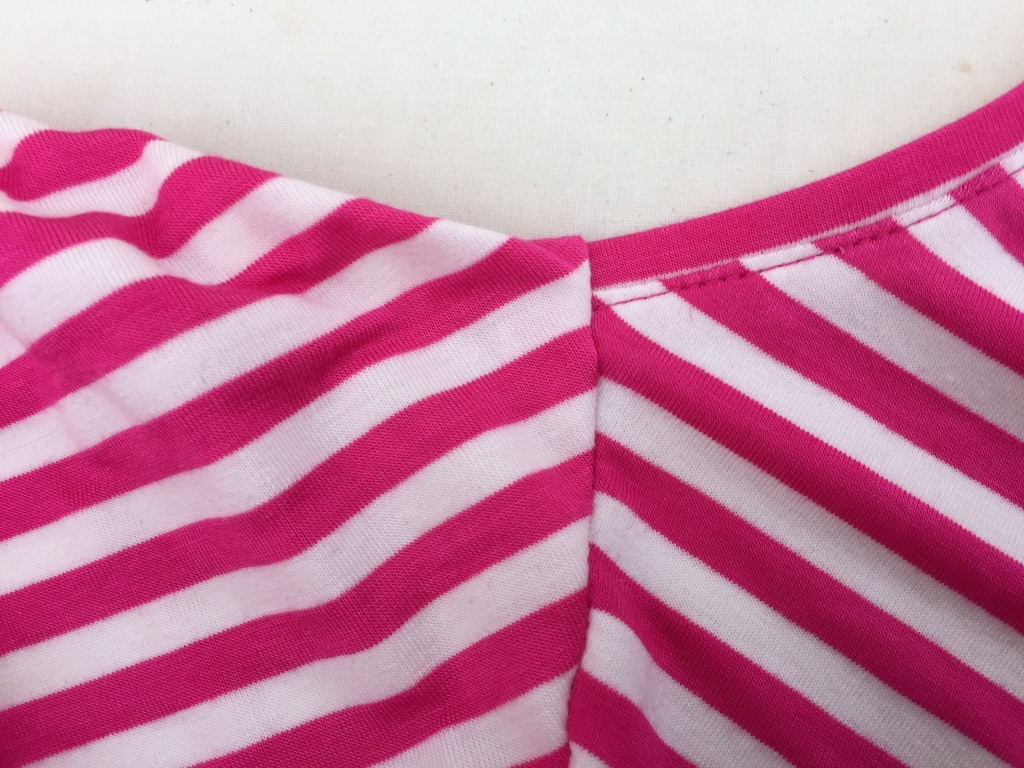 Turn the top back to inside out and finish your shoulder seam. I haven’t used any clear elastic to stabilise the seams but you can if you prefer.
 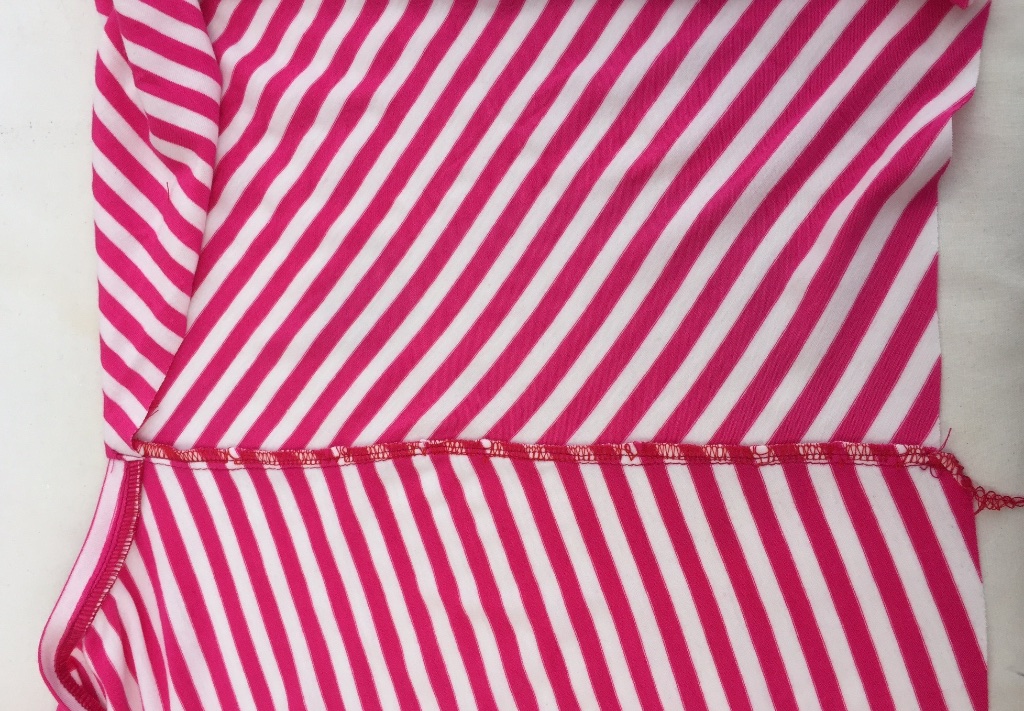 I like to topstitch to strength the seam and finish it off nicely.
 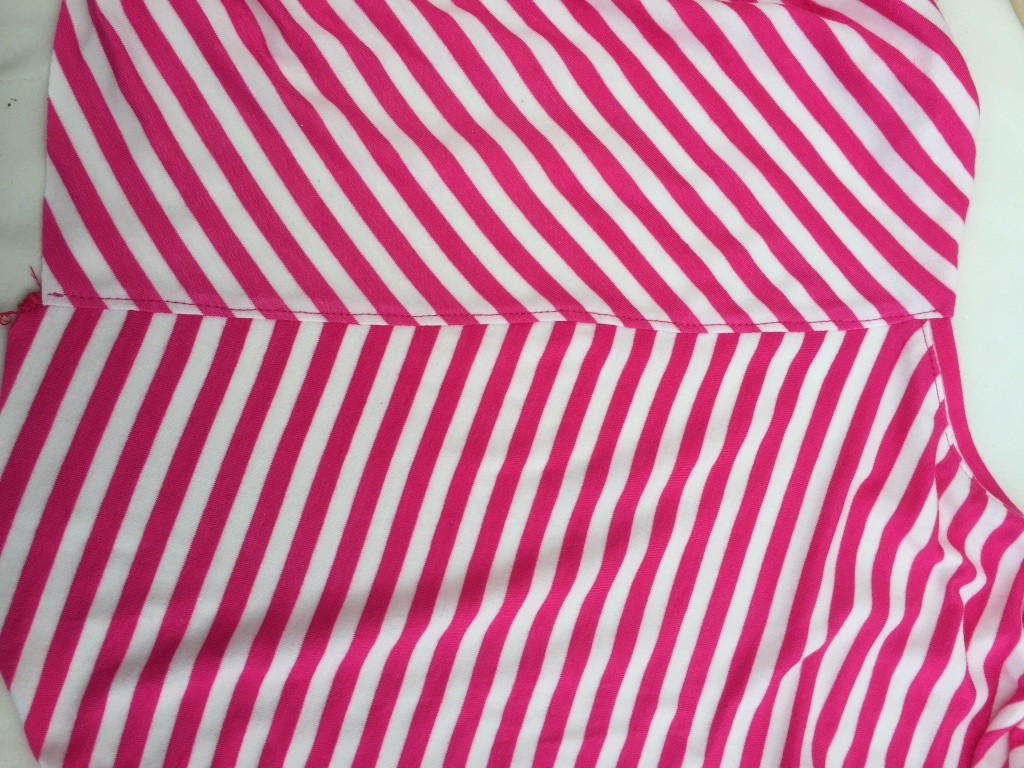 On some tops I’ve made which are slinky jersey i’ve not finished off the front neckline at all, and just left, as Jersey doesn’t fray.
 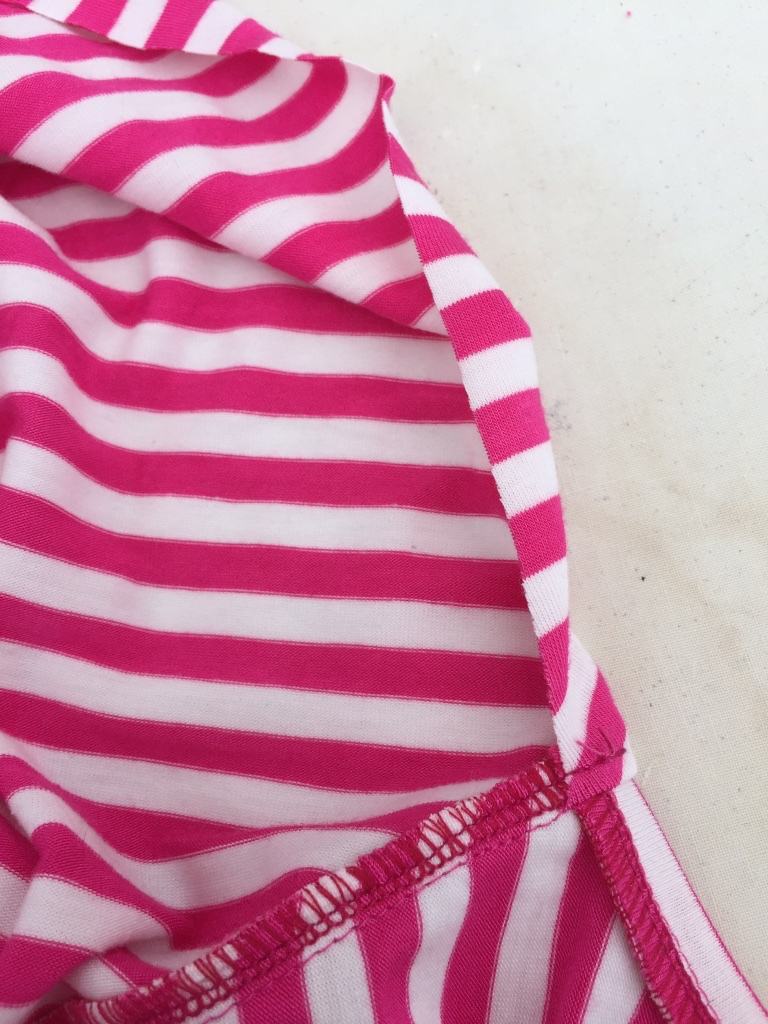 In this case I used wonda web to hem it – it gives it a sharp finish and no stitching to be seen.
  Ta-dah!
  and another!
 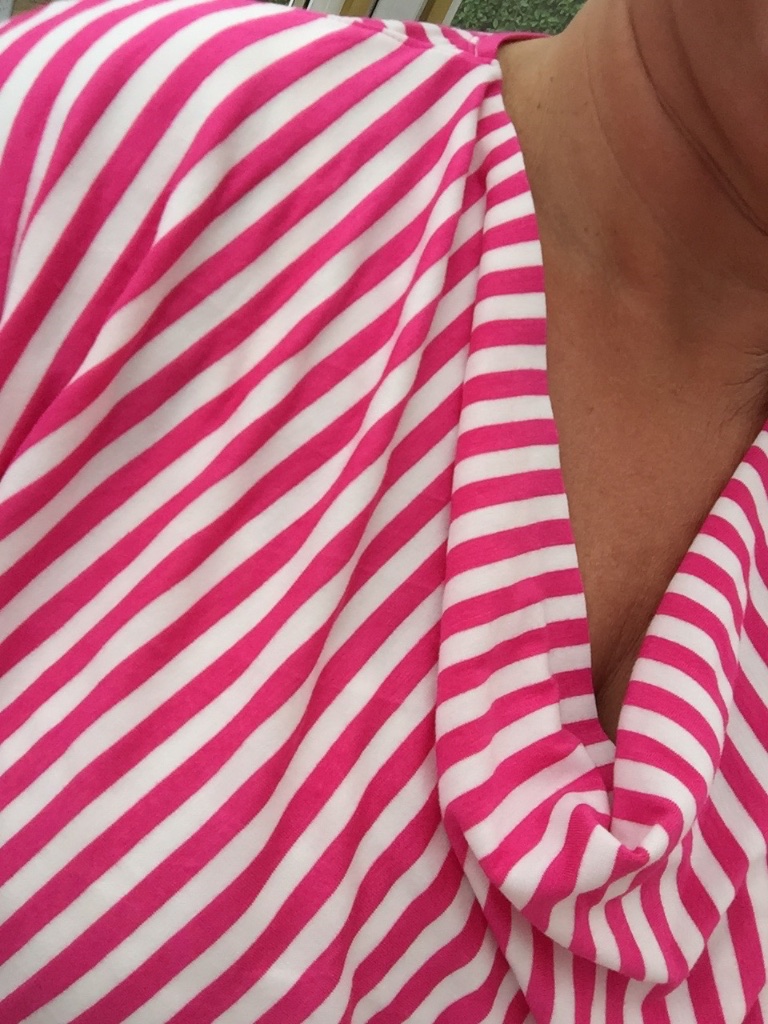 And another!
 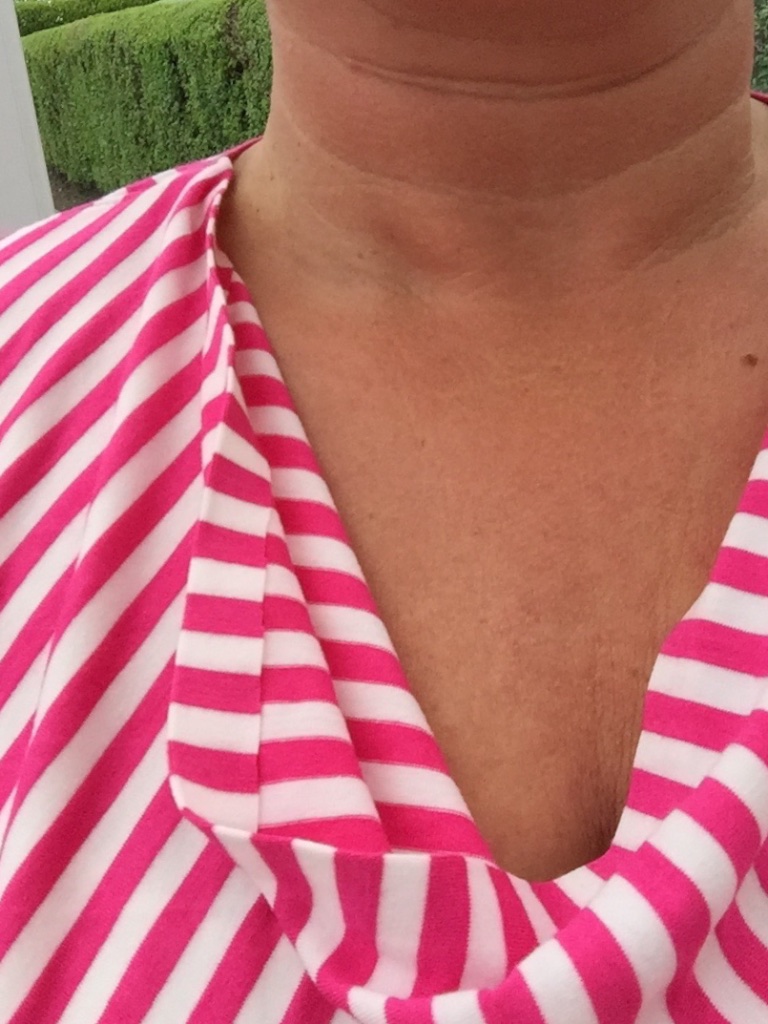 I finished the bottom hem the same way but top stitched it with a twin needle (pat on the back – not done this before! well, not successfully!).
 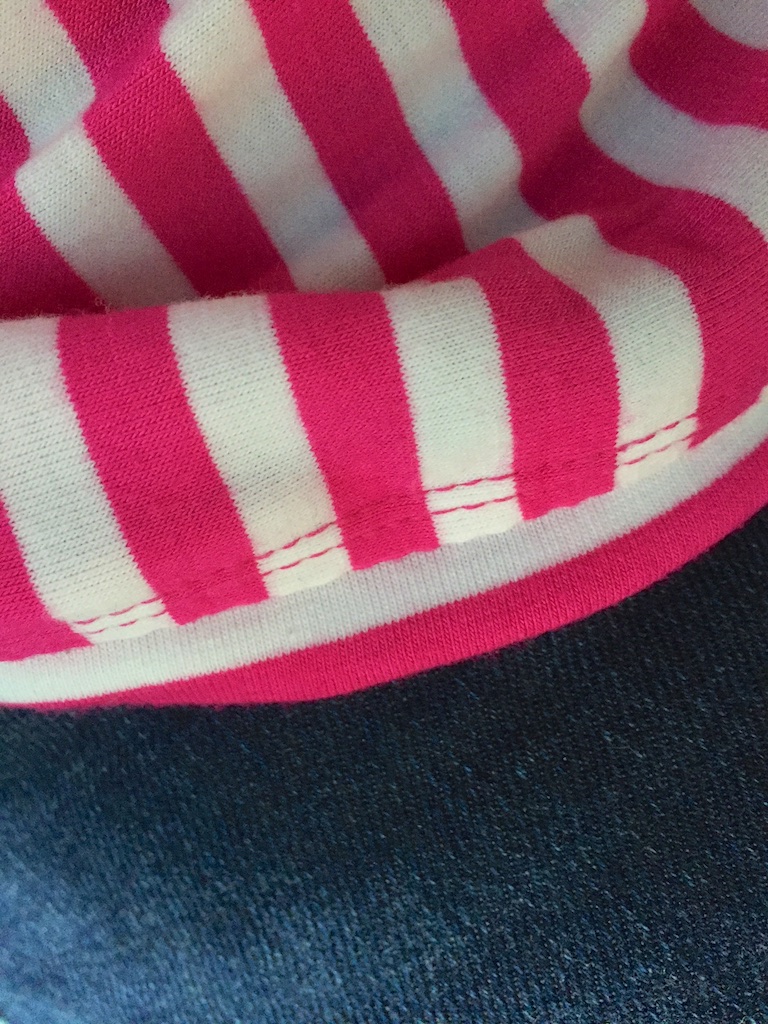 Hope that’s useful. Any questions leave a comment or email me! Or if you spot any errors or anything that doesn’t make sense, let me know.
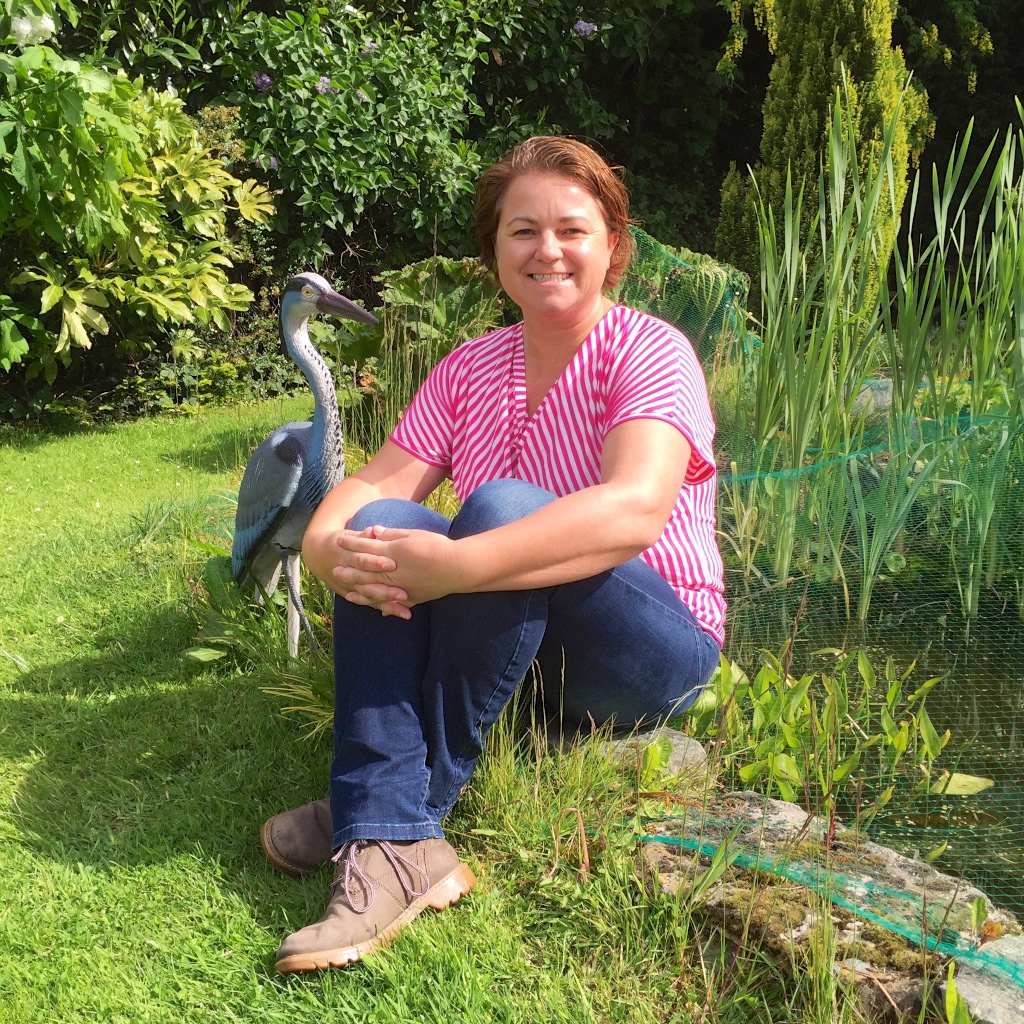

If anyone is going to tempt me away from my current yarn obsessive behaviour, it’s you Thimberlina! I do love love that Candy Bag strip top.
I think I need to send you a fabric bundle to kick start your sewing mojo! 😃
That’s a grand idea. But the house has a lot that needs sewing for it and the fabric’s just sitting waiting while I ignore it. I really don’t need to find my dressmaking mojo right now.
You may not be a sewing teacher but thats a great tutorial! Love the neat neckline!
Thanks Hila! I think lots of photos help better to explain that too many words – for me anyway! 😀
Agreed. I am quite visual too.
Thank you soooo much! Was wondering how you managed that perfectly matching trim round the front neckline! 🌻🌻🌻
Thanks Del – didn’t want to keep it a secret, needed to share it with my sewing buddies! 😀
💕💕💕
Lovely job & excellent tutorial too!
Congratulations.
Thanks for the feed back, it’s good to know it made sense! 😀
A cowl neck top is on my list, fab tutorial thanks so much 🙂
no fitting issues to deal with! I should image it will be a nice quick sew for you after all the pattern drafting 😀
Will definitely come back to this post when I attempt a cowl neck again. Love these colours on you, looks great 🙂
Thanks! Hope you find it useful if you make one (or two!) 😀
Lovely clear tutorial with great pictures – thank you! Will be returning to this one!
Glad you enjoyed it and hope it helps when you make one 😀
I haven’t made a cowl neck! I need one!
Only one, lol?!?! 😂😄😂😄😂
Erm…….6?????
Your’s is very bright and colourful. I have recently made myself one. It has been put to good use!
There’s just so easy to wear, aren’t they?! I’m definitely going to make a couple more before I put away me pattern 😀
This is a great little tutorial 🙂 I don’t think I’ll ever make a cowl neck but it’s great for those that will! Those instructions from Lekala are the shortest ever… No.4 confused me! That stork (is it a stork?! Something like that) besides you in the last pic frightened me, I thought it was real and so close to you hahaha!!
No it’s a heron….its plastic and is supposed to scare away the real one that comes and steals my dads fish from the pond 🐠
Oh yeah… Well it would scare me away! Hope it works!
I love this colour on you. I too have found pink a great colour although would never have bought a pink garment from a shop!
My cowls have a big flap of material in the front so you just don’t see the edge at all but I love how you finished of the back neck edge. Something I’ll definitely do next time.
Thanks Lucie! You’re cowl neck tops are lovely, it’s what inspired me to make some more 😀
Pingback: The 2nd Half of MeMadeMay 2017 | T H I M B E R L I N A