Latest Posts

Thank you By Hand, London

Whilst browsing By Hand’s website I found a tool they have which does all the calculations for 1/4, 1/2 and full circle skirts!!

Amazing!!!

Thank you so much! After making one for my niece I found the calculations scary as I didn’t want to make a mistake with the lovely fabric I bought.

Here’s one I made earlier….

20131224-134151.jpg

And I blogged about it here…..

I can’t wait to make another (for myself!) now I’ve found this App.

Thanks again By Hand!

Christmas Party – 80s Style!

I’ve just been to my SECOND Christmas party! This was a fancy dress party

– 80s theme! Time to get sewing!! 

For my ‘outfit’ (I’m on the right) 

SKIRT

I had an old skirt with a broken zip. I read on ForeverFierce how to bleach denim and thought I’d try and revamp this sad skirt that I’d never wear again…..

I laid it out in the bath and squirted neat bleach on it, and left it about 20 minutes. 

It turned a mucky yellow colour…….

Then I washed it on a quick 40 degree wash. I chopped the peplum off the bottom and using my ruffling foot made a ra-ra inspired trim which I stitched behind the lower edge. 

For the white cropped top, dare I say it, think I should whisper, I used my Sobertto pattern, without the pleat at the centre front. 

For the blue top I used McCalls 6648 which I’ve previously used to made 2 dresse and a grey top. It’s a really versatile pattern and easily adapted. Previously blogged about here.  

6648.JPG

I made view C (the pink one) but changed to a round neck and omitted the lower band.

The leg warmers were made using some blue rib. 

I completed my outfit with pink opaque tights, a beautiful beaded necklace and homemade earrings. 

We laughed all night!

Gemma on the left found an old white dress in her wardrobe. My ruffling foot sprung into action and I made a 2 tired ra-ra on the bottom. I used my white Sorbetto as a template to make a bright top to go over the dress. I also made a belt but she decided not to wear that. She didn’t thing it went. Did anything!?!?

Gemma’s outfit which I made in my break at work.

She was then in a dilemma about colour tights would go. I received a panicky message whilst she was out shopping – yellow or green!? She opted for yellow, which went lovely with her silver ankle warmers and white stilettos. 

All the fabric was from my stash so both of the outfits cost nothing! 

We crimped out hair, donned our co-ordinating head bands and nervously headed for the party. 

It was amazing! I won’t bore you with lots of pix, but here’s a few of my favourites:

Boy George

The Umpa Lumpas were brilliant – seen on the left.


Wham – complete with fake tan from Home Bargains! And no, it didn’t wash off!!

Christmas Party Dress

LEFT: frock made in September. RIGHT: Christmas party frock!

I’ve been thinking long and hard about what to make for my works Christmas do, and also something for The Monthly Stitch Challenge – “Party!!”.   I didn’t want to buy a pattern or any material as my stash should be is vast enough to find something.

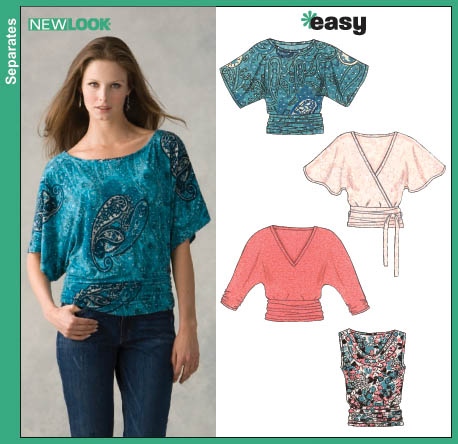
Eventually I decided on Newlook 6648 which is a top that I previously made as a frock:

I made the flowered one, bottom right.


 here’s where I blogged about it.

The pattern calls for jersey fabric, but I wanted to make it in a shiny polyester so decided to cut it on the bias so it would have some stretch widthways. Easier said than done!!

It took me ages to fold the material eventually I went with the pattern and kept everything crossed.

It was really easier, and the bias gave enough ease to get it over my head. When I’d sewn up the side seams it was way to big, hung like a sack with no shape.

I took the seams in about an inch from just above the waist all the way down and shortened it to below the knee. Much better!

I applied dark blue satin bias binding to the arm holes

It looked terrible so I bent it over, pressed it then hand stitched it in place. Big improvement! And quite therapeutic sat hand stitching!

For the hem I was a it lazy! I overlocked the edge, then turn over a narrow hem and machine stitched.  Passable.

Not a lot else to say……now just a couple of action shots from last Saturday night! Unfortunately I didn’t have time for a photo shoot before we went out!

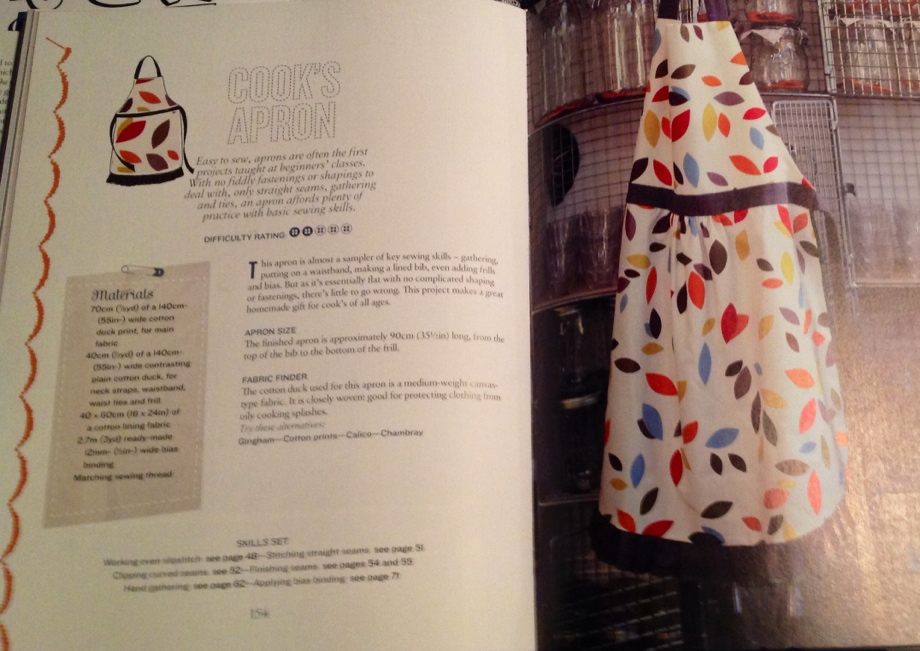
Cook’s Apron from The Great British Sewing Bee

Time was running out for me in The Monthly Stitch’s Challenge – ‘something from a book”.  As I only own 1 sewing book I wasn’t exactly spoilt for choice.  

This month has been really busy.  I’ve made a big start on making my Christmas gifts, and also I’ve had 3 birthdays and an anniversary which I’ve made pressies for too. Before I knew it, there were only 2 days left in November for me to make something for the Monthly Stitch, so it had to be something simple. 

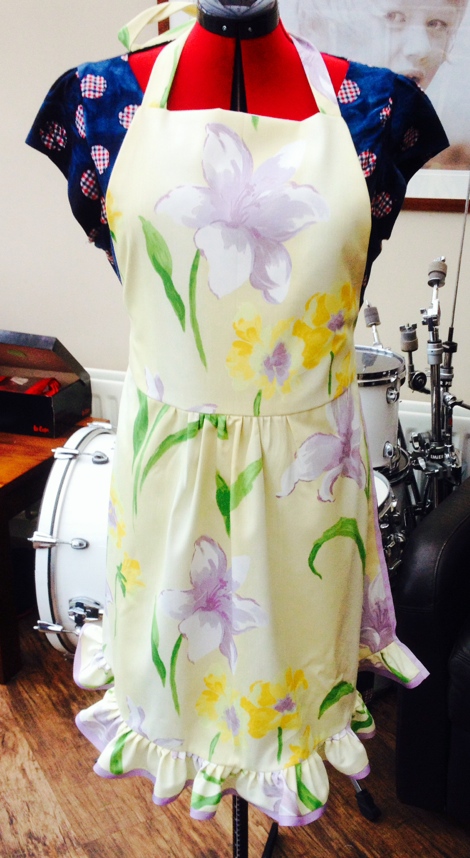
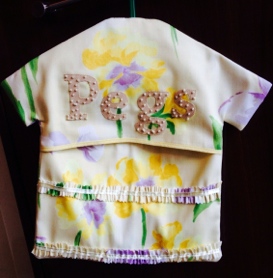
I chose the cook’s apron as it would be a nice pressie to go with the peg bag I’ve already made for my Auntie Kath. Here it is:

Here’s it is with ‘finishing touches’ that aren’t on its own blog.


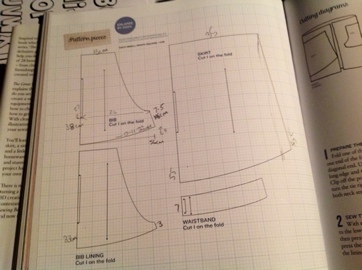
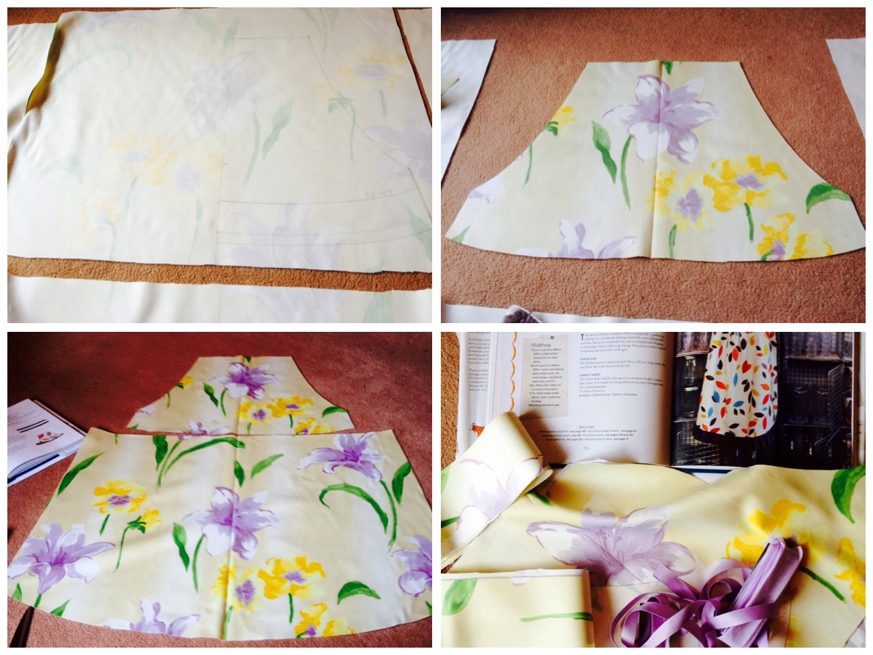
When I made the apron I didn’t have any graph paper, so armed with a pencil, French curve and tape measure I marked out the outline directly onto the back of the fabric. I worked out the measurements and wrote them into the book. 


I decided to make 1 or 2 changes to the pattern:

  • I didn’t use a contrasting fabric as I didn’t have anything suitable. So for the front I used the pattern piece for the back. 
  • I didn’t follow their instructions for the pleated trim on the bottom. Instead I used my ruffling foot. 
  • Instead of slip stitching the top part lining in place at the back I stitched in the ditch from the front. 
  • I made all the lengths needed 3 inches wide when I cut them out, ie the ties and the trim. I did this as I used the ruler on my French curve to measure and it was easier. 

As per usual with all the gifts I make, I want to keep it!! It’s very pretty and girlie. My hubby thought it was a dress when he saw Gertrude modelling it.

Here’s something I prepared earlier….. 


Me_n_tunic.JPG 

I made this in the summer and previously blogged about it here. This is the free pattern which comes with The a Great British Sewing Bee book. 


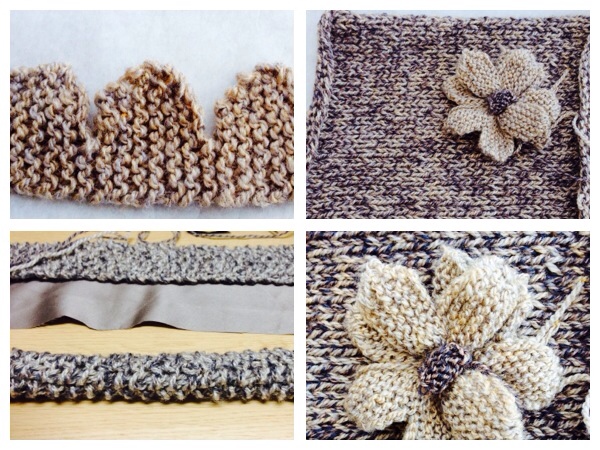
Here’s a sneaky preview of a bag I’m knitting for one of my nieces for Christmas. 

I have all the bits made, it just needs sewing together….

Top left: flower before being ‘sewn up’. Bottom left: the handles.


Peg Bag 1st attempt

Whilst trawling the internet looking for inspiration I came across grannymaudsgirl who has made the cutest peg bags ever. I didn’t follow her tutorial as I wanted to make one with a flap rather than a circle, and I also wanted to try out my ruffling foot but mines pretty average so I’m going with hers next time.

Here’s how I made mine:

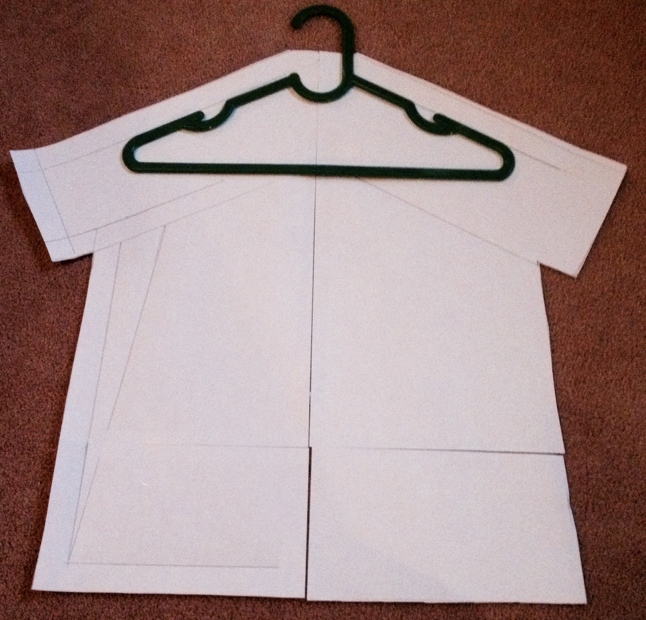
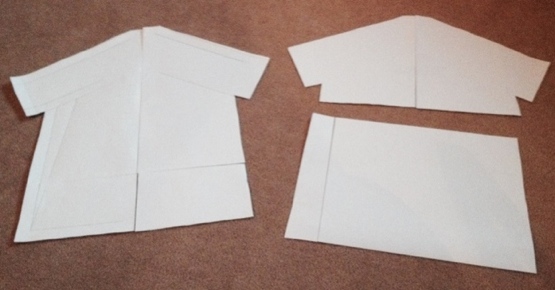
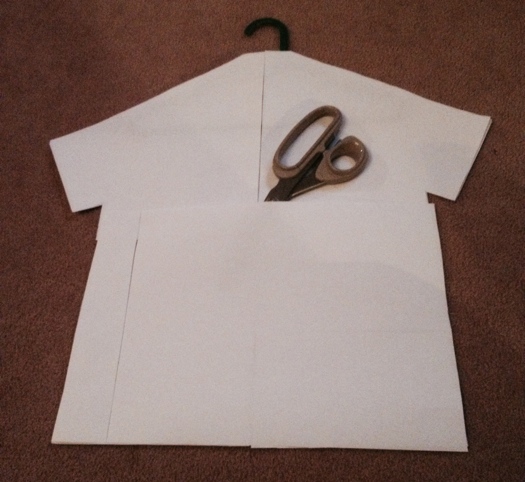
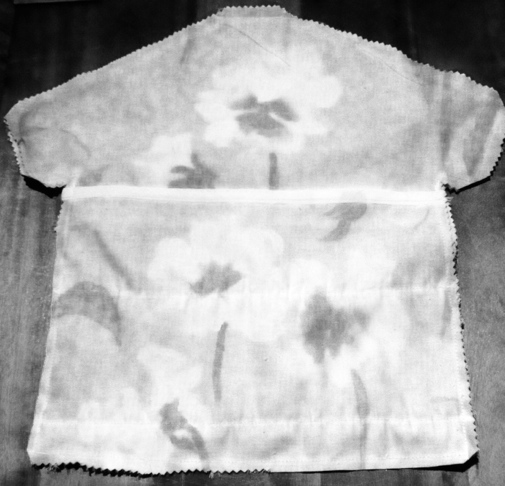
I drew a pattern based on the only small coat hanger I could find (I need a trip to ikea) then used this as a template to make the 2 front pieces.

I used some curtaining fabric that I found in the loft. There’s 16m of it on roll, and I don’t remember buying it!! It’s been in the loft since we moved here almost 11 years ago.

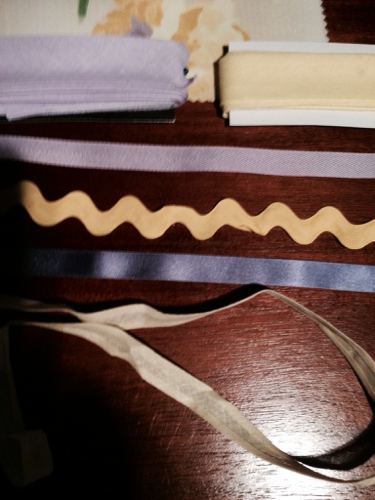
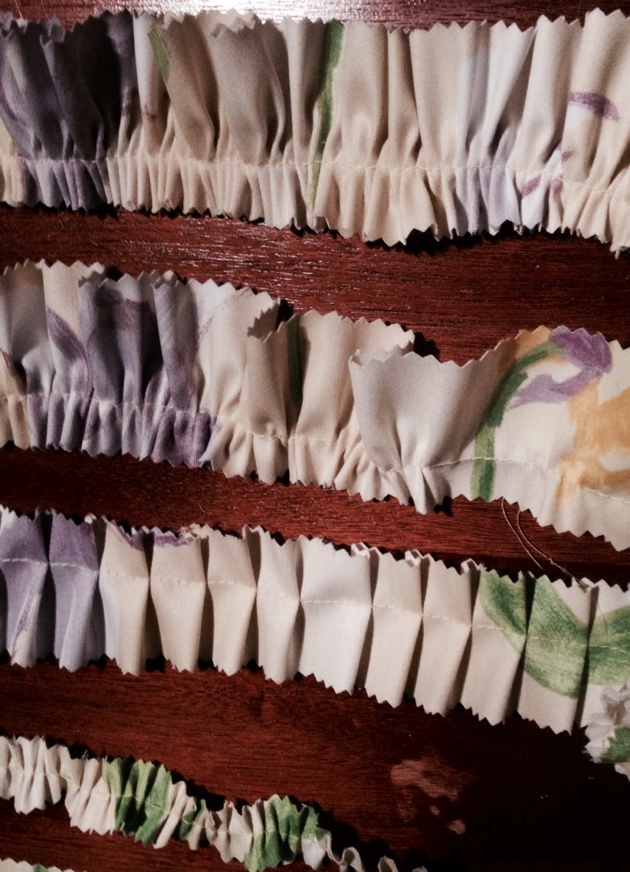
After rummaging in my stash I found some bias binding and ribbon which would come in useful and also ruffled some strips of fabric.

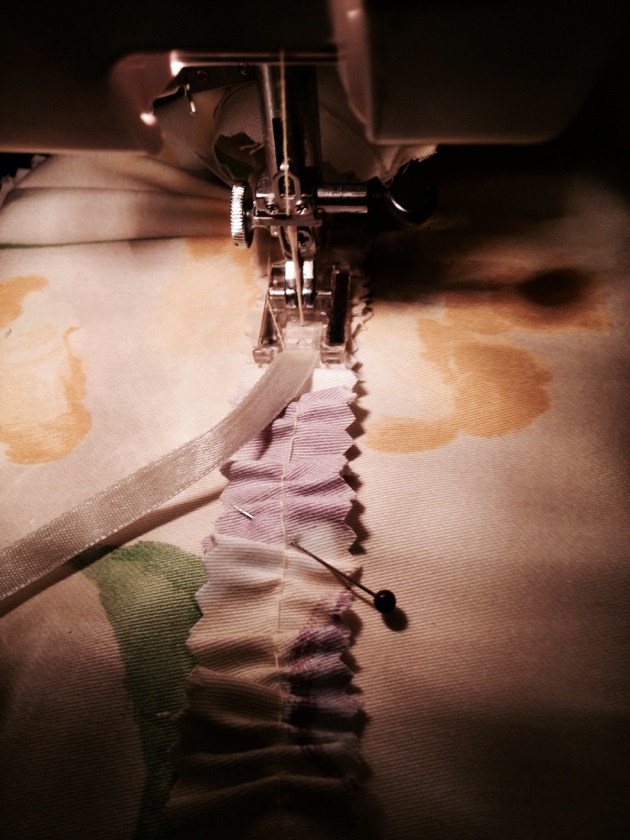
I LOVE my ruffling foot!!!! It’s amazing and so easy to use.

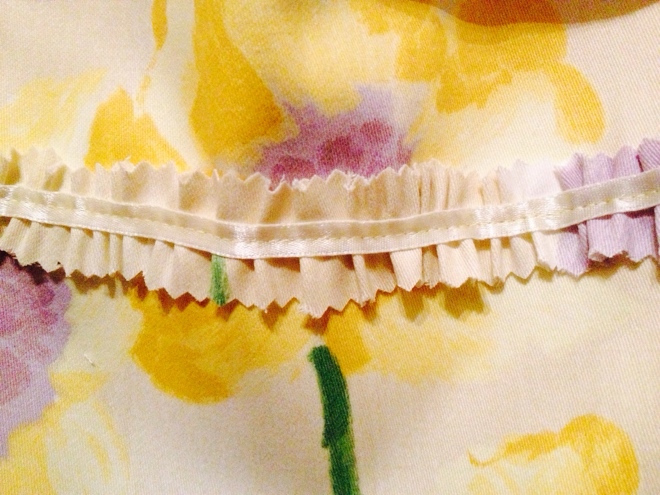
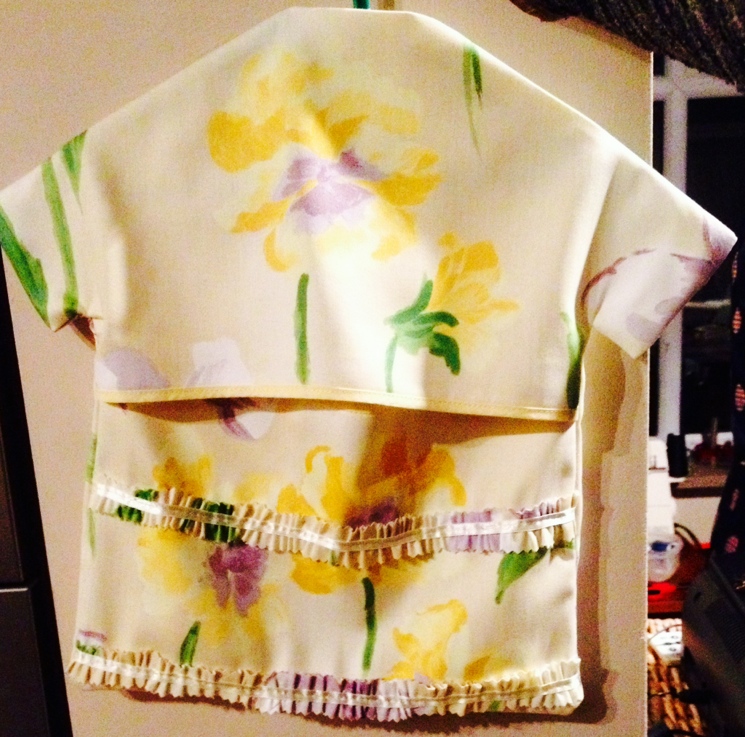
I played around with different ways of arranging the trims but in the end I used the narrowest ruffle with a narrow ribbon stitched on top (x2):

The trickiest part was working out whether to put the flap over or under. It reminded my of making pillows. Luckily I did it right the first time. I’d done lots of reinforcing on corner etc that it would have been a nightmare to unpick.

After turning it to the right side, a good press and adding the coat hanger, here we have my first peg bag!

I think I need to add something above the flap.

 Any suggestions?

Organising PDF Patterns

20131119-193404.jpg

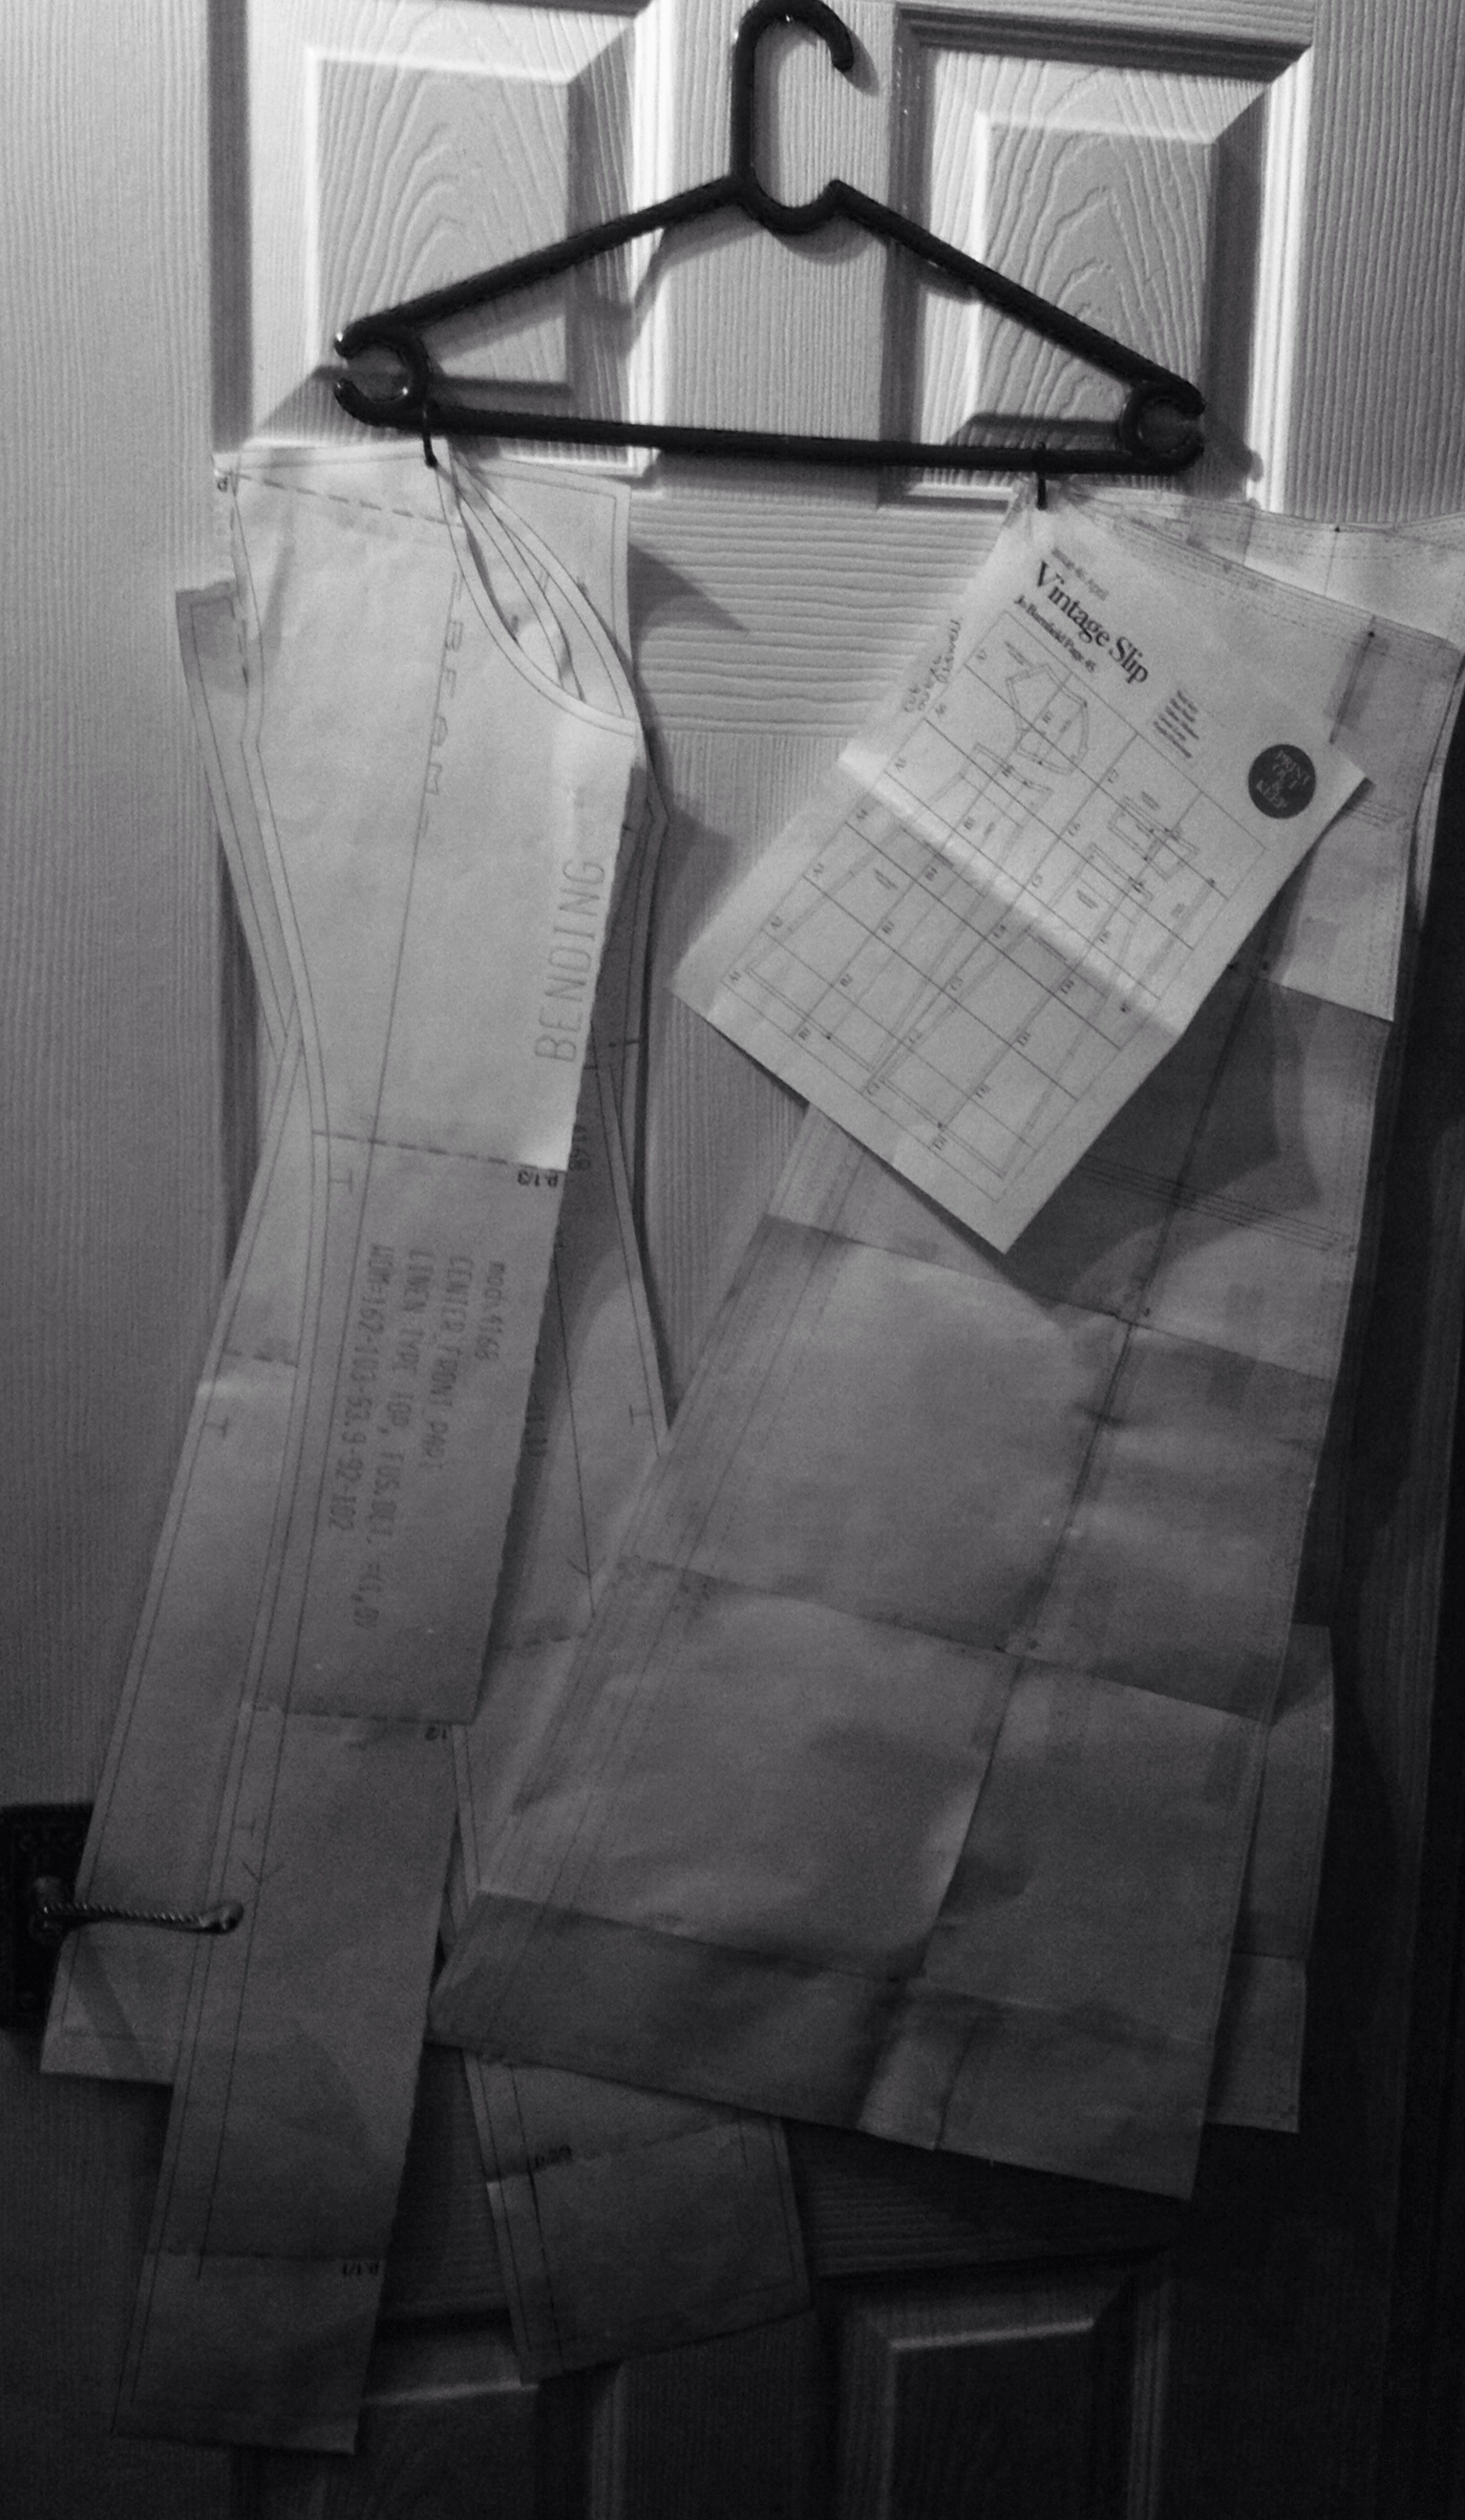
I usually roll my PDF patterns up into a tube after using them but today I had a brain wave of a better way to store them.
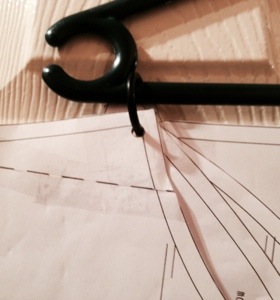
Strengthen one corner with lots of cellotape then make a hole with a hole puncher. Do this for each pattern piece. I then cut the straight end of a plastic ‘D’ ring and slipped each pattern piece onto it.
I then put the ring onto a coat hanger.
Now all I need to do is find somewhere to hang them up!

20131119-193824.jpg

20131119-193834.jpg

IS THIS NORMAL?!?!

Hi fellow fabric horders collectors!

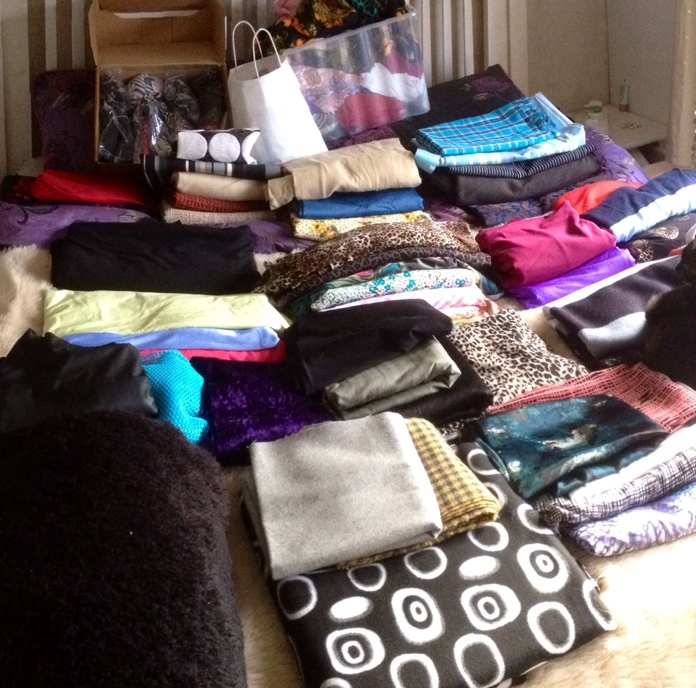
I decided to sort out my little stash today and was shocked to discover all this…….(it’s a good job my hubby’s at work!)

Is it normal to accumulate so much fabric?!  I’ve organised it into piles – plain jersey, patterned jersey, cotton, leather, wool blends, Lycra,slinky poly, stretch cotton….I could go on… but I won’t. 

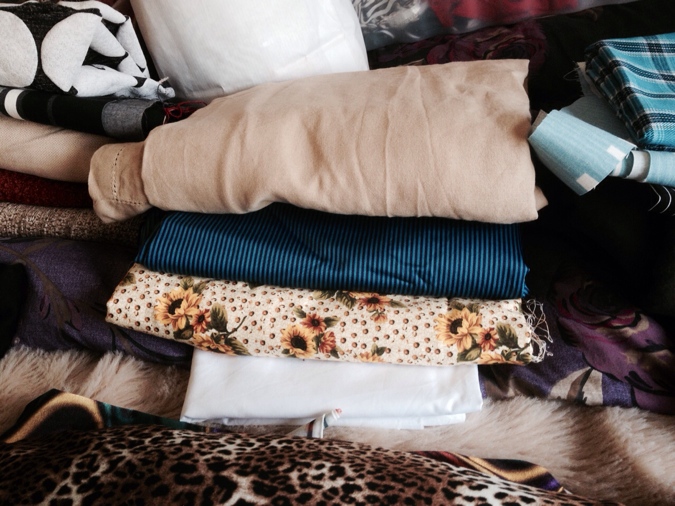
Here’s a few close ups, including one with Rory the cat trying to camouflage himself!

I really need some reassurance that this is quite normal and I don’t have a problem!! 

Also, any suggestions on stash busting would be greatly appreciated. I’m intending to make quite a few totes etc for Christmas Pressies, but most of my fabric is for dressmaking not bags. I may have to go shopping!! 

Blog Backlog, shopping in Harrogate & Bag catch-up, oh, and fluff in my machine


Such a busy week!

Lots of unselfish sewing and an impromptu trip to Haroggate (pronounced ‘Harrow-gate’ if you’re posh!).  And a big ball of fluff!!

My Auntie Kath, who taught me to knit, iron and bake when I was young lives in Harrogate. She had her birthday last week, 70 something I think (her age has always been something of an enigma!) and I forgot to post her card. This was a blessing in disguise as I’d not visited her for ages and I could also call into a couple of fabric shops that I’d found on the internet – Fine Fabrics of Harrogate and The Remenant House

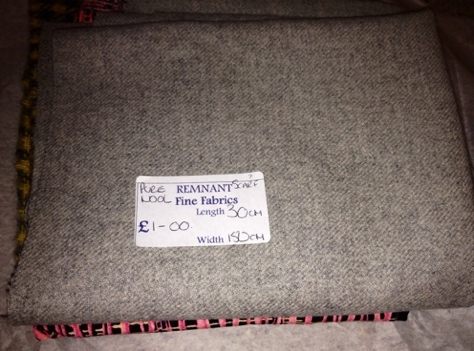
FINE FABRICS OF HARROGATE – this little shop certainly lives up to it’s name! Not a very big shop, but bright and airy and the fabric is well organised and is a pleasure to browse. I was almost tempted to buy a couple of metres of 3 or 4 different fabrics that caught my eye, but as I intended to just go for ‘a look’ I would just be adding to my stash. So, with much restraint I made just a few small purchases from the remenant section. The remnants were neatly hung on hangers and clearly labelled with the fabric composition and the length. Much better than rummaging and guessing.  The prices were reasonable too. I bought 4 remenant pieces, some satin bias binding and a zip. Not a huge purchase, but they were lovingly wrapped for me to take home. 


Here are 3 of my purchases, not sure why I didn’t photograph the 4th – that was a mustard and grey hound tooth wool fabric which I think will be a fabulous bag for one of my nieces. 
 

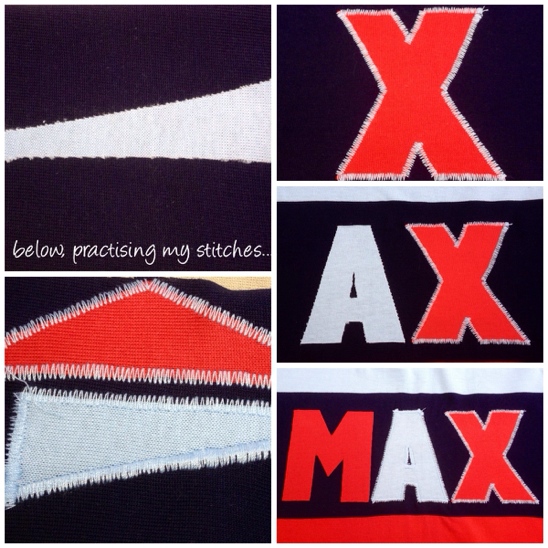
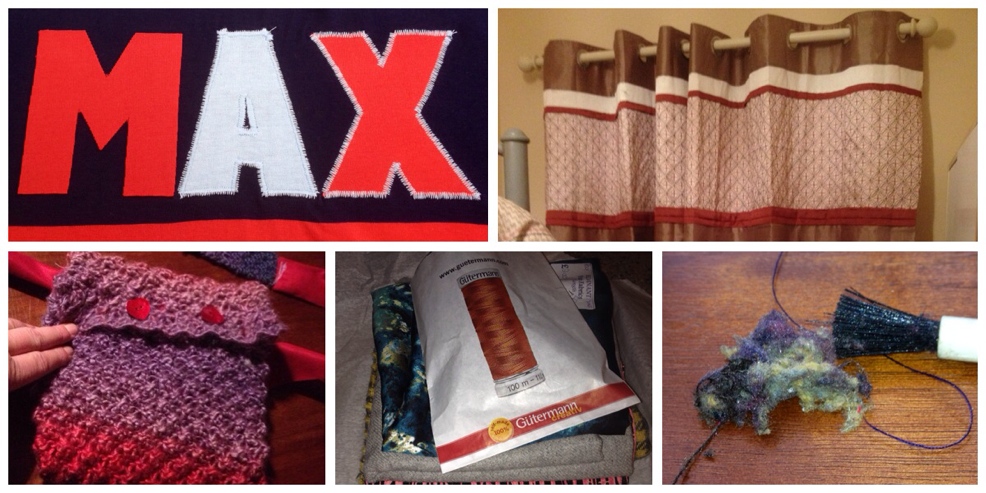
Later in the week I needed a pressie for my hubby’s 3 year old god sons birthday. Like most children he has everything, and with Christmas only around the corner I thought I’d make him something unique – a pump bag with his name on.  

I used some fabric in my stash which I bought a while ago on eBay. Dark blue, light blue and red wide stripes in a sweat shirt material. I French seamed all the seams for added strength and it only took just over an hour to make. 

Here’s my progress:

For the cord casings I cut 2 pieces the width of the bag and turned the edges and stitched, then pressed them in half right sides together.

I then stitched them to the INSIDE of the bag, bent them over and stitched with right sides together, encasing all raw edges.


Now, for some bizarre reason I didn’t take a photo of the finished article, DOH!! But I have asked his mum if she will take one and email it to me. So one day, hopefully not too far away, there will be one.  

There, that’s bag number 1, here’s bag number 2 for my lovely niece (I have 4!) who was visiting us from America. They emigrated almost 5 years ago and it’s the first time they’ve been back home. Maddie is 11 this Friday. 

Originally I thought I’d knit her a scalf with some wool in my stash. It was going to be a jumper, but although I love the wool, I didn’t think once I’d started knitting that I’d get my wear out of it, so back in May it became a UFO. 

Here’s the front of the jumper and the label showing the wool:

Beautiful I know, and very girlie, but I could make 5 frocks in the time it would take to finish!


So, I cast on 42 stitches with 5 1/2 mm needles and proceeded to make a scarf. 

If anyone’s interested in the bobbly pattern, it’s really simple (can be made as wide as you want in multiples of four then add 2. Makes a fab blanket with super chunky wool and 15 mm needles which grows ridiculously fast!). 

Row 1

Purl

Row 2

Knit 1, (purl 3 together, knit into the front and back front of the next stitch) repeat bracketed bit to end the. Knit last stitch. 

Row 3

Purl

Row 4

Knit 1,  (knit into the front and back front of the next stitch, purl 3 together) repeat bracketed bit to the end. Knit last stitch. 

That’s it! Carry on until it’s long enough or you get bored (or run out of time like I did, then turn it into a bag!!) 


For the next bit I need to set the scene: 

it’s 9pm, the scarf is about 1/3 of usual scarf length and they’re heading down to the south of England at 9am the following morning. And I couldn’t make Maddie something without making something for her brother Oliver too (age 7). 

So, speedy seamstress takes over and casts off and sewing machine goes into overdrive:
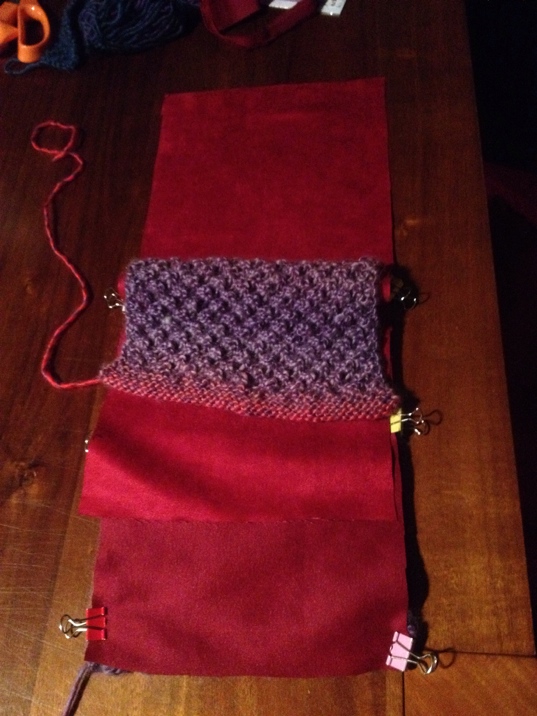
I sandwiched the ‘scarf’ between 2 pieces of suedette fabric and held it together with clips. I’d no idea how it would sew together, but I was running out of options. I used my roller foot. The lower piece of fabric went a bit skewiff, but nothing really terrible. 


I turned over the lining top and bottom, and stitched some of the red fabric to the bag strap I’d quickly knitted (8 stitches knit 2 purl 2 moss stitch) to make it long enough. It was ok sewing with the woolly side face up if I took it steady and used longer stitch length – I used 4 mm. 

I wasn’t sure what to do next, maybe turn the top over and add a button or 2…..

I couldn’t decide, it was 11pm and my bed was calling. So I let Gertrude wear it and turned in for the night:

Bear with me, it’s the longest blog I’ve written but I’ve nearly finished. 


The next morning (at 7:30am) I decided that the sides would be simply sewn together with no flap and I’d best make a start on Oliver’s bag. 

I used the same technique as for Max’s bag and here is the finished article: 

With seconds to spare I arrived at my mums in time to catch them before they had to leave. I gave Maddie her bag, together with a darning needle, some wool and a pair of scissors.  She loved it.  I think she loved it more because she was allowed to finish it off herself!


One last thing, if you’ve never removed the bit of the machine which holds the bobbin in place and never had it serviced (like me), here’s what I found :

Yuck!!! What a mess! 


One last thing, (if you’re still here, well done!) as I’m writing this I’m planning a giveaway to celebrate 1,000 views. Only 20 something to go!  When i started my blog only a couple of months ago I was giddy when I hit 50! Never did I think so many of you would read what I had to say. So, any suggestions would be greatly appreciated, and it would have to light as I’d like to be able to offer the giveaway to all my followers from around the globe. 


Whoops!! Just one last thing…..honest!!

In and amongst that lot I went shopping with my mum to Dunn Elm.  We found 2 separate curtains, different lengths but same fabric for £2.50 each in the remenant bin!!! So I shortened them for her, and made some tie backs with the spare fabric (tie backs not up yet….c’mon dad!!!).  

 

Tartan Half Circle Skirt – a bit of a tutorial…My First!

Today’s my niece’s 16th birthday. She asked me to make her a tartan skater skirt. After lots of googling we went shopping to Fabworks in Dewsbury on a fabric hunt. As soon as she saw this fabric it was love at first sight. It was also the most expensive one we saw at £10/metre. It was a wool mix, but was machine washable. My sister would hate me if I made something that was dry clean only. 

Silver.JPGOriginally I intended to make her a 3/4 circle skirt but I wasn’t sure how the seam would match up to I chickened out and made a 1/2 circle. I had a trial run in my size as I’d never made one before. I made mine in a thick silver fabric which ended up being a nightmare to work with, it just curled up at every stage. 
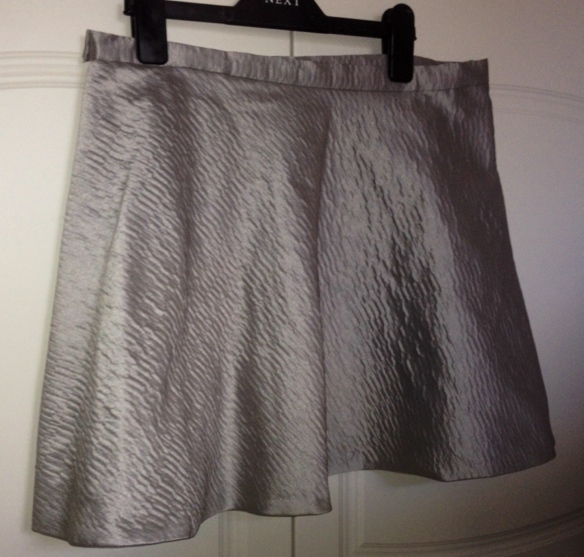
 

After pressing the living daylight out of it it eventually behaved, but alas, I have produced another UFO. I’ve not idea when I’ll ever where it so can’t bring myself justify the time needed to hand stitch it. 


So, with lessons learned from making the UFO, armed with a calculcular I set to and worked out the radius of Lucy’s waist. I was so glad I enjoyed maths at school as this was the easy bit!!


It took me ages to work out which was the right side of the fabric, and even then I wasn’t entirely convinced, but I was going to stick with my decision so marked the right side to stop me changing my mind and moved swiftly on. 


I cut the lining (bottle green poly) tho no picture of that – I just traced around the tartan fabric. 


I found when I made the silver skirt the waist edge stretched as it was mostly on the bias, despite stay stitching. To prevent this with the tartan I stitched a 5mm cotton stay tape along the waist edge on the main fabric and the lining. 


Then I added green satin bias binding to the hem so the finish would be really neat when I hand stitched it. I also overlocked the side seams before stitching together. 


I added the zip, a normal dress zip about 8 inches (the only one they had in green!) with no pins. I went with my sewing intuition and despite reading millions of tutorials and watching Craftsy lessons in inserting zips where no one mentioned this method, it worked! I just thought if the worst comes to the worst – I have a stitch ripper!! 


I then used waist band interfacing (not sure of its shop name) which I find makes the waist band so much easier and quicker:


When I “stitched in the ditch” on the right side I didn’t tuck under the back part, instead I edged it with bias binding. I thought that with the fabric being quite thick, the back part wouldn’t be long enough to cover everything when I stitch in the ditch and also the contrasting colour made a neat finish. (Hope this make sense!). 

At this point I hit a brick wall. Although I had  Lucy’s measurements I need her to try it before I finished it completely. 


Arrrhhhhhhh!!!!!!


It was 3 inches too long!!! Oh well, better than 3 inches too short. 


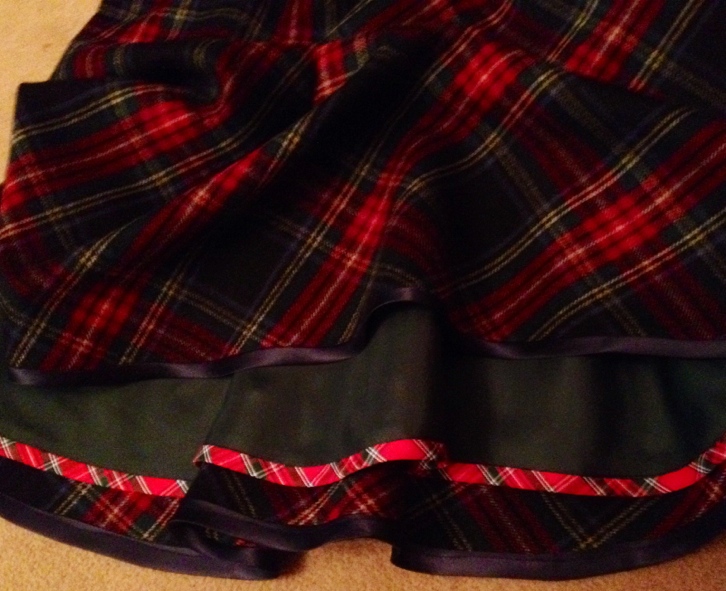
I’d no green bias left. I had some black satin bias binding, but decided against this and called to Boyes. I bought some navy blue satin, red satin and some red cotton tartan. She’d decided she liked the binding showing – no hand stitching of the hem……YIPPEEEEEEEE!!! 


I carefully measured 3 inches from the bottom, but just hacked roughly away at the lining. It’s ended up a little bit wonky but only I know. 


After applying binding to the outer and inner layer it was looking good…….!


After hand sewing to neaten everything up (which I found surprisingly therapeutic), I just need to make a couple of button holes and sew on the buttons. 


My auto button hole wasn’t working as I’d have liked, so I practised a few millions of unautomatic ones until I was happy. I also found it easier to cut the holes first, then stitch. 


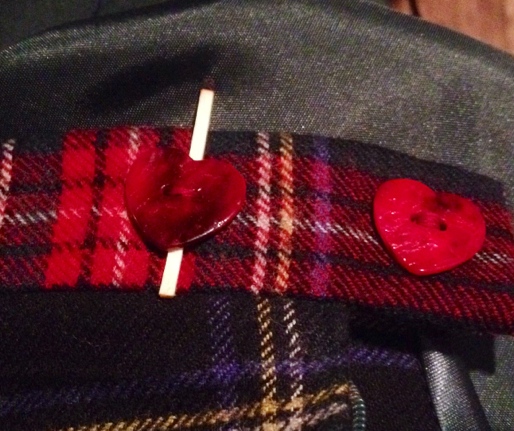
I remember reading somewhere that you can buy something for your machine so the button stands off from the fabric when you sew but as I only had 2 to stitch I was doing them by hand. I used a match stick between the fabric and the button to create a bit of looseness for the button. 


Don’t you just love them heart buttons!! 


All finished! Just need gifting wrapping and a ride to my sisters………

And here’s a very happy birthday Girl!! 


She is happy really….just felt a bit self conscious as she knew the pix were going on my blog! 

Oh, and one last one…….

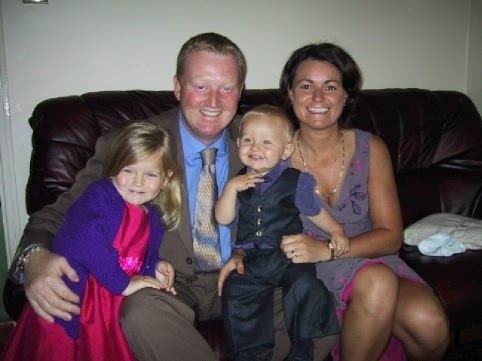
 My favourite pic of Lucy, her brother Alfie with me and my hubby. This is Alfie’s christening – I’d made him a suit to match his dads! Probably the last thing I made up until June this year! 

This was taken about a week after I found out I was pregnant with Harrison, think that’s why I’m looking radiant – not my usual look!