
For those of you who don’t follow the Monthly Stitch (and I don’t think that’ll be many) here’s a chance for you to boss my around and choose a pattern for me to make in March.
Thankyou, in anticipation!

For those of you who don’t follow the Monthly Stitch (and I don’t think that’ll be many) here’s a chance for you to boss my around and choose a pattern for me to make in March.
Thankyou, in anticipation!

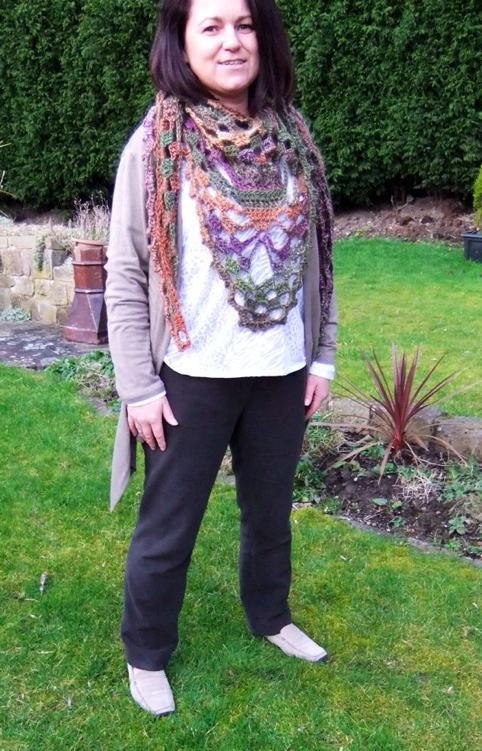
Phew! Talk about Cutting it fine. February’s challenge for The Monthly Stitch is to make pants. Or trousers, or slacks depending whereabouts in the world you might be.
So here’s my moleskin Manhattan Skinny Bitch Curvy Chick trousers. I bought the PDF version of the pattern for $12 (about £7) as I didn’t want to wait for it to be shipped from the USA.
This pattern company designs patterns for petites – I’m 5’4″ so not too small but not tall either. Neither am I a skinny bitch or a curvy chick, but hey ho, I loved the free Tonic T pattern that I made here, and here for my mum in law, so thought I’d given the Manhattan pants a whirl.
Sticking together the PDF pattern pieces wasn’t the easiest of tasks. Not sure if it was my printer but I lost some of the lines near the edge of the paper and had to draw them in where I thought they might go…..

The red lines are what I needed to draw in. Not such a big deal really.
Once I started sewing they were a dream to put together. The instructions and diagrams were very clear, and there is also extra help on SBCC’s blog to help with the fly construction, some handy tips for choosing your size and adjusting the waist. And fitting.
I didn’t make a muslin as I was fairly confident that if I went with my hip size they’d fit. And they did!
The fabric is a 100% cotton moleskin in a dark, not quite chocolately, brown. I’ve had this fabric about 15 years, and there was 3m of it. I can only think I must have bought it with the intention of making my hubby some trousers otherwise I wouldn’t have bought so much. (He’s 6′ 3″ with a 35″ inside leg, think he got my share!).
I soooo glad I didn’t make him some. These trousers are sooo comfy and warm. Perfect for walking in on a cold day. I can wear them with my boots and a big jumpers or with my loafers and a couple of thin layers on top. The only down side is that they take forever to dry when washed.
So, moving on, more pix of the pants……..

My favourite part and of which I am most proud is the fly. A couple of times I’ve even be known to unzip and show it off to friends who’ve admired my new trousers!

This is a bit overexposed (the photo not me!) but it shows the front quite well. It looks on the photo that there’s some tension in the waist band but there isn’t – honest!

Before I go, I have to say, Have you noticed the scarf? I can’t believe it’s only 2 months since I took the Craftsy course and learnt to crochet. I found this pattern on Craftsy for only $1 and started it 3 nights ago. I just had a couple of quietish night shifts and 3 hours yesterday and it’s done! Love it. The wool was an inherited UFO from my mum. She started making me a cardigan a year or so ago but only made the back. So I’ve a few balls of this lovely wool, not sure what the rest will be yet, I might have a go at some mittens before the weather warms up.
A little belated Birthday wish for my lovely mum, and introducing my niece to sewing!
It was my mum’s birthday at the end of January but unfortunatley whilst my sewing mojo has been in overdrive I’ve had writers block with the blogging! Think it’s due to a combination of finding the time candy crush saga and also having some decent photos to add to it.
So here we are, I’ll share with you what I made for my mum:
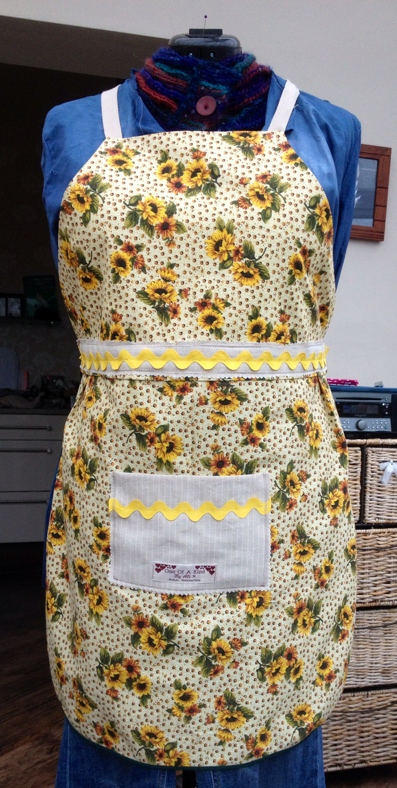
My mum’s always super busy in the kitchen making yummy things. As she is vertically challenged I thought I’d make her an apron that wouldn’t reach her ankles.
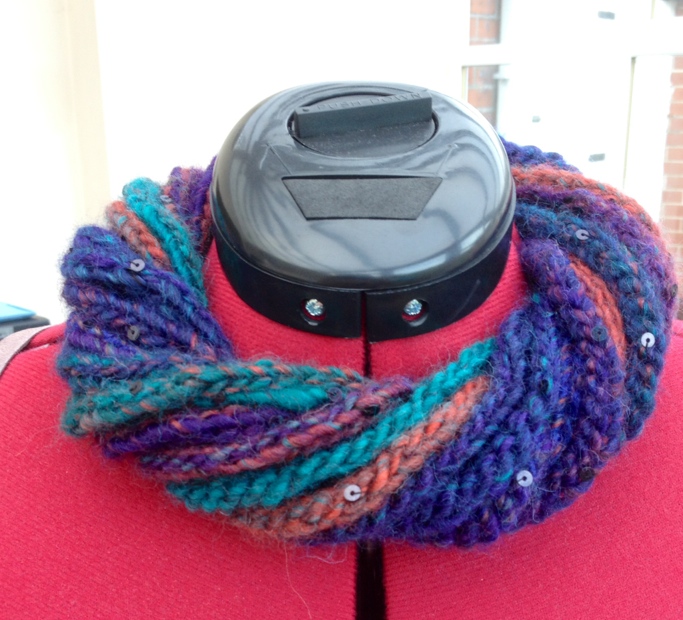
And a crocheted scarf that turned out so well it was really difficult for Thimberlina to part with!
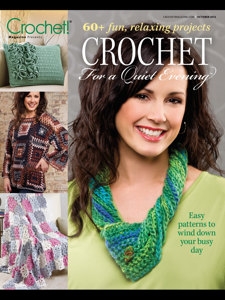
I found the pattern for the scarf in an old copy of Crochet magazine. I followed the instructions but mine turned out much shorter, which has made it warmer and cosier.
The scarf can be worn a few ways:
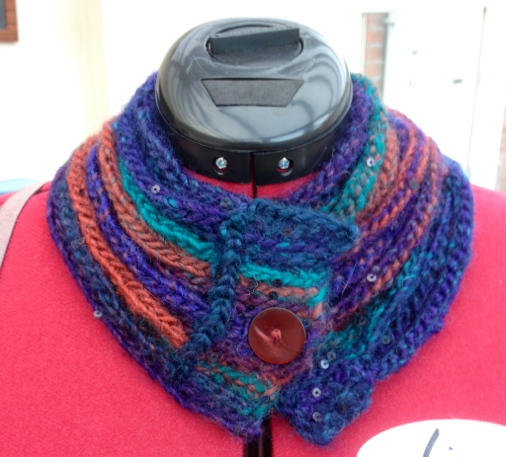
The scarf who really easy. The only challenging part was counting the chains for each length – over 100!!
I also made her a top which is on an earlier post here.
Just after my mum’s birthday my brother and his family came up from Southampton for a long weekend. It was great to see them, and I was able to spend some quality sewing time with Ebony, my niece.
She loved the fabric I used for my 1950’s outfit and ‘we’ made her a zipper pouch with some of the leftovers. We worked out the maths and she did all the cutting out (she loved the rotary cutter!!) and she did all the straight stitching – I inserted the zip, and when we turned it the right way round at the end I think she was amazed by how it turned out!
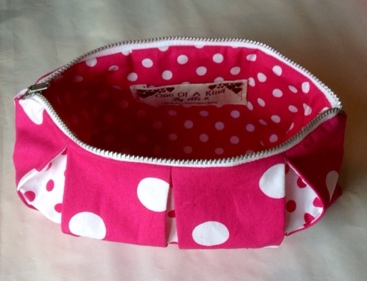
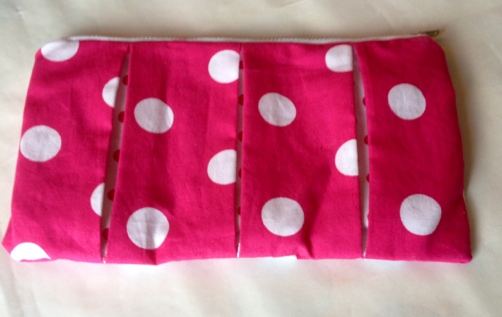
Once we’d finished, in typical 11 year old style, she disappeared to play on the xbox with Harrison, so I made her a little purse so match…..
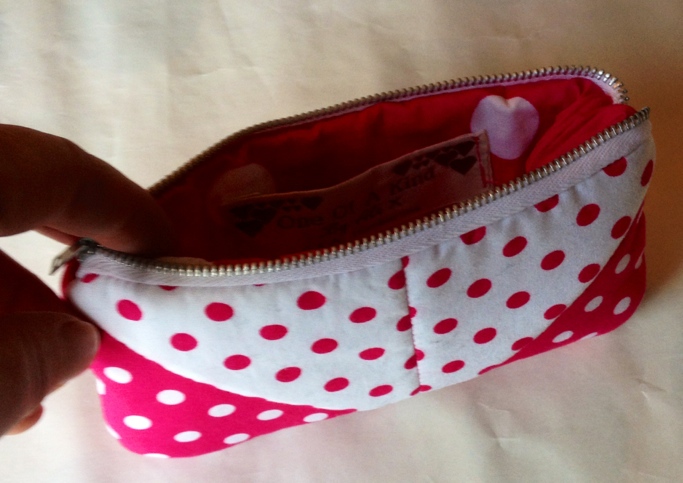
Hopefully over the weekend I’ll be able to get some photos of my moleskin trousers I’ve made for this months challenge on the Monthly Stitch, and what I think will be my most favourite skirt ever that I made yesterday.
At last! The wait is over! If you’re reading this and in the UK switch on the telly, it’s about to start!! Just a reminder in case anyone’s forgot!!

A couple of weeks ago I stayed up late to make a start on my latest project Simplicity 2150. I bought the black furry fabric last year and intended to use it to make the front and collar part of this Vogue 8757 jacket:
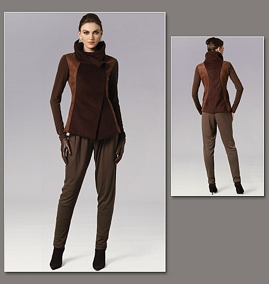
I ummed and arh’ed about which other 2 fabric to use and never gotten round to making it. I loved the black furry fabric and decided to use it to make something more straight forward that would be more useful, so went into town and bought this Simplicity 2150 pattern:
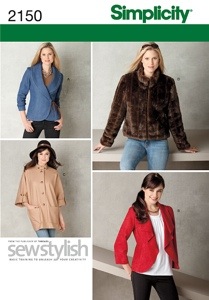
I chose view D (top right). It was one of the only patterns I could find that suggested a fur fabric and the simple style I thought would be purfect!
I was between sizes so chose the larger size, tho there was no need to as this jacket has 7 inches of ease!! This sound way too much, but when I’m wearing it it doesn’t feel so big, and it’s the only jacket I have that fits my favourite winter jumper underneath.
When I was cutting out the fabric it was a night mare – I had a major Gorilla malting problem which stuck to socks and rapidly spread over the whole house. This was one project that had to be done in a few days, as my usually very tolerent husband was loosing his patience as everything was turning black and fluffy. It’s a wonder it didn’t end up in his food! I don’t think i’ve ever vacuumed as often!
So, it took 3 days. And I loved making it. I’ve never made a lined jacket before. The lining! It’s amazing!

If I’d have known the inside was going to turn out so well I’d have taken more care inserting the arms. Friends who i’ve shown it to wearing it inside out think it looks great, but they don’t sew and aren’t as picky as me.
Here’s the back:

I’m not sure of the composition of the lining, I think it’s viscose. It’s really soft and not at all slippy or rustly like normal lining fabric. I used a fine black fabric for the sleeves as I wasn’t sure if the fabric would be shown from the cuffs and thought if I made the lining black there if I made a mistake it wouldn’t show.

Here’s a close up of the fur. It almost shows the deep pile and how fluffy it is, but it doesn’t show the colour very well as it’s really black in real life.
The instructions and construction were really easy, probably because there weren’t many pieces and no zip or buttons holes (it fastens with hooks and eyes). The only part I got stuck on, or should I say really stuck on, was stitching the cuffs.
Some of you more seasoned sewers out there might be able to help me out with this. It said to sew the jacket and lining together round the neck, front and bottom and leave a gap at the bottom. (managed this no problem) Then some how pin the cuffs then pull them through the gap at the bottom and stitch. Sounds simple but I just couldn’t do it. I googled. I You Tubed. I re-read the instructions. I read lots of tutorials and eventually I got out a needle and cotten and handstitched!
I love the finished result and have worn it so much. It’s so light and snuggly and I feel like I’m wrapped in a cosy blanket.
Here’s a quick funny……
Me: “Harrison, Have you seen my Gorilla Jacket? I’ve finished it. Gertrude’s wearing it.”
H: “No, I’ll have a look when I go downstairs……”
comes back up….
H: “Mum, is it real gorilla fur?”
Pricless!! I really wish I’d have kept a notebook of all the funny things he come’s out with.
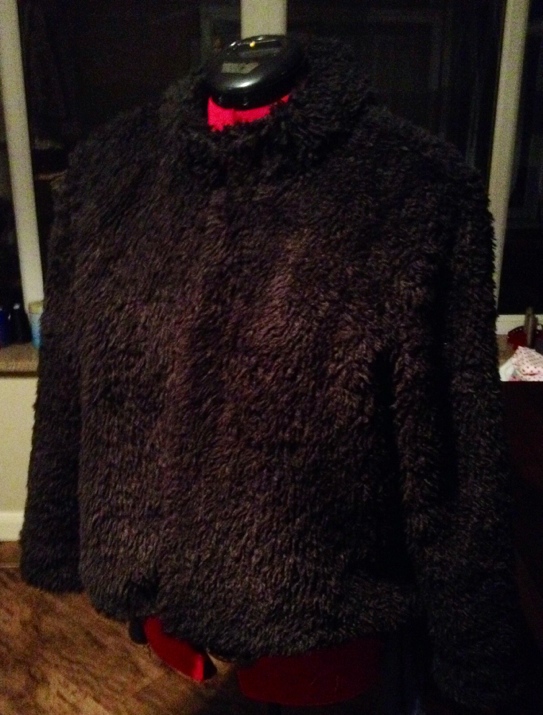
Here it is on Gertrude. With it being black it doesn’t photograph too well.
A couple of weeks ago I decided to refashion my diesel jeans, part 1 can be seen here.
I’ve put so much thought into doing them, more time thinking than sewing, as I wanted them to be just right.

I’d pinned various fabric to the jeans before choosing which I would actually use.
Eventually I decided to use the plain blue which had been dyed. I spent a whole afternoon creating lots of stitches onto it with a twin needle and 2 colours – charcoal and a goldy colour – to give the fabric a bit more interest.

I made single, double and triple rows of twin needle stitching randomly across the fabric.
Originally they were going to be pintucks, but then tension on my machine wasn’t behaving, hence going for just the parallel stitces, but suddenly in the middle of sewing unwanted pintucks began to form!! Rather annoying after many failed attempts to create them early.

I was using my newly acquired pin-tuck foot. When I sacked the idea and went for the parallel stitches I kept my pin-tuck foot on and used it to guide my 2nd and 2rd row of stitches.
Once the bottom piece was ready I chopped the legs of my jeans and joined the crotch to form a skirt. If you’re thinking about having a go at refashioning your own jeans, beware!! This part was way trickier than I thought it would be.
I stitched the front and back where i had previously pinned but had a sticky out bit at the front – not a good look!
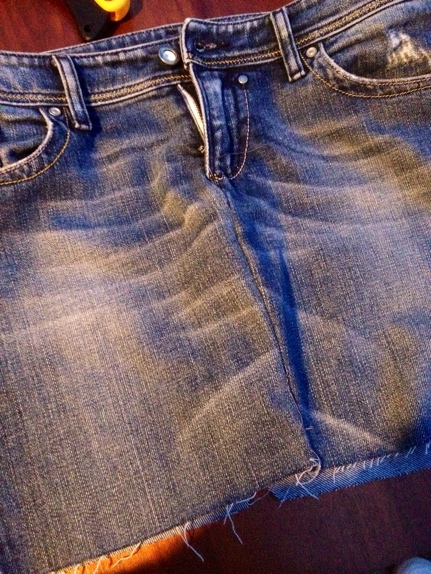
2nd attempt at crotch – no photo of the first as I was so annoyed I ripped out the stitches before taking a photo. You can see on No 2 where it sticks out at the front, just below the zip.

Crotch no 3 – still sticking out!

Crotch attempt no 4 – I bravely cut right up to the zip, hope I would be able to manipulate the fabric more and have a flatter front!

Whoop- Whoop!!! It worked!

I pleated across the top of the fabric (with my ruffling foot)to be attached, and sewed a row of stitches to the jeans part. I was then able to match up the 2 rows of stitches which made connected the 2 pieces together easier.

Voila! The finished result!
CONCLUSION:
I’m gutted!! It looks terrible on! Not at all flattering!
I’ve decided to abandon the project for now, and in the meantime hunt out some floaty fabric, probably floral, and later in the summer make it into a maxi skirt. Watch out for Diesel Jeans Refashion No 3!
Even thought I’m really disappointed with the finished result, on a positive note, I think I’ve conquered my twin needle phobia!
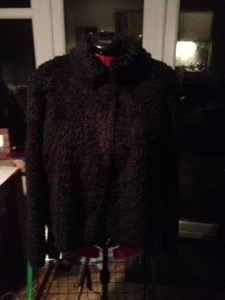
Think I should have gone to bed 2 hours ago with my hubby instead of staying up late with my latest project and a bottle of wine! I’m a bit rubbish at drinking, so after 2 glasses and struggling to pin this strange fabric (which would be better suited as a gorilla ccostume) I’m calling it a day!
PS I’m making simpilicity 2150 view D

This is my second post (and last!) of Christmas gifts which I made. All the ladies in my family received handmade gifts, mainly zipper pouches, peg bags or tote bags, oh and scarfs (no pictures, forgot to take some before they were wrapped but will pester the recipitants for one!).

I love this peg bag and had a really hard time wrapping it up to give away! I gave this to my brother! He wasn’t too impressed but his partner was! I used on old favourite denim shirt, and the press studs on the front work, so when it’s dropped on the floor all the pegs don’t fall out!

This is a Tonic T Shirt from Skinny Bitch Curvy Chick – a free pattern and definitely worth the download and effort of sticking it all together! Here’s some I made before for me….

Another peg bag – this one was for Bertha, my parents Caravan. Yup, she’s got a name, She’s even got her own Facebook page! Another one with a proper closure, better than having open ones I think.

More peg bags, one for my neighbour one for my mum in law.
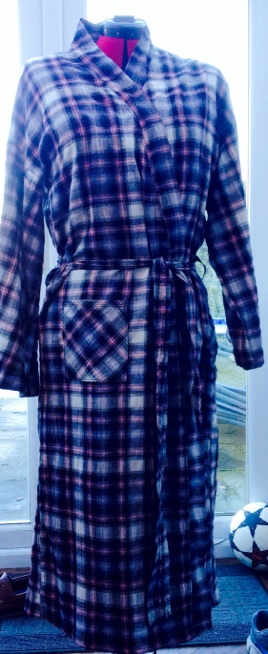
A dressing gown for my sister. I actually inherited this from her as a UFO. The girls in her Ranger group made it, but it was terrible!! The seams were dropping to bits, they’d only sewn the front and back pieces together and the inseam pockets were showing on the outside! I managed to unpick the side seams, and got rid of the pockets and added one to the front instead.

A knitted bag for a friend at the golf club. I recently took another photo as since I can now crochet this bag now has a proper closure.
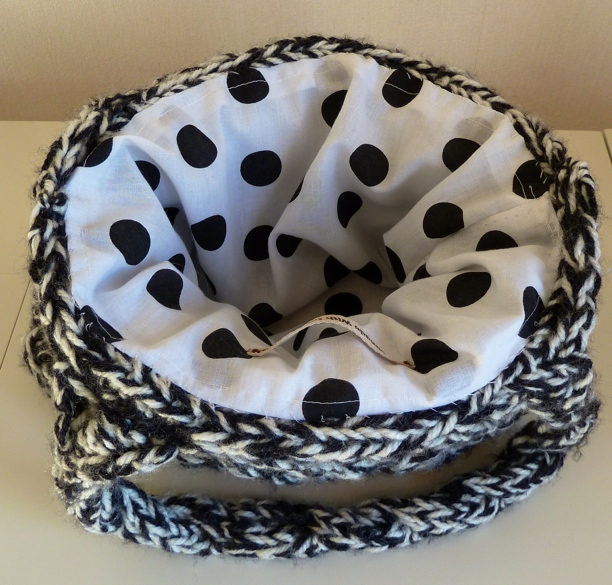
Inside view…..something else I didn’t want to part with! Luckily I have one I prepared earlier for me!

A peg bag I sent to a friend in America.
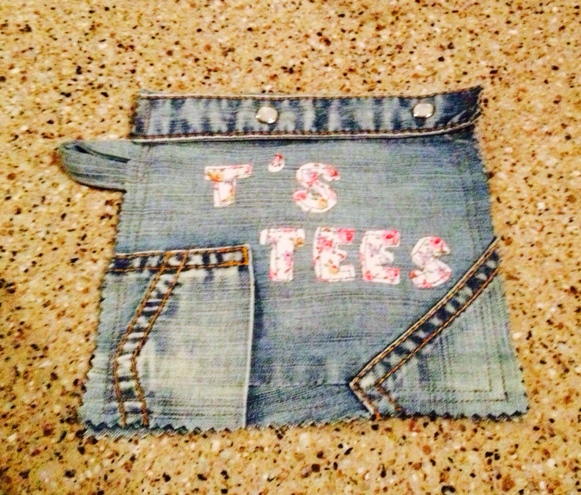
Tina’s golf tee bag – was in an earlier post but this is a better picture.
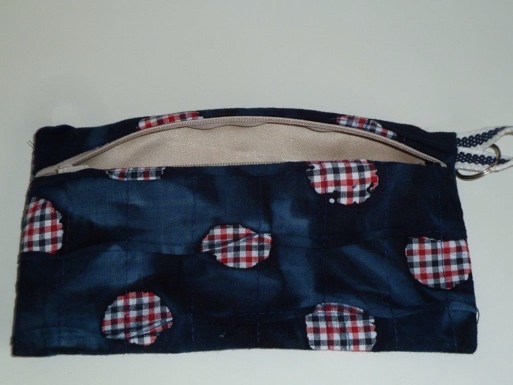
another zipper pouch – love making these, there’s so many ways to personalise them!
Is it just me, or do you guys struggle to give things away when you’ve made them? I kinda get attached, and make things that I’d like, but will only make things for those who I think will appreciate them.
I didn’t find it cheaper making things if I account for my time. If I’d have spent the same amount of time at work working overtime I’d have been quids in! But I wouldn’t have been as happy!
Here’s one last pic, an after Christmas Pressie!

After reading a great blog (sara Vs Sarah) and learning how to make hankies with a crocheted edge, I had to have a go! I made this last weekend and have posted it off to my lovely Auntie. She’ll really appreciate this, as she’s a proper lady and likes a hankie when she goes out.
Oh, go one then, one more……

It’s my mums birthday this Saturday and I’ve made her a top (mccal 6604). I’d previously made this for myself in a different fabric, but my mum keeps threatening to pinch it off my washing line, so I thought I’d best make her one too!
Hi, I’m going to start work on posting some pressies I made for Christmas. Here are 3 reversible Mini totes I made for 3 of my nieces.
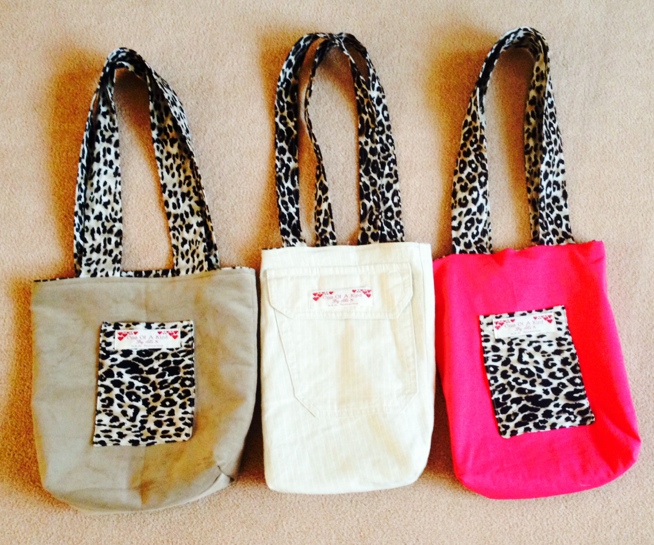
All the fabric was from my stash, except the cream one in the centre – I used the back pocket from a pair of my hubbies linen trousers. He’s not missed them, yet!!
And here are some zipper pouches:

This was made as a secret Santa present. I drew a guy from work who like to cross dress, so made him a make up bag and popped a bilingual blingy necklace inside!
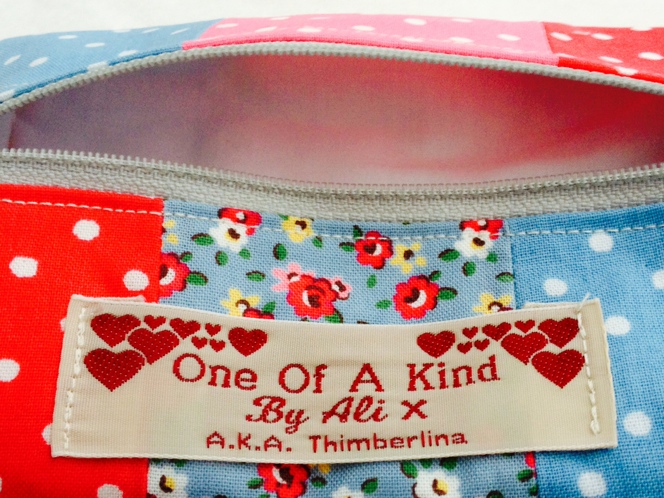
A glasses case for my lovely mum! – my first attempt at quilting!

The one on the left was for a friends daughter – Poppy. I kept the one on the right and use it for carrying my crocheting when I’m on the move!

Here’s a pouch I made for my golfing budding for her to hang on her golf bag.
That’s all for now folks!! Feels good to be back doing some selfish sewing now Christmas is long passed!

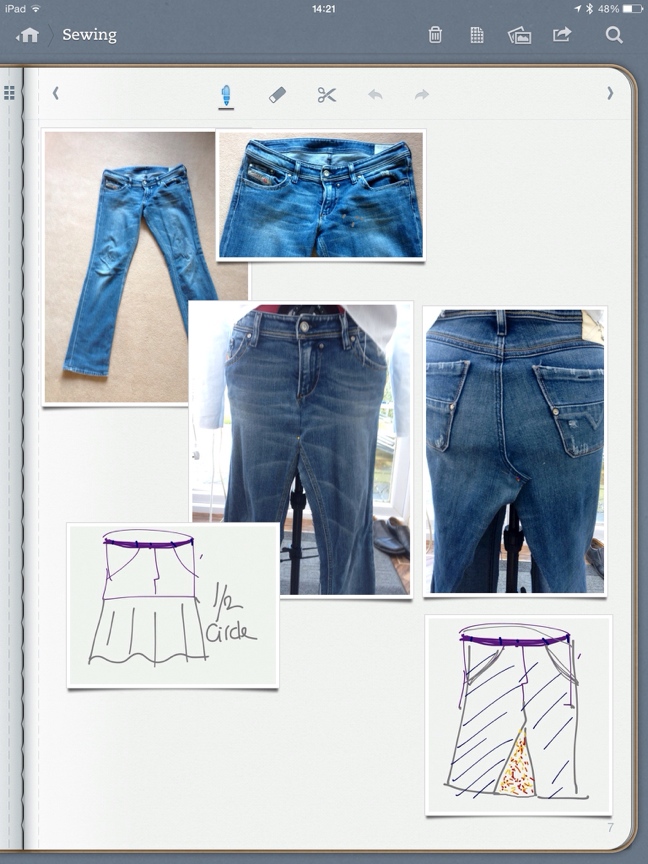
I splashed out on a pair of Diesel Jeans around 5 years ago. They were quite low rise and at the time looked great. But over the last year or 2 my tummy has grown a couple of inches and the jeans are now not so flattering and have been laying dormant in my bottom drawer.

During the last week I’ve given a lot of thought to my sewing plans for 2014. As I have joined the RTW Fast I think I need to put more thought how I spend my sewing time. Usually I’ll knock together something easy and quick but it won’t necesarily be a wardrobe staple.
I’ve now decided that I will:
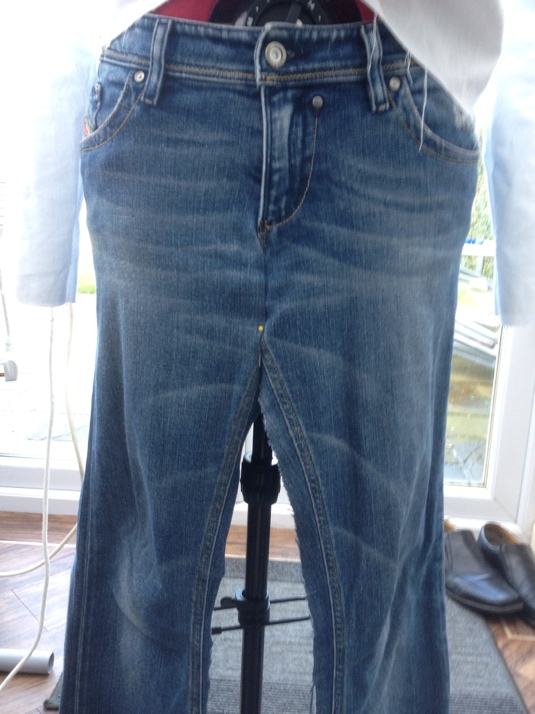
Front View – this was a bit difficult – at first I thought the centre seam should be like the back (below) and go to the side but it looked a bit weird.

I pinned the centre back seam to the side. This was the only way I could get it to lay flat.
Initially I thought I would add a triangular panel to the front, but changed my mind as I didn’t want the skirt to look like an old pair of jeans. Instead I thought I might add a flounce (???right word!!) to it – 10 inches down from the waist would start about an inch below the back pockets.

I tucked my tape measure in top of my jeans at 15 inch and was able to slide it around the waistband and measure a 10 inch drop. On hindsight I think it would have been even easier to lay the jeans out flat and chalk mark it, then just pin the flounce.

This is the skirt with a flounce (or is it peplum??) made from a 1/4 circle. Not enough fullness I think.
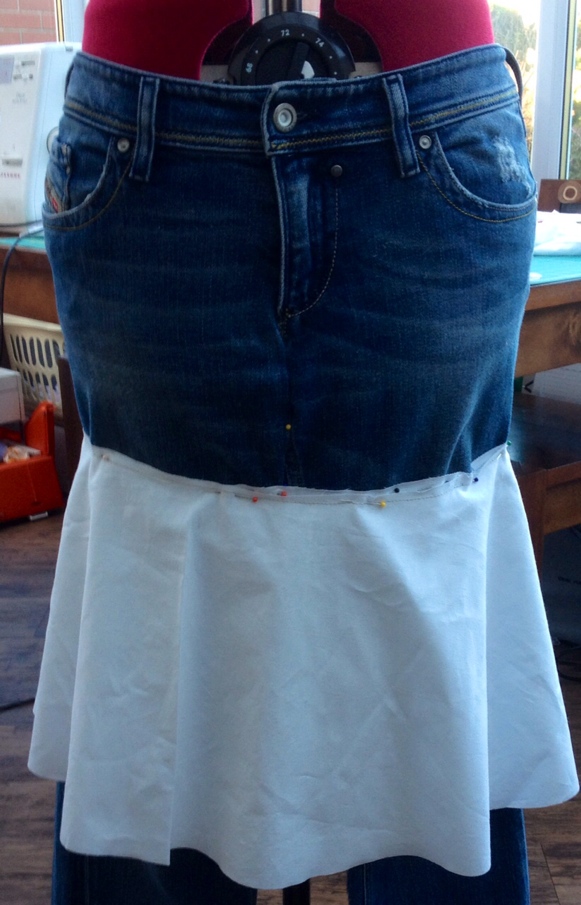
flounce made of a 1/2 circle. Actually looks fuller in ‘real life’.
Now I’d decided what style I wanted my skirt I then had to decide on the fabric. I came across an old 100% cotton duvet with a swirly pattern stitched onto one side:
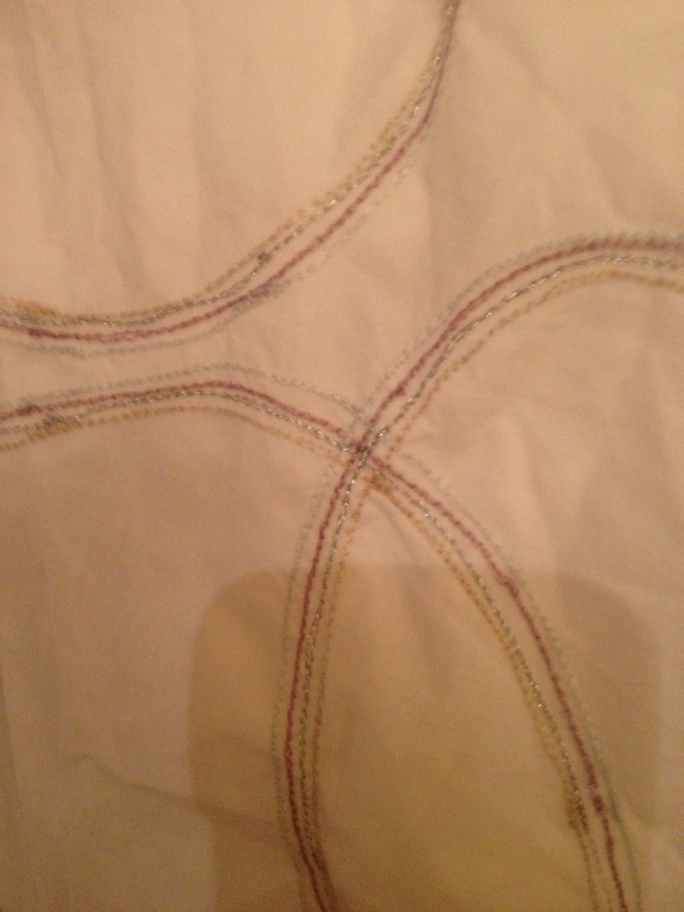
The duvet is actually white, and the stitching is blue, beige and silver.
I had a quick trip out and bought a Dylon machine washing dye in Denim blue and popped it in the machine with the white flounces I’d previously cut out, a white cotton muslin for a jacket and some other small pieces of white cotton which would be big enough to make bias trim in case I needed some.
I’d definately exceeded the 600g of fabric they suggested for the fabric to be dyed the full dark colour, but as the jeans are faded slightly I didn’t think it would matter.

Here’s the material in my washing machine just a couple of minutes into the cycle. I think it looks like a scan photo!! Can you see it’s face?! Not sure if it’s a boy or a girl!
I had to put the machine on a full cotton 40 wash which lasted an exceedingly long 2 hours. I then removed everything to have a peek before putting it back on for another cycle to wash out the dye. It looked a bit patchy, but nothing terrible. Now all I have to do is wait for this to finish…..only 27 minutes, not that I’m counting.
Hopefully by the end of the week I’ll have my new Diesel skirt to show you! I’m golfing tomorrow, working Wednesday and taking my mum in law for a scan on Thursday, but I WILL finish it this week.
Has anyone else tried dyeing fabric clothes before? If so, have you any tips? And, more importantly, have you refashioned any of your favourite jeans? If so, how did you do it, and do you have any links to photos? Also, if you think my idea will look naff, please tell me!!

 T H I M B E R L I N A