Latest Posts

Mum does a runner with my New Victoria Blazer

I’ve spent most of the weekend making my 2nd Victoria Blazer from By Hand London. (Link added in case by some crazy chance you’ve not heard of those talented London Girls who make fab patterns!).

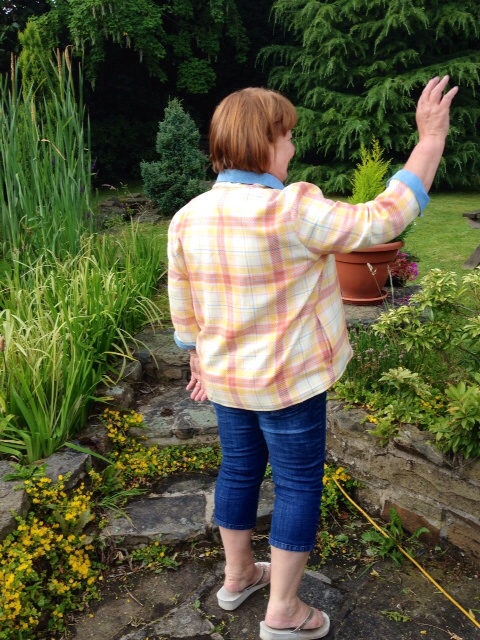
As usual I was struggling to find a photographer so I called at my mums. Before I could hand her my camera iPhone she had my jacket on and was away down the garden!

She gathered speed when she realised I was hot on her heals:
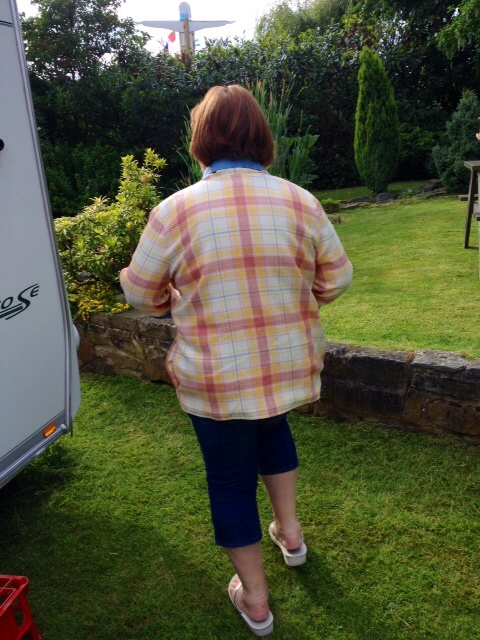
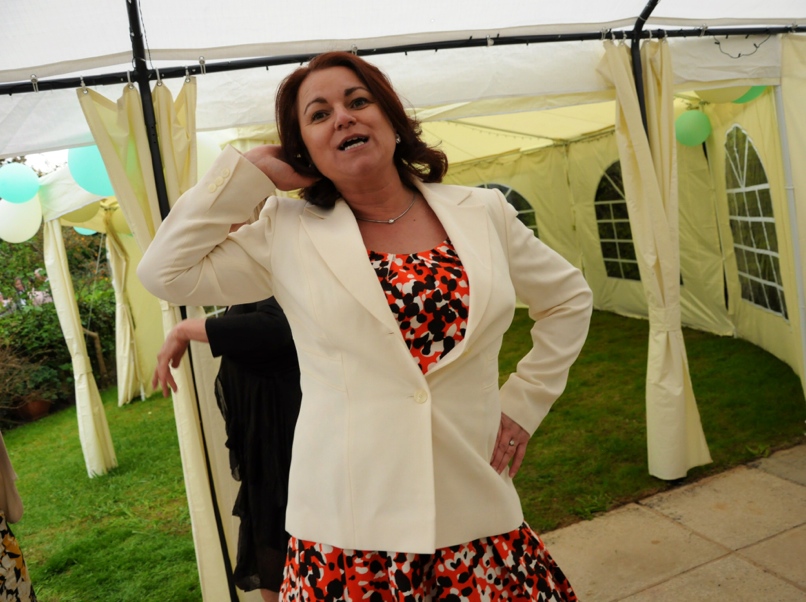
So here’s my mum modelling MY new Victoria Blazer:

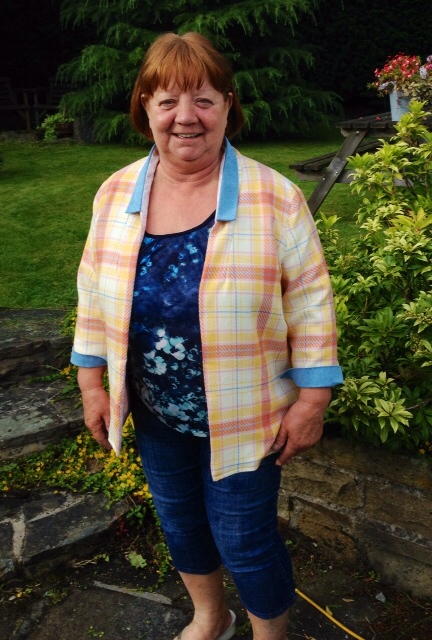
Unintentionally showing the pattern matching in the pockets.

I did eventually recover my blazer, but I think when I get round to making Victoria No. 3 it will be for my mum!
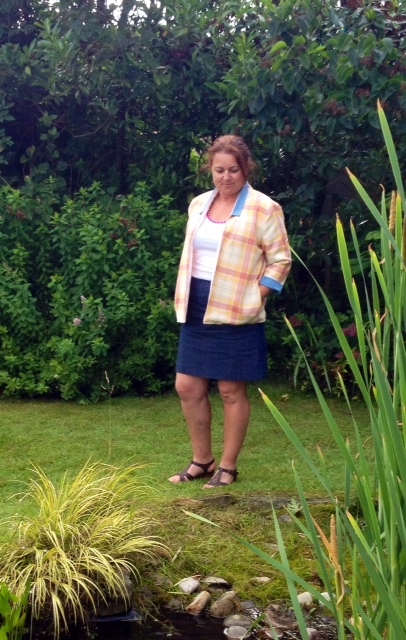
Back to the nitty gritty…..’how did I find this pattern?’, and ‘what changes did I make?’

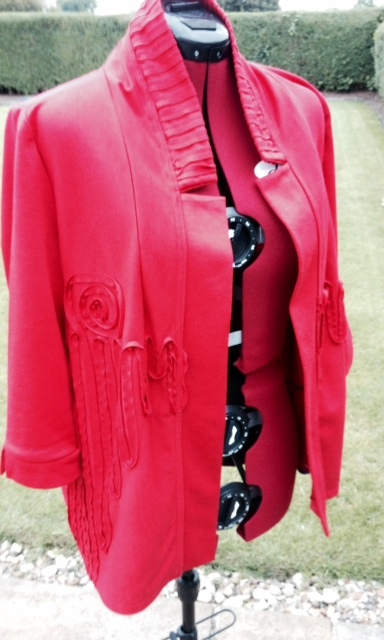
LOVE the pattern! Who couldn’t or wouldn’t?!?!   I bought it (only a month ago) after spending the last 8 months drooling over all the Victorias around the blogosphere I really didn’t know what to make it with. I wanted a soft denim one, a flowery one, a linen one, the list was endless. Then, on a mini shopping spree to Dewsbury (mini because Dewsbury is really not that big, but worth a visit on market day) I found a pillar box red ponte knit with a little surprise……..

£3 per metre!!  What a bargain!! So 3 metres later I had a vision for my Victoria blazer!

Careful placement of the pieces were called for, the 2 circles in the middle of the pattern weren’t level, which I thought would cause a problem, but it worked out ok. I used the border on the very bottom for the collar, but thought it would look ‘too much’ if I’d have used if for the lapel and cuffs too.

I didn’t line this jacket as I didn’t have any suitable stretchy lining, and I’d seen Scruffy Badgers which turned out fab so I thought I’d give the lining a miss too.

I’ve worn this jacket to death, mostly with my denim Yasmin Yoke Skirts, and no one ever believes I’ve made it, tho they do when I confess to not stitching on the added embellishments!

I used red satin bias binding to edge the front and also to hem the bottom. Here’s Gertrude  modelling it:
My other Photographer was having a tea break!

Looks like Gertrude has grown proper legs!

This is just the comfiest thing ever to wear.  Looks super smart with everything, but feels like I’m wearing a cardigan.

I’ve worn it so much I needed to make another. My measurements for BHL are 18-16-14.  For the ponte knit I made a straight 14 and it was fine due to having slight stretch. For the woven one I decided to cut an 18 with the intention of taking it in if needed, but it’s ok.

When making my plaid blazer there were one or two things I did slightly different..

  • Lined the sleeves. I used a shiny stretchy cream fabric. No idea what it is, it’s crepe on one side and shiny on the other. Was £7/metre at Truro fabrics. (Bought it on my holidays last year).
  • Sewed the sleeves in before joining the side seams and setting in the pockets.
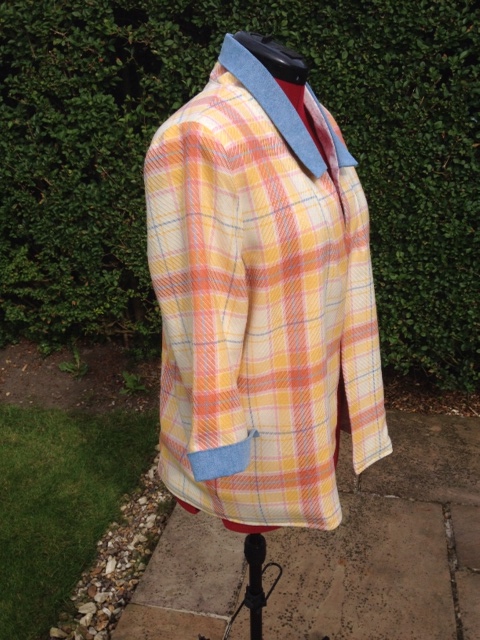
  • I didn’t add the lapels. I was going to but somehow they ended up to long, or the blazer ended up too short. No idea how that happened but pleased with the effect without them.
  • Stitched the lining to the shell just around the front initially, then pressed and under stitched where the lapels should have been to give the front some substance.
  • Skipped the French seams on the cuffs due to being lined.
  • Matched the opening of the cuffs up with the seam instead of the opposite way round.  With the cuffs being made with contrasting fabric I didn’t want to emphasise any mishaps ie dodgy pointy corners, (tho they turned out ok so no need to worry).
  • After I’d sewn the bottom I left a gap and turned it right side.   I then pressed and top stitched the bottom. I’d gone a bit wrong somehow and it bagged a little. I could have ironed it out, but as the excess was on the outside it made the lines wonky on the pattern. So now it bags only slightly, but the bottom is straight.

I overlocked everything and prepped my collars before I started proper sewing.

I was so pleased I’d been careful cutting out. The plaid matched in places I didn’t expect! Even inside the pockets!

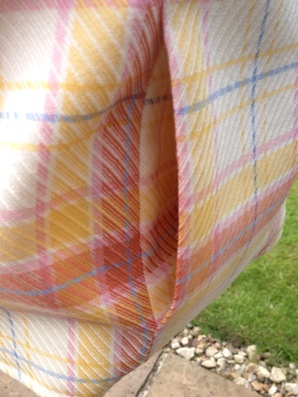
The inside is almost a gorgeous as the outside…..
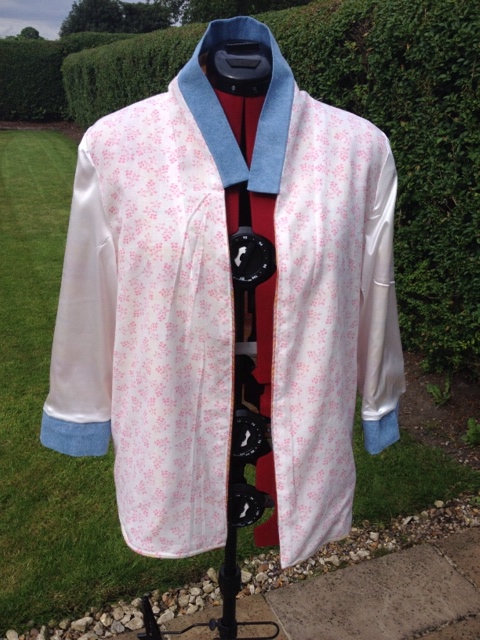
Now I think my next project is to make a Yasmin Yoke skirt with the pale blue denim!

Plaid Victoria Blazer BHL #1

I’m desperately in need of a coffee break after a morning pattern matching my latest project – my 2nd Victoria Blazer.

My first one is unfortunately not blogged as yet (soon to be), totally different to this one, and 2 sizes smaller as I made it in a ponte knit. Here’s a peak of it in the cutting out stage….

Victoria_jacket_BHL.JPG

Some major decision making went into this one, choosing where to place the embellishments.

….back to today’s project….

About 2 months ago I bought this light weight wool mix (definately wool as it smelt of sheep when I washed it!) from Dewsbury market for £4 per metre. What a bargain! Turns out to be a second, I found a few holes in it today when I came to use it, but as I bought 3 metres I’ll be able to work round them.

Plaid_fabric.JPG

Holey moses! Not quite a bargain after all!

Not sure why, but I tend to be make life difficult for myself when I start a project. My first (and only) Renfrew was a plaid,

Another unblogged project, think I need to get my ship in order!

and my Vogue 1353 called for a crisp cotton-like fabric and I chose a crepe, meaning everything had to be interlined.

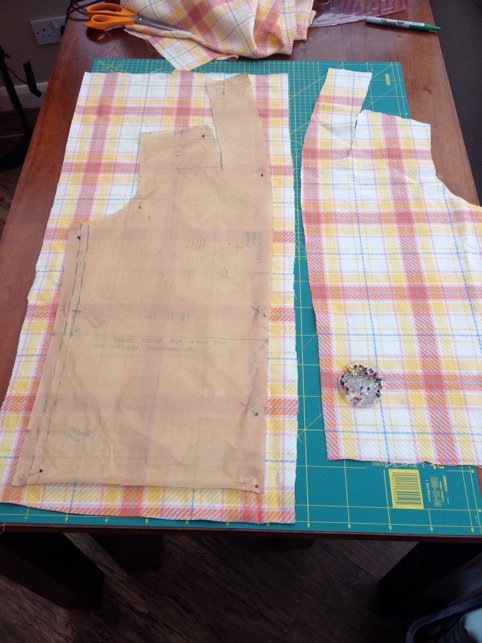
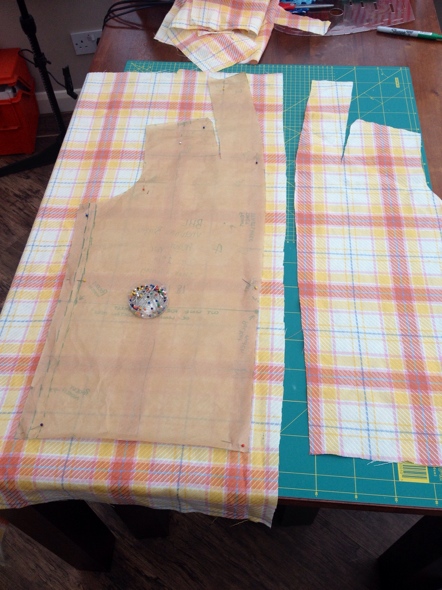
When I started placing my pattern pieces on my fabric for my plaid Victoria I found the pattern was becoming distorted as the weight of the fabric hanging over the table was too heavy.

I chose where I wanted the back piece and cut out a rectangle large enough to accommodate it and found it much easier, no wonky plaid lines created. I then did the same for the front pieces.

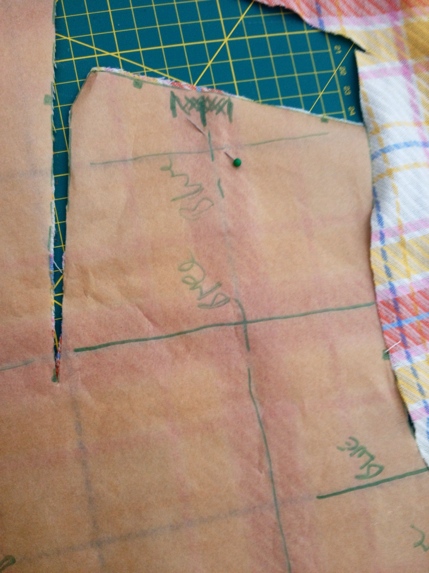
To ensure the front and back match at the shoulders I traced the pattern of the plaid onto my backpattern piece and transferred this to the front piece.

I cut the pieces out in one layer, it takes longer but you can see better that the pieces are going to match up.

Ta Dah………

Just need to cut the rest out now’ think I’m going to give the lapels a miss..mmm…not sure….

Has anyone else used plaid? Tips very much welcomed!

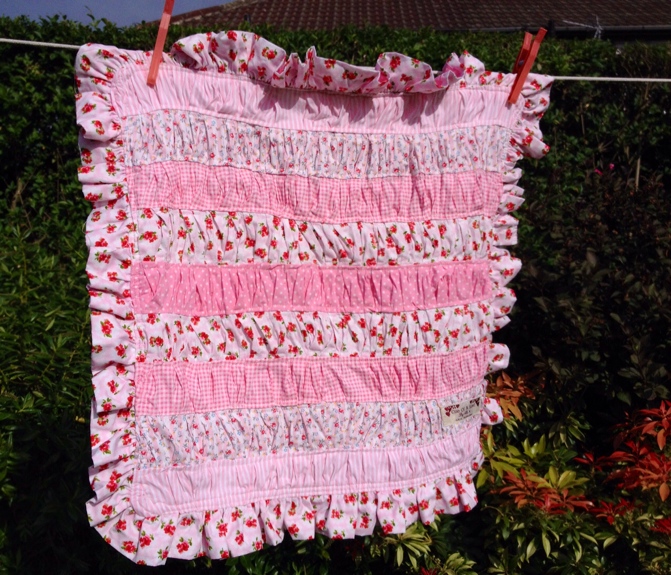
A Ruffled Blankie for our new addition


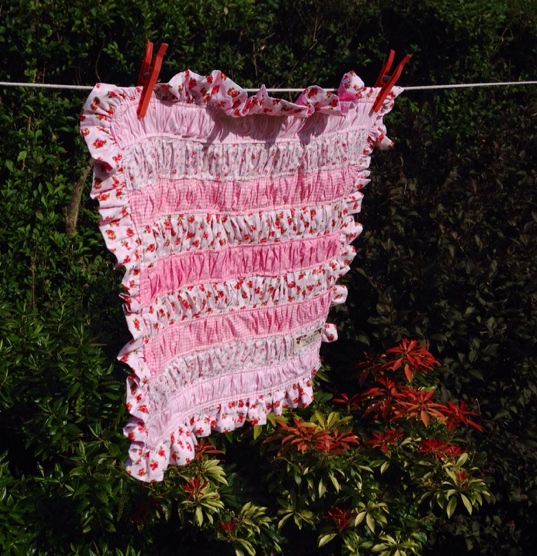
My brother and his partner’s latest addition, Layla Rae, is one week old today. For the last 7 months I’ve been pinning to my ‘ideas for the baby’ board on Pinterest. 

2LittleHooligan’s tutorial has been at the top of my to-do list for ages – a Ruffled Lovey: 

Christina’s tutorial is brilliant, really easy to follow with lots of photographs. 


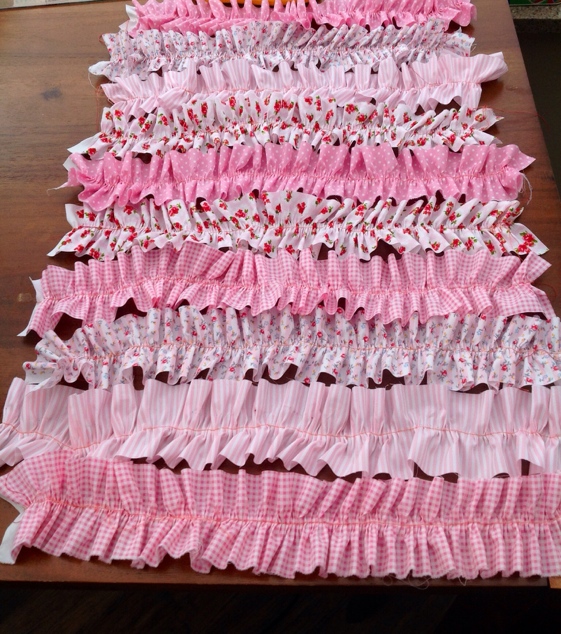
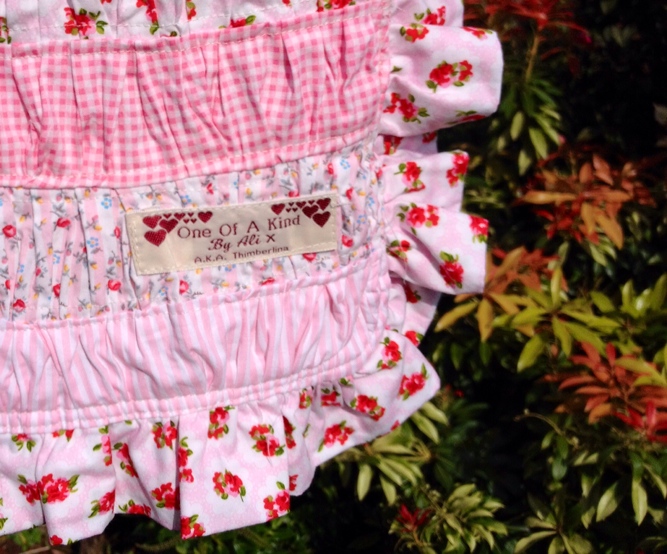
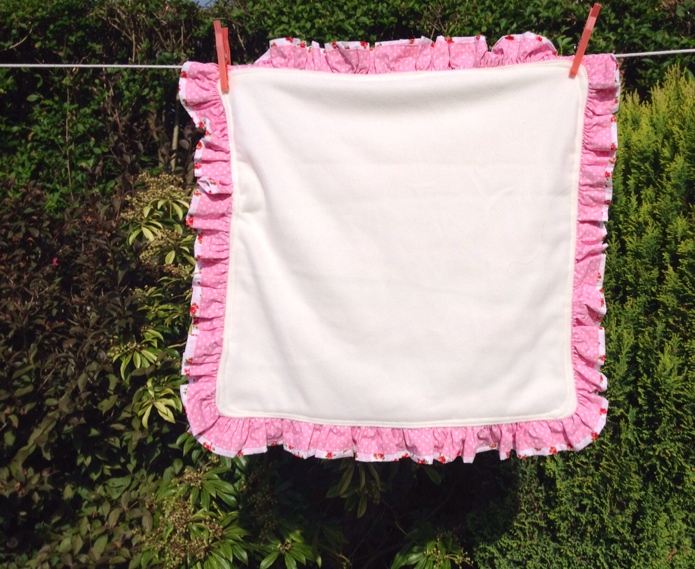
I bought 5 pieces of fabric, each 1/2 yard long. This was plenty – I still have the equivalent of around 3 fat quarters left. For the backing I bought a cream fleece blanket from Ikea. 


I used my ruffling foot to created my gathers, but you don’t need one to make the blanket. For those without a ruffling foot Chistina recommends using Simple Simon & Co’s method. 


I stayed up late to finish the blanket and felt it necessary to drink co-ordinating pink wine!

I was so pleased with the blanket once finished, it almost made me feel broody! 


The only change I made was the outer ruffle. Instead of using a 5″ strip I used a 3 1/2 and 2 1/2 and stitched lengthways so each side was different and the back fleecy side had a bit more interest so it wasn’t as plain.

I really loved making this, it was super easy and the cutest make ever. I can’t wait to make her a matching little dress from the left over fabric. Does anyone know of any cute/easy downloadable patterns? Preferably free! 

TMS – Sew Stretchy

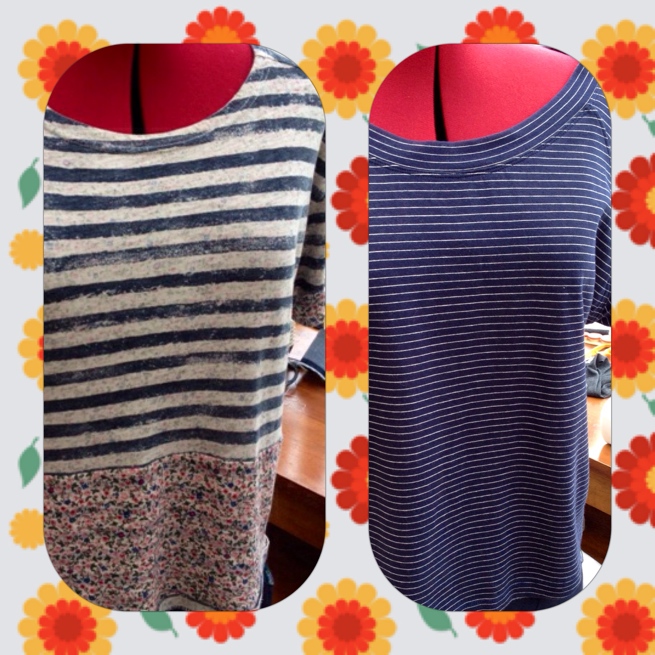
For May’s challenge at The Monthly Stitch I’ve made a top and also refashioned one of my favourite T Shirts.

Whilst flicking through the Great British Sewing Bee’s book from the 2nd series I decided to make the simple T Shirt.  It calls for a floaty fabric, not a ponte knit as I chose!

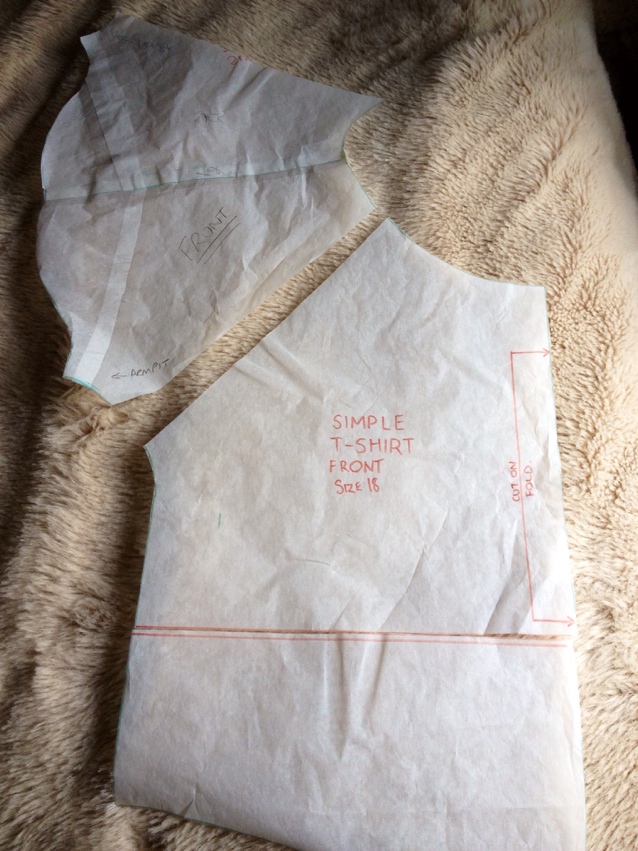
As you can see it is really simple, as the name suggests, as there are only 2 pieces.

I only had 60cm of the stripey ponte knit so had to be a little creative and decided to adapt the pattern so it had raglan sleeves. I also lengthened it by 3 inches for adequate tummy coverage.

I cut where I thought the seam should go at the back and front and stuck the chopped off pieces to make my raglan sleeves.  I didn’t bother to add anything extra for seam allowances as the fabric has stretch and is loosely fitted so thought it would have enough ease without.  

 As you can see from my pattern I’ve cut out a size 18.  This is the biggest size, here’s the size chart from the book:

I’m a size 18 for bust and waist, but a 12/14 for hips. I know there’s lots of you out there that are smaller than me, but also lots who are bigger too and think maybe that the included patterns should have more larger sizes.

It all went together fairly straight forward.  I stitched sleaves to the back and front, pressed the seam downwards top stitched.  I now think I should have maybe pressed the seam upwards and had the top stitching (or is it edge stitching?!?!) on the sleeve, not on the main body of the top.  I then stitched the side seams.

For the neck line I folded a strip of the fabric and stitched it to the outside, turned it in, pressed and top stitched.

For the hem I follow the instructions from when I made By Hands Pollly Top which makes it really easy to sew hem which isn’t straight.

I’ve wore this top loads in the last 2 weeks – made it in time but late blogging. It looks great with linen pants and also some beige cut offs.

The obligatory inside shot when things go smoothly.

Lastly, I stretched my time to fit in a little refashion.  Not something I’ve done much of in the past, but as I’ve signed up for the RTW Fast and am 5/12’s of the way through I need to keep battling on.  It’s the time factor juggling my sewing time between things I ‘need’ and things I ‘really need’.

Here’s an old favourite, my Levi’s T Shirt.  It had a band around the arm which were a little tight on my biceps. Not bingo wings here!! Thinks it’s all the lifting at work I do.  If only my abs were as toned!

As you can see the fabric is reversible – the inside is a lovely small flowery print.

I chopped it in the middle, turned it around, chopped off the arm cuffs, turned over and tacked in place.

Good luck ladies with June’s challenge!

2 down, 3 to go – Vogue 1353

As some of you will know we have 5 wddings to attend this year, and Vogue 1353 was made for one or two of the weddings.  It could even be for all 5 as there will be totally different guests at each one!

If been putting off blogging about Vogue 1353 which I managed to finish in time for wedding number 1. Reasons being:

  • Lack of photos of it being worn.. Well, lack of flattering photos. Photo top left is of me doing the “…..Y…M…C….A…..”
  • I’ve gone off the fabric a little bit, and am regretting making it in such bold material.
  • I had a few hiccups whilst making it which ended up reducing it’s likeability factor.
But, hey oh, it’s finished and I’ve worn it 3 times so I’ll share it with you.
Before I carry on, I NEED to show you Cheryl’s, from Redknits Birthday dress a.k.a. Vogue 1353.  It’s gorgous, and it gives you an idea how mine would have hanged if I’d have used the right fabric! Can you see how it stands out……?

Click HERE to be taken to Cheryl’s blog.  

  I’ve just deleted loads of text.  This could have ended up being a really long post, so instead I’ll add my photos with just a few words.

Hemming nightmare!  Despite spending hours hand stitching the fashion fabric and the interlining together when I  came to hemming it puffed out and wouldn’t hang straight.  I unpicked the horse hair, made 3 more attempts at stitching it.  I eventually put a film on the TV, set up Gertrude in front of it with the dress and spent the afternoon handstichting the hem. It worked, ish.  I have spotted a couple of tiny baggy sticky out bit on the hem but no one else has, or at least they haven’t said.

No one has noticed this either. Even I can’t when I’m wearing it! This is the centre back seem…..really no idea how this happened, I didn’t notice until it was way too late to fix it.

A proud moment – I’m loving the inside!

mmmm, the back doesn’t look so bad either!

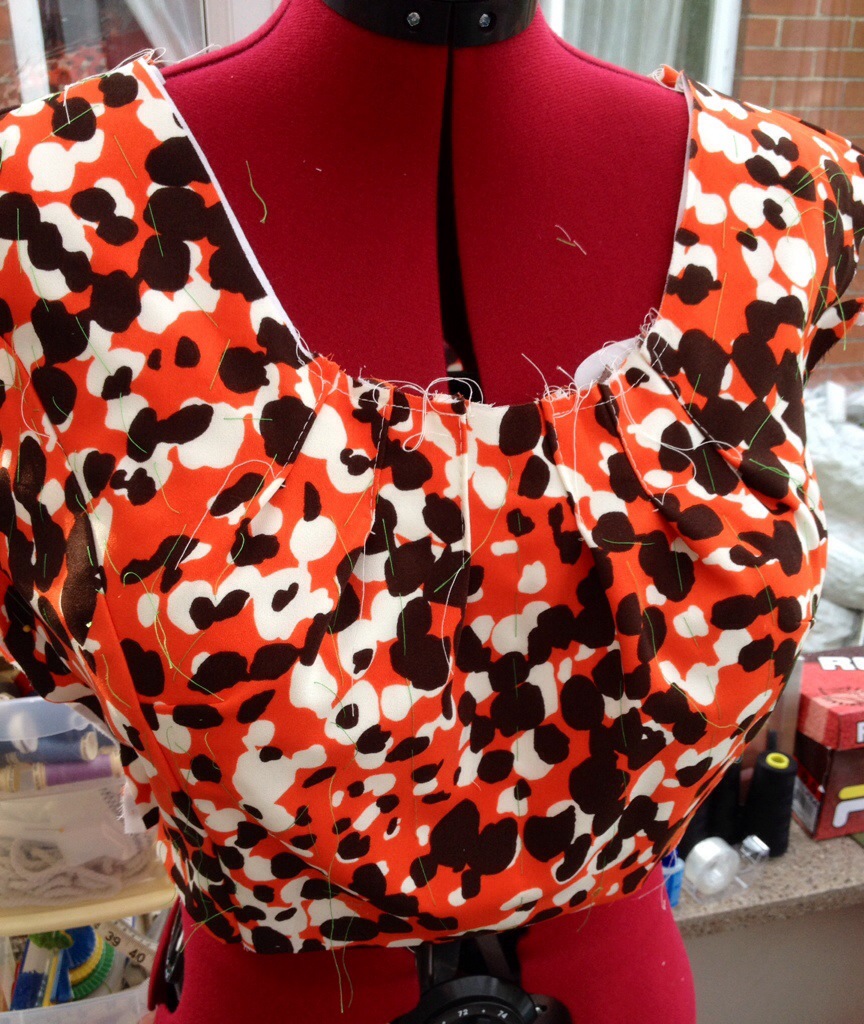
Loving the neckline. The pleats stay in place beautifully, no need to be adjusting it when I’m wearing it.

The pleats hang great. The cotton interlining really helps the fabric hold its shape. unfortunately it hangs too straight down, unlike Cheryl’s above.

Hubby and little H (little H cos my sisters Big H tho little H is now the biggest!) both got orange ties.  Not sure now if that was a good move…….

Little H – you can just about see his tie!

Does anyone remember the Wig Wam Bam?   I think one of the best things about a wedding is a good knees up on the dance floor.  The wedding reception was in the bride and grooms gardens so felt a bit silly doing the wig wam bam in daylight, but not half  as silly as I looked…..!

When I wore the dress the 3rd time (2nd was at wedding no 2), I added a skinny black belt and wore my 1950’s underskirt undereath. I really wish I’d thought of that at the beginning!

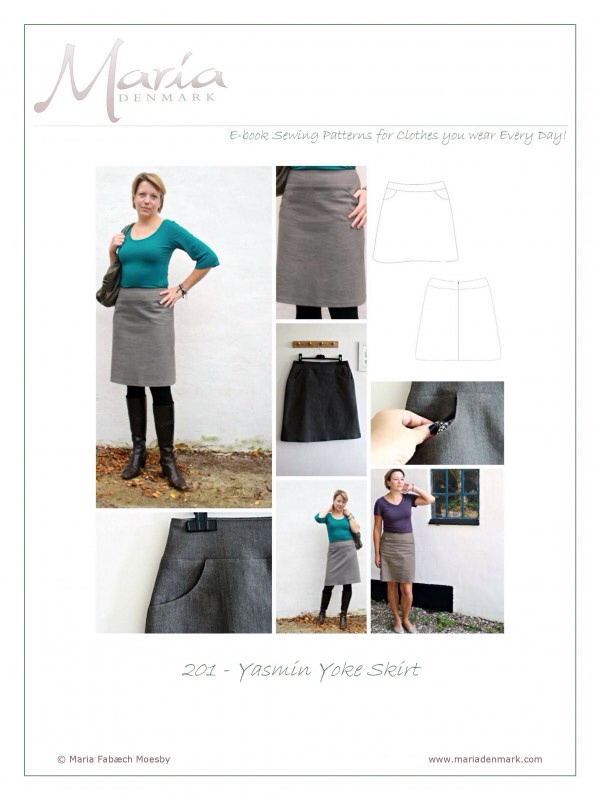
Maria Denmark’s Yasmin Yoke Skirt

Introducing my new favourite pattern…….

The Yasmin Yoke Skirt

Maria Denmark’s Yasmin Yolk Skirt

I’ve made 3 in the last week.  It’s rare I ever make 2 of anything never mind 3.  The last time I made more than one of anything was when I made my Bridesmaid’s dresses almost 14 years ago!

I stumbled across Maria’s patterns when browsing the different Indie patterns I’d never heard of after reading various blogs promoting  Indie Pattern month.  The Yolk is designed to disguise “tummy fluff” (as she describes it).  I’m all for that!  Since I stopped smoking just over 12 weeks ago (pat on the back…) I’ve put on about 7 lbs.  This feels to have been distributed very unevenly – bust 1 lb, waist 5 1/2 lbs, hips 1/2 lb. It’s driving me mad – the extra pounds more than the no smoking.  Most of my clothes are too tight and as I’ve joined Goodbye Valentino‘s 2014 RTW Fast I can’t nip out to buy anything new and stretchy to tide me over til I loose these new found inches.  And, I’m really reluctant to sew as I don’t want to spend hours making something that won’t fit me if and when I loose the extra wieight.

Enough of waffling on…back to Yasmin!

The pattern is a PDF to download.  Of all the other patterns I’ve downloaded this was the easiest I’ve put together.  Once stuck together I traced off my size then added 15mm seam allowances.  I’ve never used a pattern before without seam allowances.  When I cut out my fabric I used carbon paper to transfer the pattern markings onto the fabric.  This seemed to take forever – I transferred the sewing lines and also the outer edges.

The outer red line is the outer edge of the seam allowance.  The other is the stitching line.  As you can see I needed to take it in a little bit more.  The fabric I used for this skirt was a strech cotton sateen.  

 Here’s my first Yasmin.  Unfortunately I haven’t (yet) any pix of me wearing it but I wore it lots last weekend.

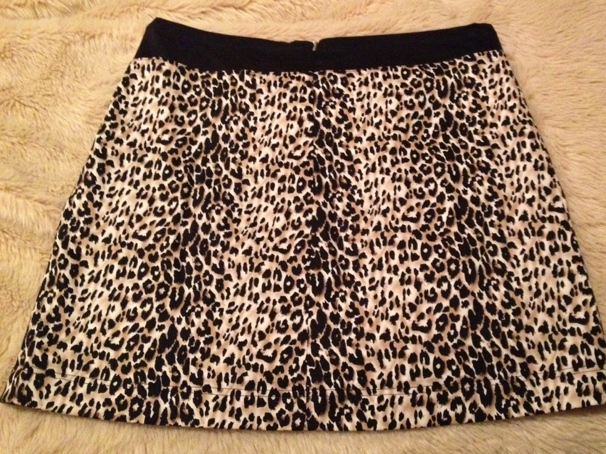
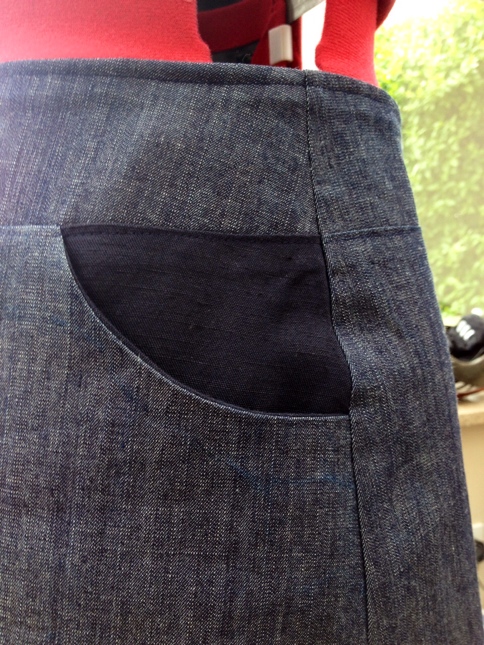
I used a black stretch cotton sateen for the yolk and pocket. This created an accidental optical illusion – my waist looked smaller!

I’m really pleased with the back. The invisible zip went in a treat – I always refer back to the FREE zipper Craftsy class when inserting zips.  Also, check out the pattern matching….Now where’s that seam gone?!

I used sexy pink bias binding to finish off the bottom of the facing and some shop bought leopard print bias from my stash around the pockets.  

My only real blunder was forgetting to overlock the centre back edge before adding the zip. When I tried to do it after I couldn’t get all the way up to the top so used a zig zag on the hard to reach parts.

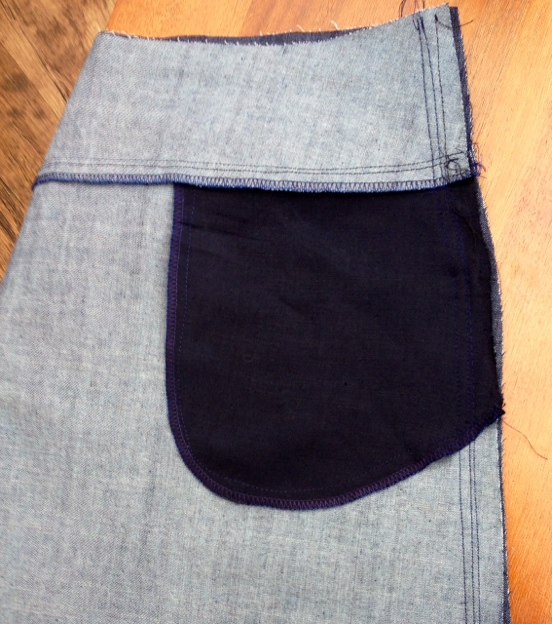
Yasmin number 2 was made using a linen blend navy blue fabric.  I bought a metre for £4.99 on my way home from work last Wednesday.   I had a golf team match on Thursday and needed navy shorts/skirt and my usual ones were obscenely tight and my backside.   Luckily it was a red hot evening so the fabric had a quick wash then on the line and I was ready to start sewing by 7pm.  By 10pm Yasmin number 2 was ready for action on the golf course.  She’s in the wash, pix to follow, but there fabric I used can be seen in the pockets of Yasmin number 3.

Today I dug out a small piece of fairly stiff denim from my stash.  It was only 24″ long, and 60″ wide.  There was only enough to cut out the front, back and 1 set of facings.

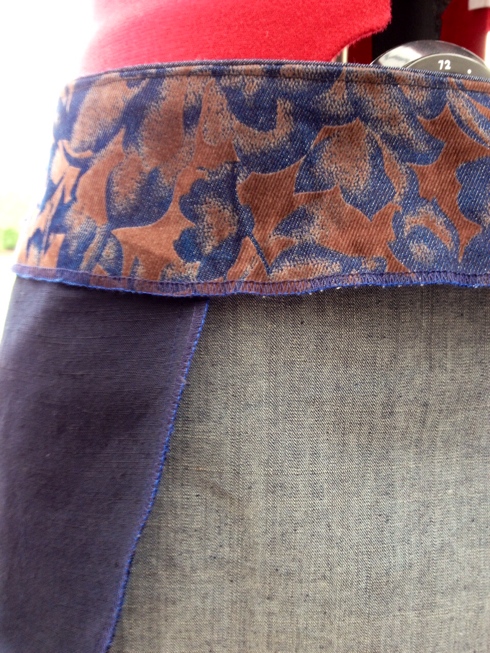
For the inside facing of Yasmin no. 3 I used a stiff patterned denim. I’ve only got a few biggish scraps of this and was never sure what to do with it. The splodgy part of the pattern always reminds my of what chocolate looks like on you clothes when you’ve sat on it!

Think this is my favourite Yasmin so far. The stiff denim holds everything in, and shows the A-line style best.  I wore it today with a pair of orange high wedges and felt slimmer than I have in ages!

Loving the contrasting pockets, but think this fabric will prove to be too flimsy next to the robust denim.

This seam matches up better.

I now use my regular zipper foot instead of the cheap plastic invisible one I bought, I find I can control the position of the needle better and usually move it more to the left nearer the teeth.

I’m not a show off, but I do think I’m getting better at inserting zips and matching up the seams. This isn’t ripply when worn.  I’m a bit bigger than Gertrude at the minute!

I had to sew 3 seams before I was happy with the fit. The instructions say to fit and pin, but on each skirt I’ve just sewn a basting stitch first, tried it on and adjusted it from the there.  Each one has needed different adjustments, they were all the same size but completely different fabric.

Once I was happy with the size I finished the seam with my overlocker and pressed the seam to the back.


Inner Beauty!

Hope you’re all enjoying Indie pattern month.

I’ve been so inspired I find myself spending more time reading sewing blogs than at my sewing machine!

My overlocker’s matching frock to Yasmin No 1! Made a while ago, unblogged.

The Frock – Vogue 1353 – #Wedding No 1

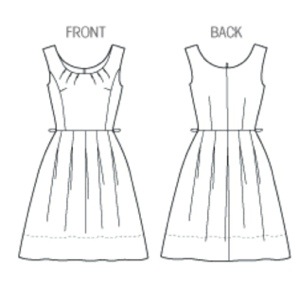
I should really have gone to bed 4 hours ago after working my 4th and last night shift but I’m too excited to sleep!! My fabric arrived in the post on Saturday and today is the first chance I’ve had to cut it out. It’s a very drapey poly crepe which hangs beautifully, but I think it will be the totally wrong fabric for V1353 which has 6 pleats round the neck, and pleated round the top if the skirt. I’ve decided to underline my fashion fabric with some white cotton that has more body than a pint of Guinness and will hopefully add some definition to the pleats. Over the past few weeks, whilst my sewing machine was in hibernation, I’ve been reading several blogs and also Threads website regarding different techniques of under lining fabric. Some say to hand stitch all over, some just to whiz around the edges……mmmm, how shall I do mine?

Here is my fabric spilling off the table, organised chaos as usual, and more TV dinners I think lay ahead this week.

20140428-175038.jpg

…..jumping forward 2 hours…..

Here’s my main fabric, lovingly attached with lots of hand stitching to the underlining:

20140428-175210.jpg

  image

Whoa! Busy day, much accomplished. It’s now about 10 hours since I got home from work this morning and I’ve not stopped working on my dress ‘cept to eat, drink or go to the loo!
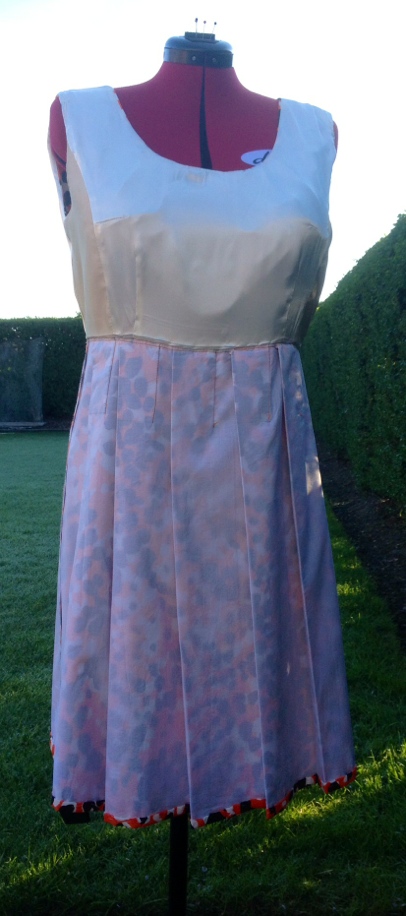
The bodice and the bodice lining are complete, tho not attached. That’s a job for tomorrow.

I’m in desperate need of feet up time and hopefully do some more tomorrow, after a game of golf and taking H to his Yorkshire cricket trials….nail biting stuff!

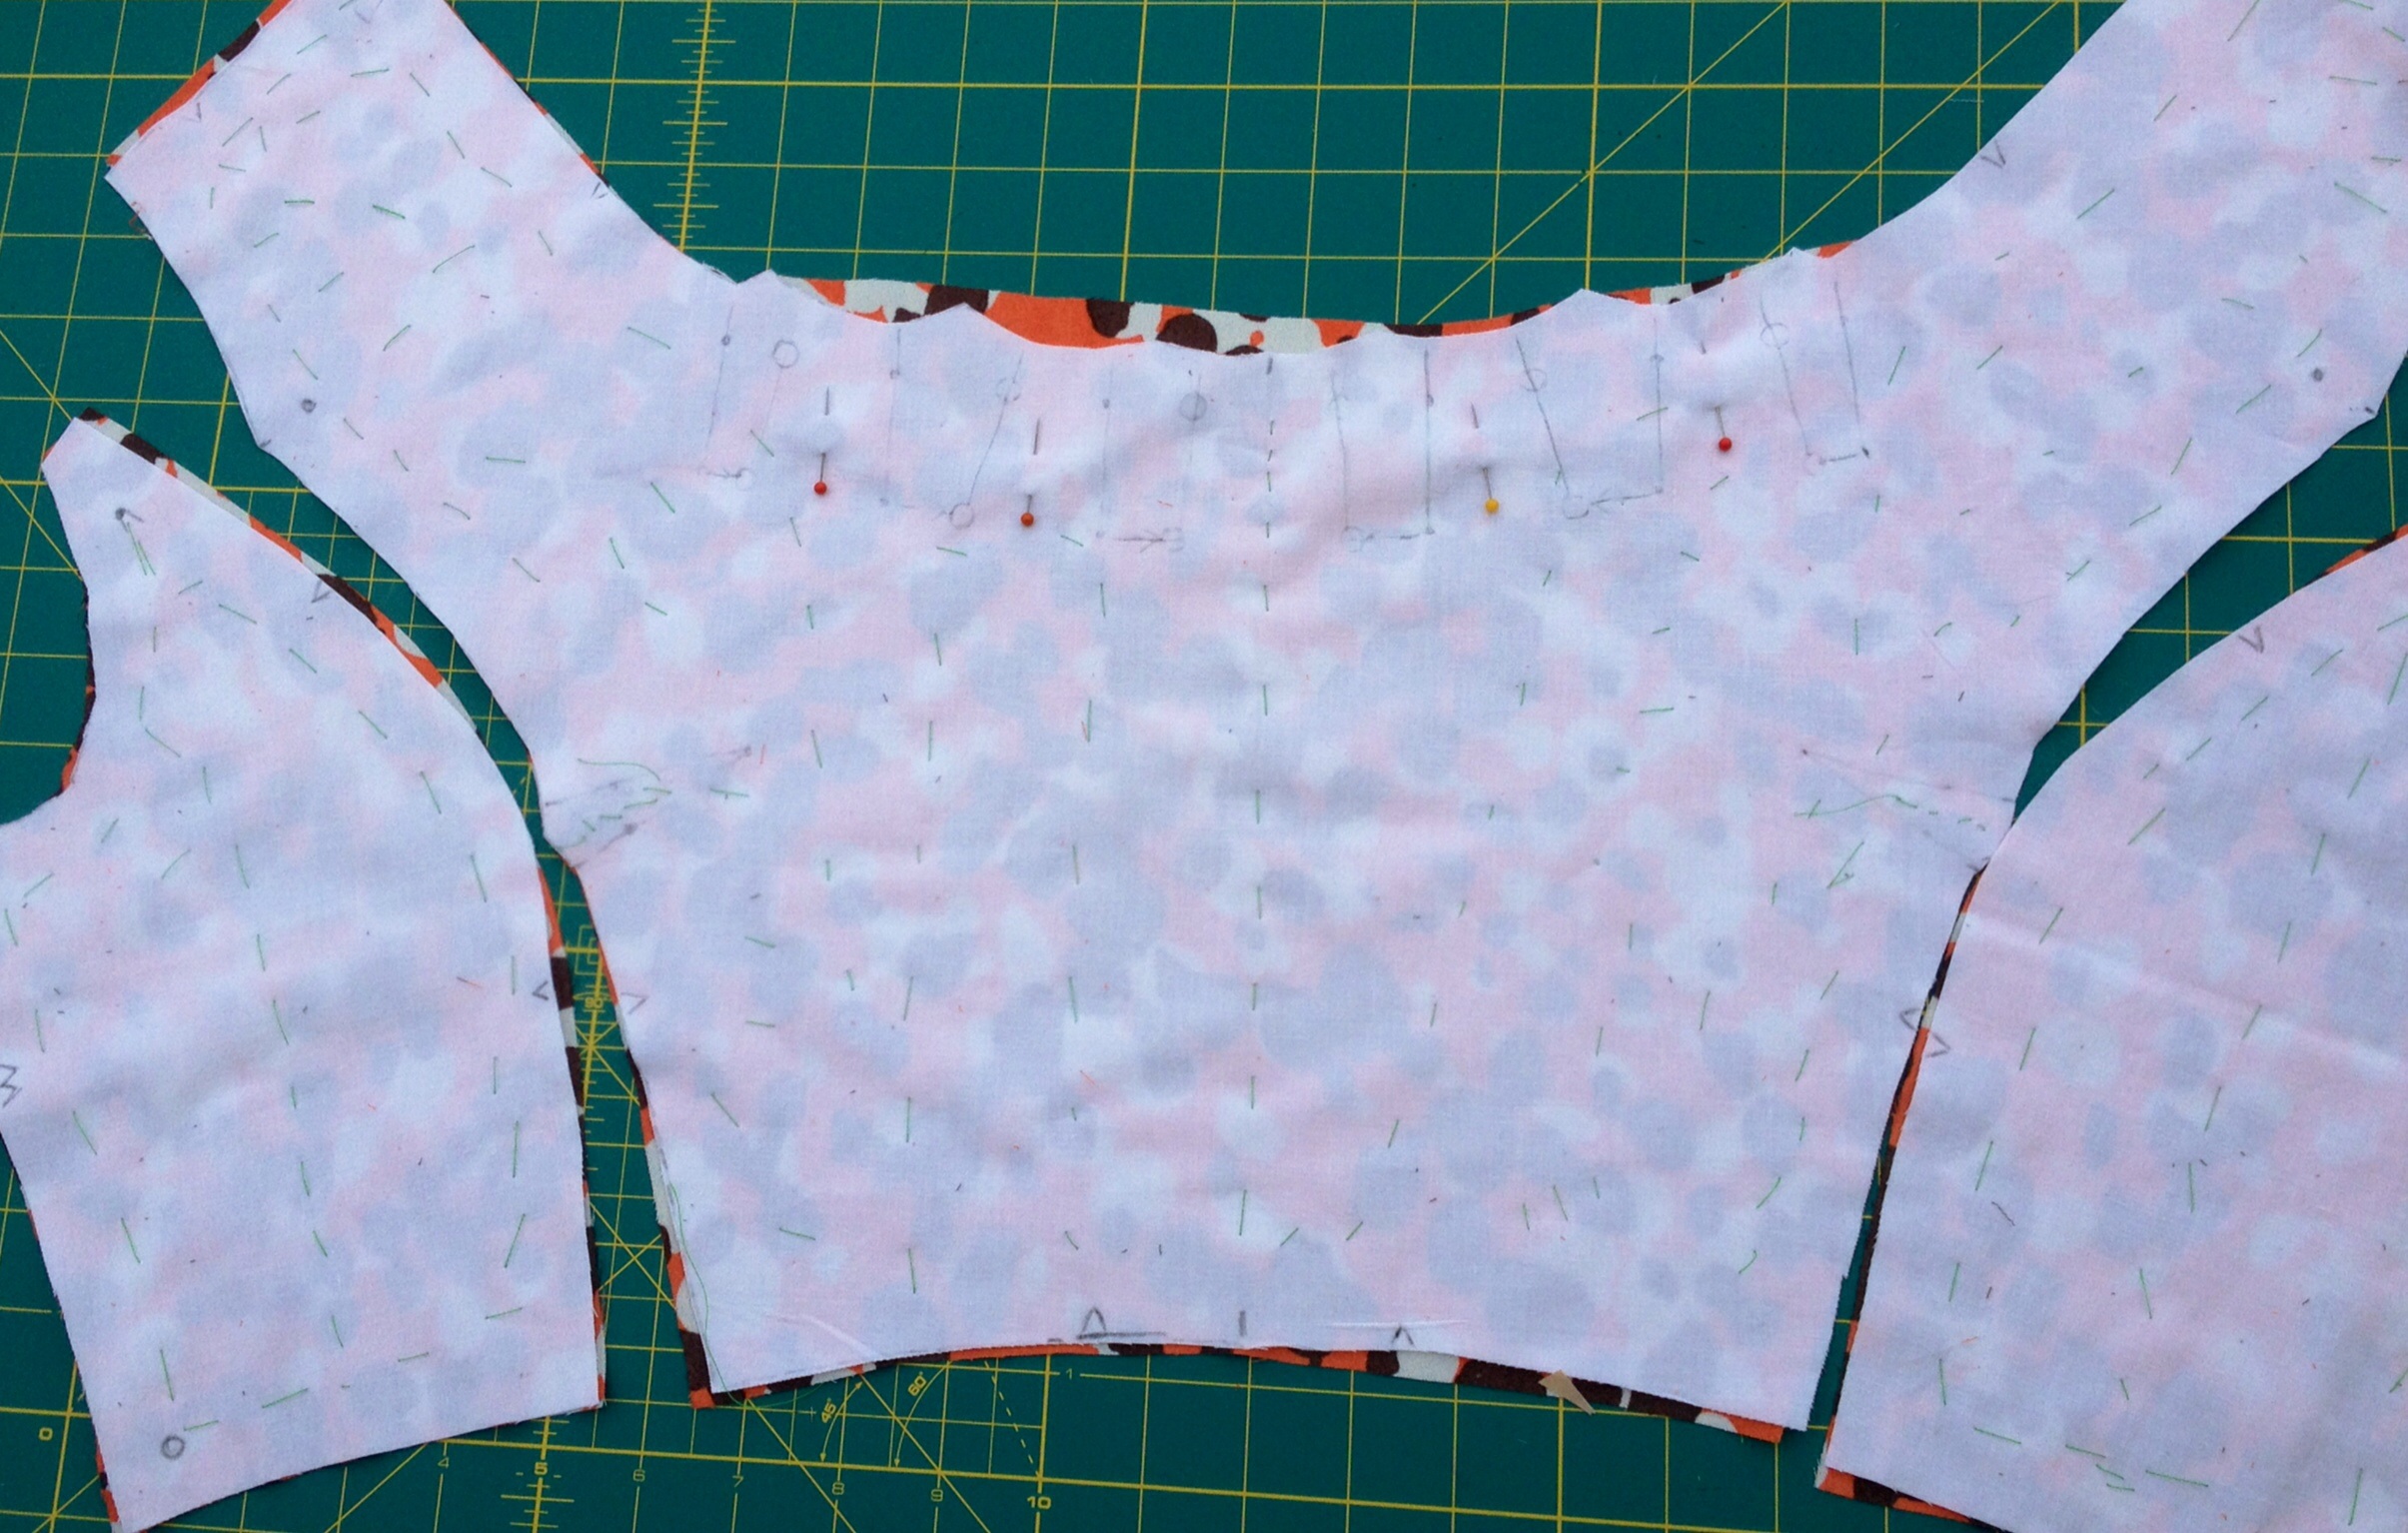
Here’s the bodice, complete with green hand stitching which has tamed the underlining and lots of basting to hold the pleats in place. Looks a little messy but I’m really pleased with it so far.

20140428-181008.jpg

I think I’m going to overlock the raw edges tomorrow before I complete the bodice.

A few firsts for me here so far making this little number:

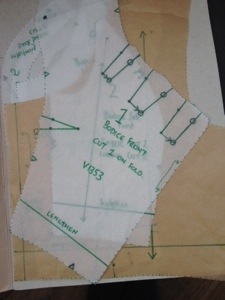
First time tracing a pattern properly.

20140428-180824.jpg First time making a proper muslin. Must remember next time to use similar fabric. I did intend to make it up in a stretch cotton sateen until this orange beauty caught my eye! So fingers crossed there’ll be room to breathe in this very unstretchy dress!

First time underlining. Love how it’s give structure to this otherwise floppy fabric!

And lastly, the first time I’ve given myself more than 2 days to make a frock for an imminent do!

Now I’m just wondering if I should change the skirt to a 1/4 or 1/2 circle. I don’t want to underlined the skirt, it will make it too warm I think, and really not sure his this fabric would hang in pleats??

5 Weddings and hopefully no funerals!

So far we have invites to 5 weddings this year! Because of the 2014 RTW Fast I won’t be able to buy new out fits (loud sigh of relief from my hubby!) and I don’t think I’d be able to produce completely new outfits for each occasion. Luckily there are all different groups of family and friends so 1 or 2 new outfits should be ok for all the weddings.

I’m a big fan of hats at weddings, but so far have not given wearing a hat a thought. All my time had been spent searching for THE perfect dress pattern.

And here it is….

20140425-172934.jpg

So far I’ve made a muslin of the bodice in a gorgeous stretch cotton sateen. I only had 1/2 metre, so wish I had enough to made it all! From the muslin I’ve worked out I need to lengthen the bodice by an inch, but other than that it should be ok. (This is my first proper muslin!!)

20140425-173135.jpg

20140425-173143.jpg

I’ve found quite a few reviews and completed dresses on the web, here’s one of my favourites from Cozy Cottons blog:

20140425-173721.jpg

Here’s my fabric which I purchased today on eBay. It’s a John Kaldor fabric, and I am loving orange this year, so think this will do nicely!

20140425-173801.jpg

I first found it on a well known online store for £8.99 per metre, but managed to find it on eBay to £2.99 per metre!

A fellow blogger, Cheryl, over at Redknits is also making this dress in time got her birthday next week. I can’t wait to see hers finished!

What did we do before pattern reviews and being able to see other people’s finished garments before we finally chose our patterns!!??

Ikea Throw Transformation

Throw

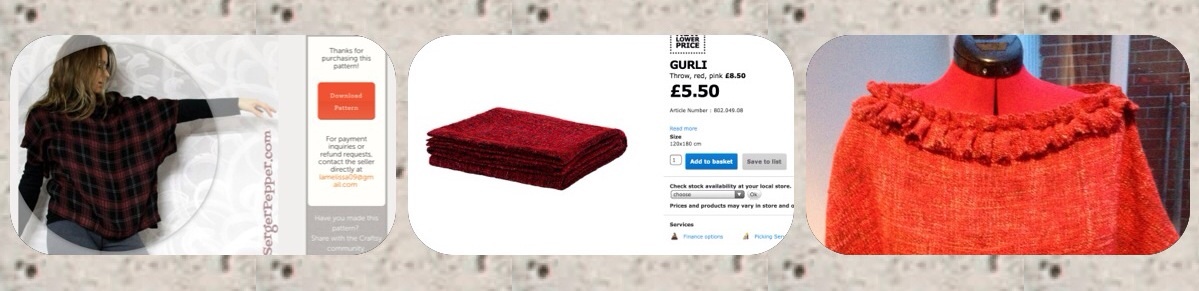
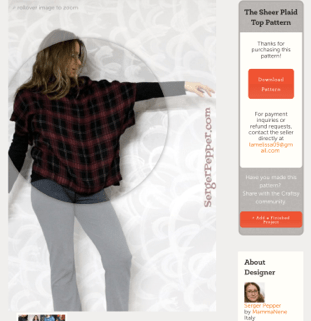
Last Saturday was Day 3 of me being a non-smoker. So to take my mind off things I thought I’d sew the current challenge for Stitch Once Rip Twice, organised by Diane over at Vintage Zest.   The challenge is ‘A Simple Top’ so I decided to make SergerPepper’s new pattern which I’d recently downloaded from Craftsy.

MammaNene’s new pattern…click HERE to view her patterns on Craftsy.

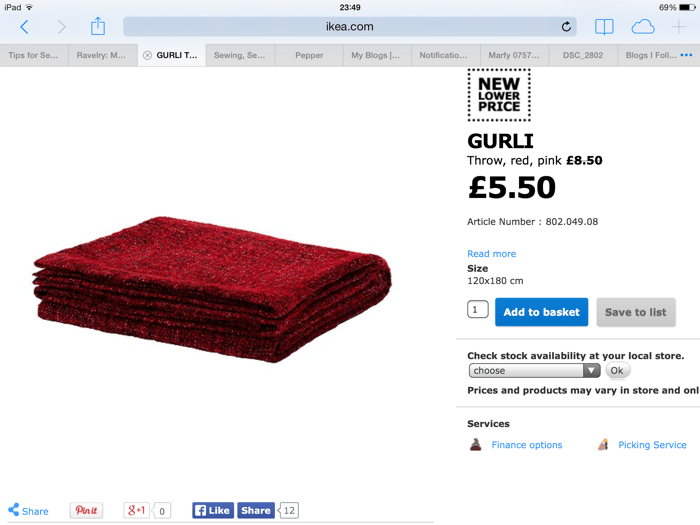
On a recent shopping trip to ikea I bought a lovely red super soft throw with the intention of turning it into something wearable. Here it is on their website:

An absolute bargain at £5.50 for 1.2 x 1.8 metres of fabric!

 The 2 ends of the blankets were hemmed which I thought I’d used for the bottom, but once I came to positioning the pattern piece I thought the hem would be too bulky so used the selvidge which had a nice neat finish.

The fabric wasn’t quite big enough for me to use the selvidge as a hem so I lost 2 inches from the back and front pieces (both the same) placing the centre of the top 1 inch past the centre fold.  It’s a loose fitting top and I had cut the biggest size so I knew it would still fit me.

I cut the first piece with the rotary cutter and when I lifted it from the mat it nearly fell to pieces in my hands!

Arrrhhhhh! This was the top where the shoulder seam and neck meet.

At the rate it was fraying there wasn’t going to be much left of the first piece before I’d even cut out the second piece! I quickly set up my overlocked and carefully overlocked all edges before cutting anything else out. After cutting piece 2 I gingerly moved it to my overlocker and overlocked this too. Phew! This was a very tense 1/2 hour in my sewing room, and under normal circumstances I probably would have had to retreat to the garden, count to 100 and smoke a cigarette. But I’d resisted.  I carried on chewing gum ’til my jaws ached.

The back and front stitched together easy enough. The fabric was surprisingly easy to sew.  I finger pressed the seams open then top stitched either side of the seam for added strength. I had visions of it dropping to bits and unravelling on its debut night out.

For the neck I daren’t attempt to cut the required strip on the bias as I instructed, so lazily I turned and stitched it with not very good results.

It wouldn’t lay flat, and really spoilt the top.

I retired from my sewing room for the day at this point to gather my thoughts, chew more gum and get ready for a rare night out with my hubby and another couple.

DAY 4 OF BEING A NON-SMOKER AND THE DAY I RESCUED MY GURLI TOP

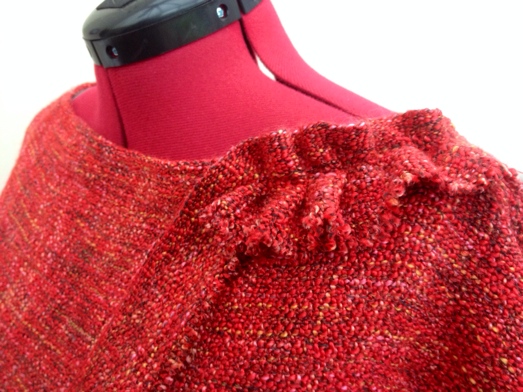
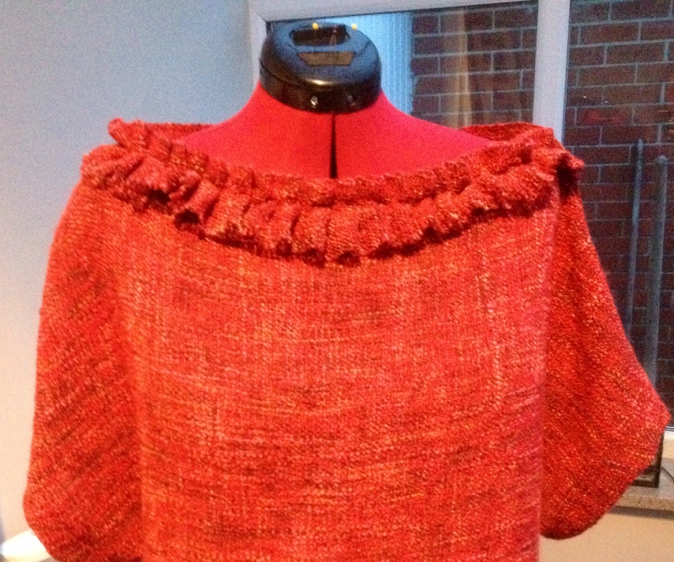
I looked at what fabric I had left and had a full length from the other selvidge. I cut along the whole length of it about 3 inches, and them sewed a straight line about 3/4 inch for the extremely frayable edge. Then pulled the loose strands and frayed it to the stitch line.

Then, with Gertrude wearing the to, I set about handstitching the above to the neckline with a ruffled effect.

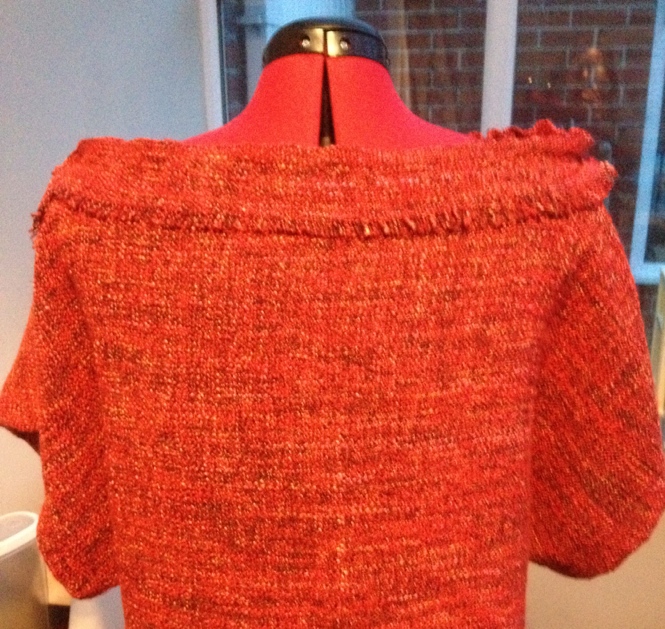
Loved the effect immediately, but once I reached the other shoulder it became apparent that I wouldn’t have enough trim to complete the ruffle at the back too.

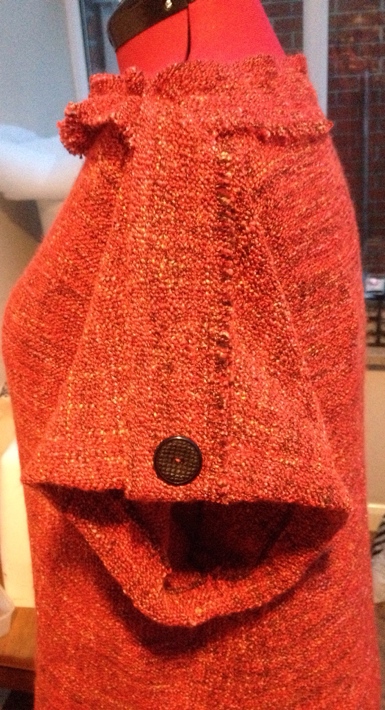
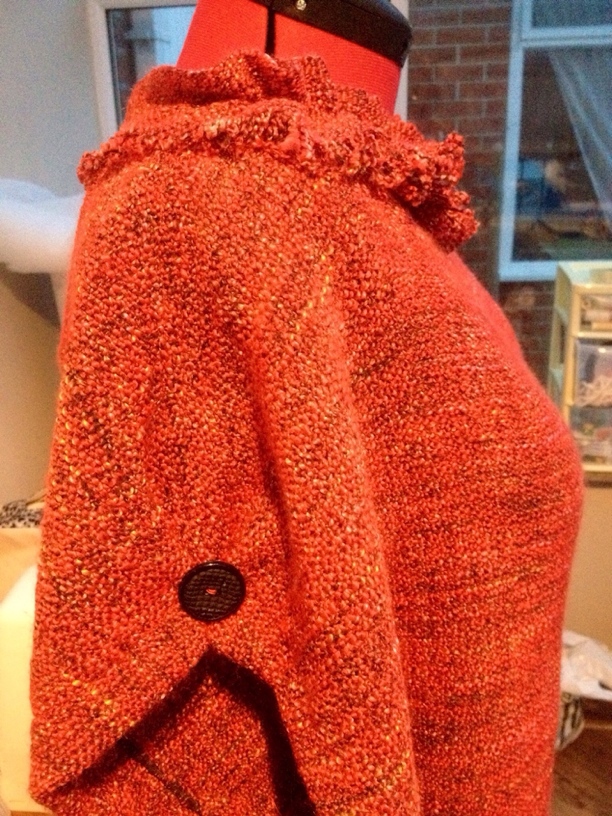
It’s a bit blurred, sorry, but you get the idea – I stitched the trim with no ruffle.  When I reached the other shoulder seam I took the trim to the bottom of the sleeve then back under itself and added a button. It looked a bit like an eppaulette. For the other sleeve I pinched a pleated and added a matching button.